Invicti IAST for Java - AWS Elastic Beanstalk (Tomcat + WAR File)
This document explainsu how to run a Java application in AWS Elastic Beanstalk and then use Invicti IAST to run an interactive application security testing (IAST) scan for that application.
The following installation instructions are for the newer version of the Invicti Java IAST sensor. If you are running the older, aspectjweaver-based Java sensor, you must remove the old sensor and any reference to aspectjweaver.jar from the JVM Options before proceeding with installing the newer version of the Invicti Java IAST sensor.
Prerequisites
- Install Java.
- Install Eclipse IDE for Enterprise Java and Web Developers.
- Install Eclipse Extensions from "Web, XML, Java EE and OSGI Enterprise Development":
- Eclipse Java EE Developer Tools
- Eclipse Java Web Developer Tools
- Eclipse Web Developer Tools
- JST Server Adapters Extensions (Apache Tomcat)
Step 1: Prepare an example application using Eclipse IDE
- Go to File > New > Project.
- In the New Project wizard, search for and select Dynamic Web Project, then click Next.
- Set the Project name field to axexample-java.
- Set the Target runtime field to Apache Tomcat v8.5.
- Set the Dynamic web module version field to 3.1.
- Set the Configuration field to Default Configuration for Apache Tomcat v8.5.
- Click Next.
- In the Java window, leave the default settings and click Next.
- In the Web Module window, enable the Generate web.xml option and click Finish.
- In the Open Associated Perspective? dialog, click No.
- Expand the axexample-java project.
- Right-click src folder.
- Select New > Other.
- Highlight the Servlet option.
- Click Next.
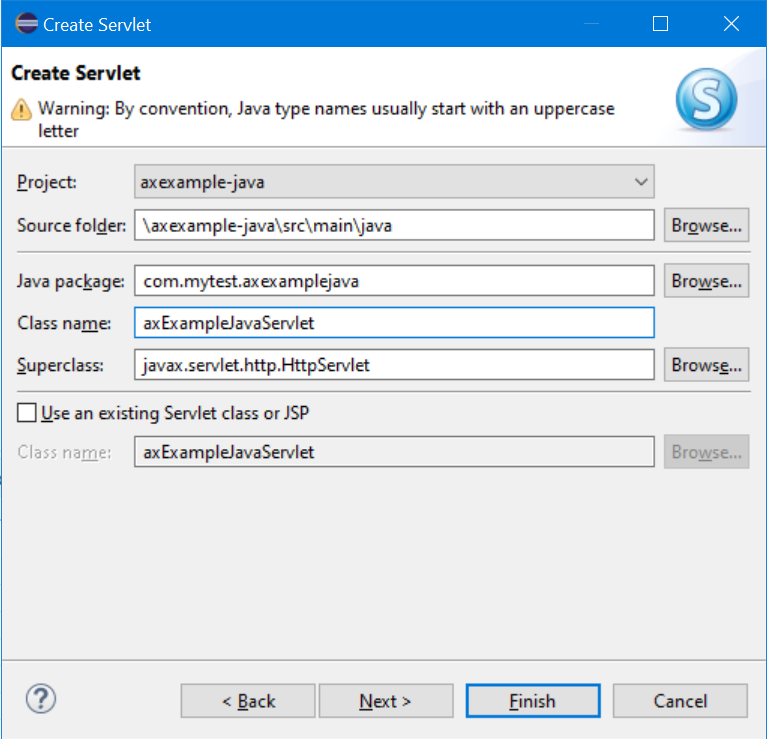
- Set the Java package field to com.mytest.axexample.
- Set the Class name field to axExampleJavaServlet.
- Click Finish.
- Edit the contents of the
axExampleJavaServlet.javafile to read as follows:package com.mytest.axexamplejava;
import java.io.IOException;
import java.io.PrintWriter;
import javax.servlet.ServletException;
import javax.servlet.annotation.WebServlet;
import javax.servlet.http.HttpServlet;
import javax.servlet.http.HttpServletRequest;
import javax.servlet.http.HttpServletResponse;
/*** Servlet implementation class HelloWorldServlet*/
@WebServlet("/axExampleJavaServlet")
public class axExampleJavaServlet extends HttpServlet {
private static final long serialVersionUID = 1L;
/**
* @see HttpServlet#HttpServlet()
*/
public axExampleJavaServlet() {
super();
// TODO Auto-generated constructor stub
}
/**
* @see HttpServlet#doGet(HttpServletRequest request, HttpServletResponse response)
*/
protected void doGet(HttpServletRequest request, HttpServletResponse response) throws ServletException, IOException {
PrintWriter out = response.getWriter();
out.print("<html><body><h1>Test JAVA Site Example for AWS Elastic Beanstalk</h1><br>Welcome to the main page.<br></body></html>");
}
/**
* @see HttpServlet#doPost(HttpServletRequest request, HttpServletResponse response)
*/
protected void doPost(HttpServletRequest request, HttpServletResponse response) throws ServletException, IOException {
// TODO Auto-generated method stub
doGet(request, response);
}
} - Expand the axexample-java project, right click the
axexample-java/src/main/webappfolder, and select New > File. - Set the filename to
index.htmland click Finish. - Edit the contents of the
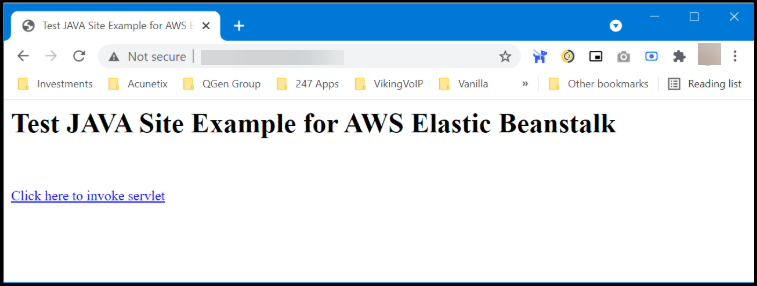
index.htmlfile to read as follows:<head>
<title>Test JAVA Site Example for AWS Elastic Beanstalk</title>
</head>
<body>
<h1>Test JAVA Site Example for AWS Elastic Beanstalk</h1>
<br/><br/>
<a href="axExampleJavaServlet">Click here to invoke servlet</a>
</body>
</html> - Make sure that the changes to both new files are saved.
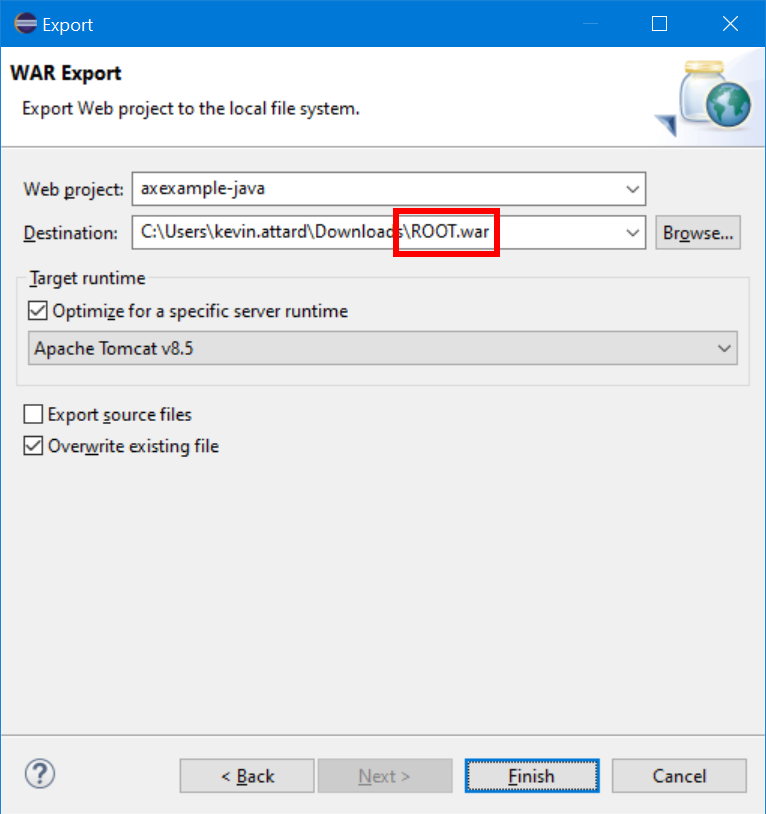
- Right-click the axexample-java project, click the Export option, search for the WAR file option, and select it.
- Click Next and select a Destination for your exported WAR file.
- Ensure that the filename for your export file is
ROOT.war. - Click Finish.
Step 2: Prepare Invicti IAST for Java
We deploy the test application to the following URL: http://eb.invictiexample.com - you need to change this to the hostname you use for your test deployment.
- Create a new Target, replacing
http://eb.invictiexample.comwith the URL for your chosen hostname. - Download Invicti IAST for Java from Invicti Platform and retain the
iastsensor.jarfile for the next step.
Step 3: Prepare a folder for your source code bundle
- Create a folder
C:\axexample-java - Create a folder
C:\axexample-java\.ebextensions - Copy your exported
ROOT.warfile intoC:\axexample-java - Copy your
iastsensor.jarfile intoC:\axexample-java\.ebextensions - Using a text editor, create a file
C:\axexample-java\.ebextensions\iastsensor.config - Edit the contents of the
C:\axexample-java\.ebextensions\iastsensor.configfile to read as follows:commands:
01_create_iastsensor_directory:
command: "mkdir -p /home/iastsensor"
option_settings:
aws:elasticbeanstalk:container:tomcat:jvmoptions:
JVM Options: '-javaagent:/home/iastsensor/iastsensor.jar -Diastsensor.debug.log=ON'
container_commands:
01_copy_iastsensor:
command: "cp .ebextensions/iastsensor.jar /home/iastsensor/iastsensor.jar"
02_change_iastsensor_dir_permissions:
command: "sudo chown -R root:root /home/iastsensor"infoThe parameter "-Diastsensor.debug.log=ON" is optional, and should ONLY be used for troubleshooting purposes. If this parameter is retained, this will output Invicti IAST logging as additional lines in the Tomcat logs starting with "[Invicti-debug]".
- Use Windows Explorer to navigate to
C:\axexample-java; press CTRL+A to select both.ebextensionsandROOT.war. - Right-click the selected items and click Send to > Compressed (zipped) folder.
- Rename your zip file to
axexample-java.zipand retain your zip file for the deployment.
Step 4: Deploy your web application to AWS Elastic Beanstalk
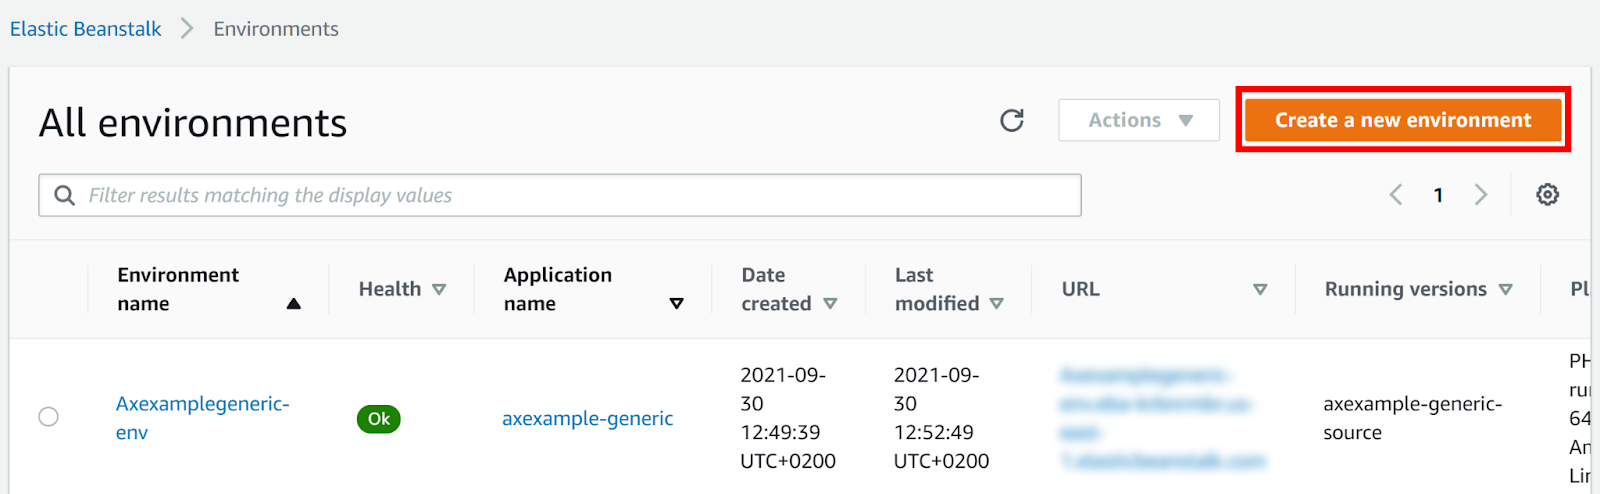
- From your AWS Dashboard, navigate to Elastic Beanstalk > Environments.
- Click Create a new environment.
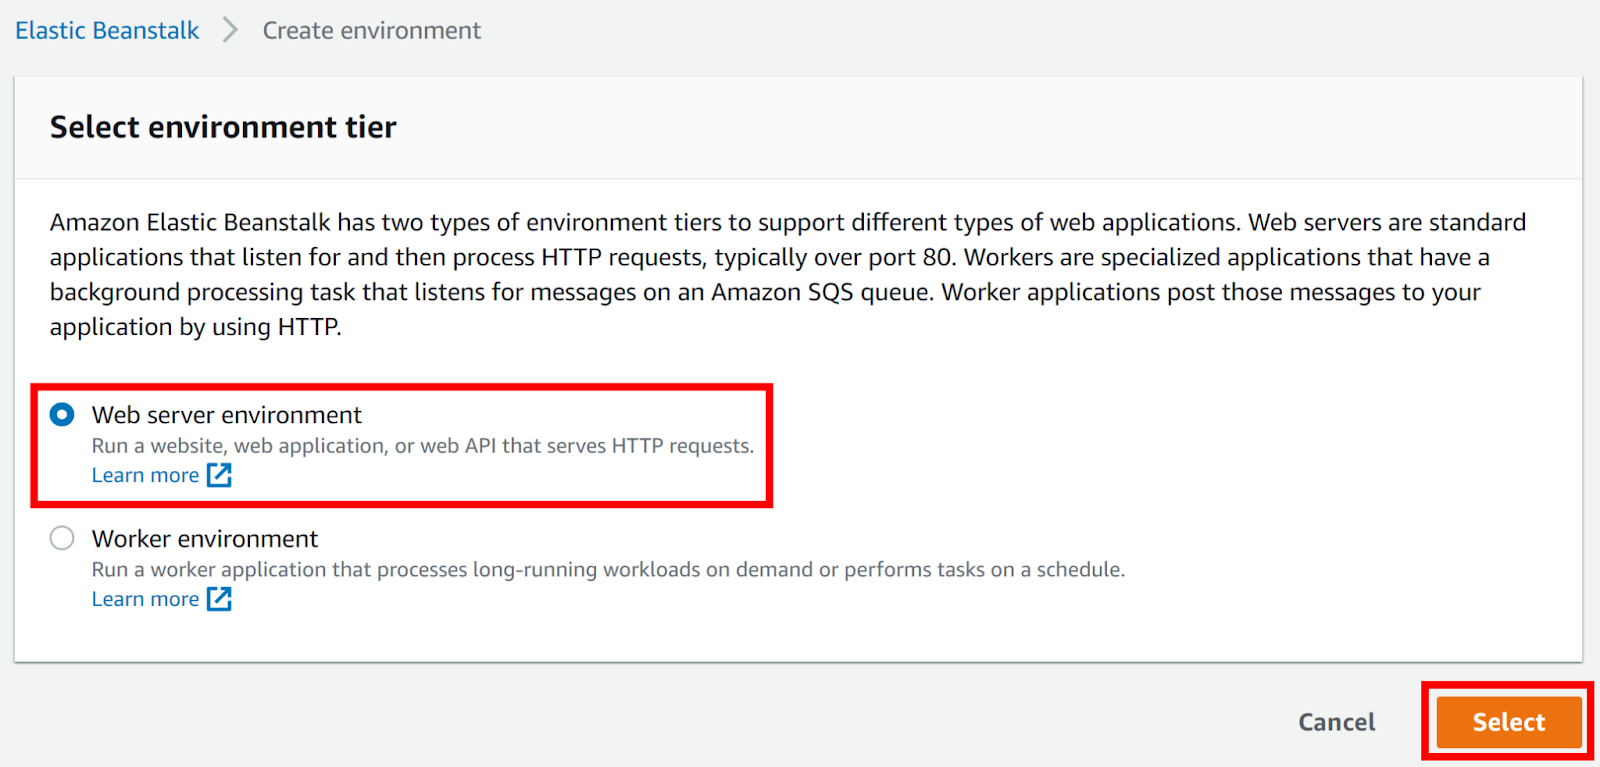
- Set your environment tier to Web server environment, then click Select.
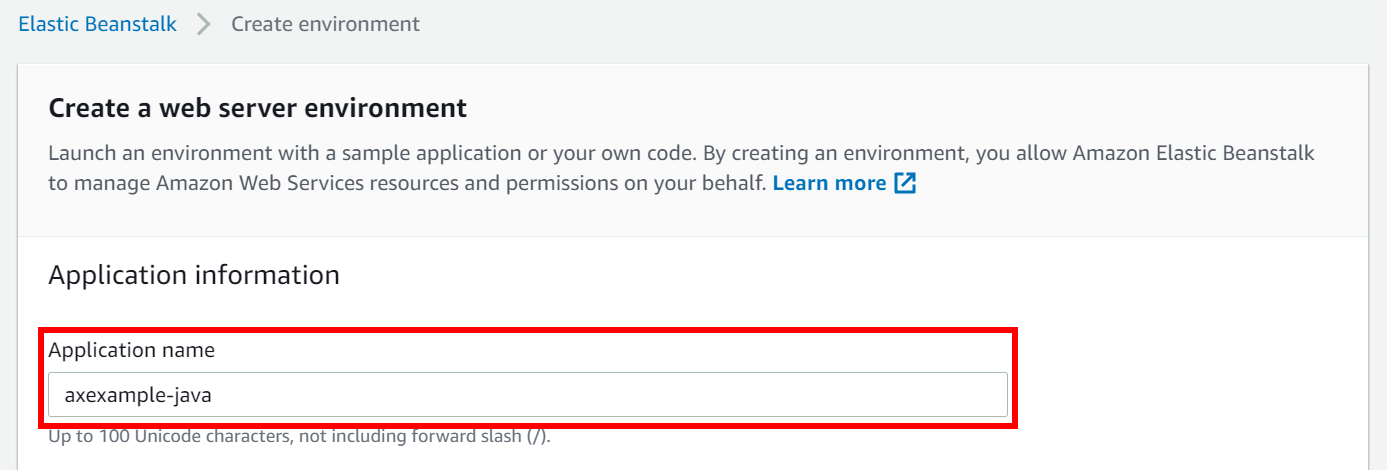
- Set the Application name field to the name of your web application. (In this example we used the name axexample-java).
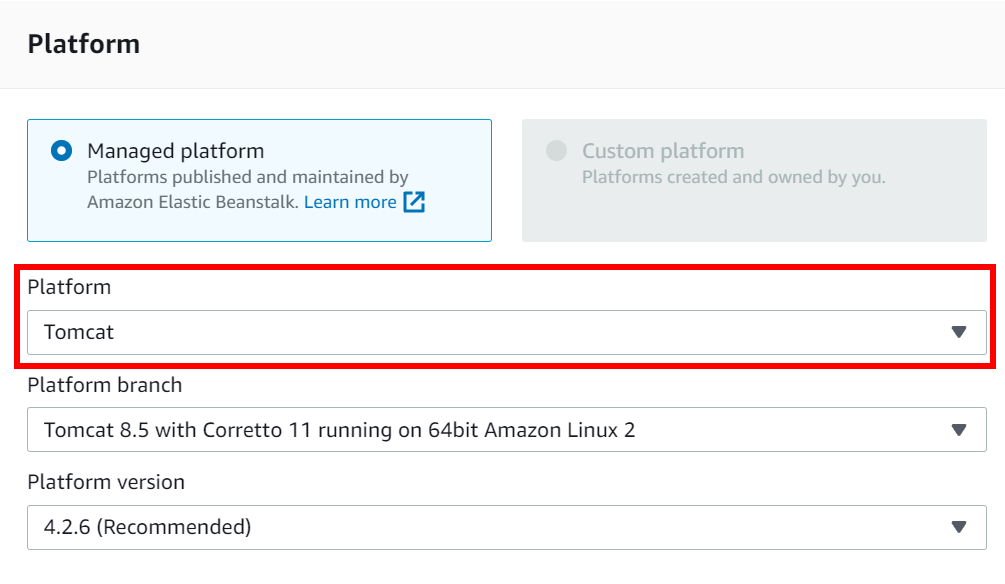
- Set the Platform drop-down to Tomcat.
- Enable the Upload your code option and click Choose file.
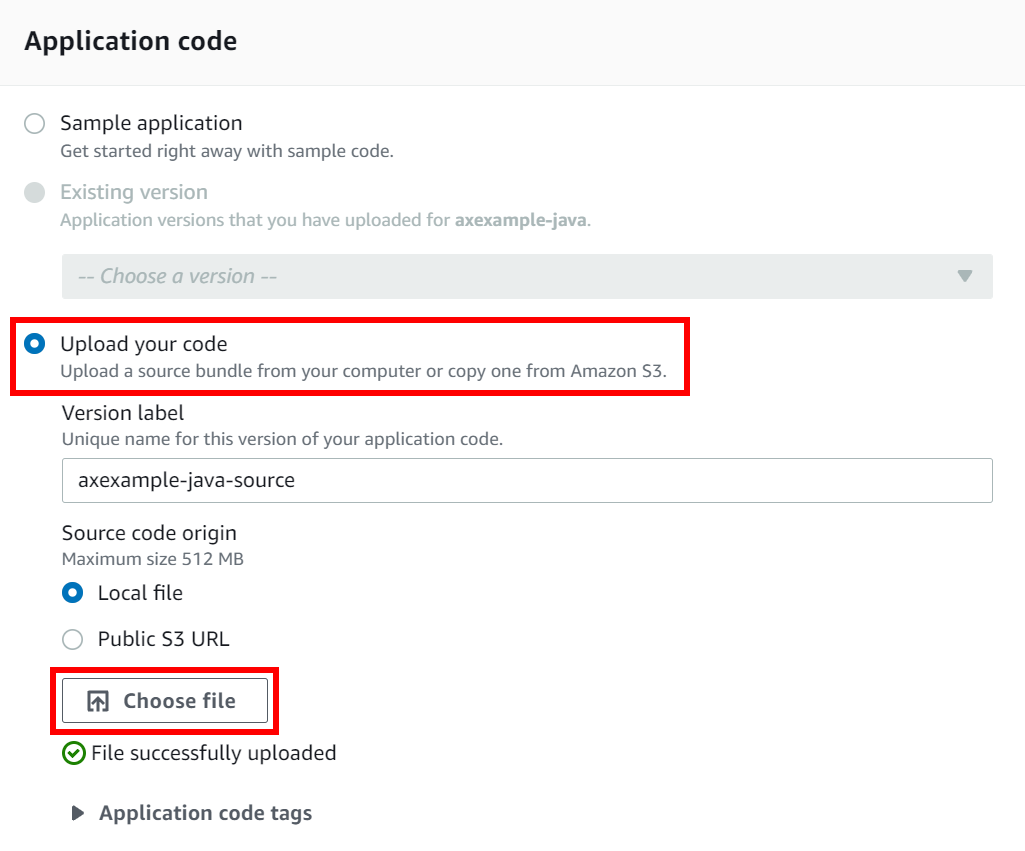
- Select your
axexample.zipsource code bundle for upload and click Create environment. AWS Elastic Beanstalk now creates your environment. This can take a few minutes. - When the process is complete, you are sent to your environment's dashboard.
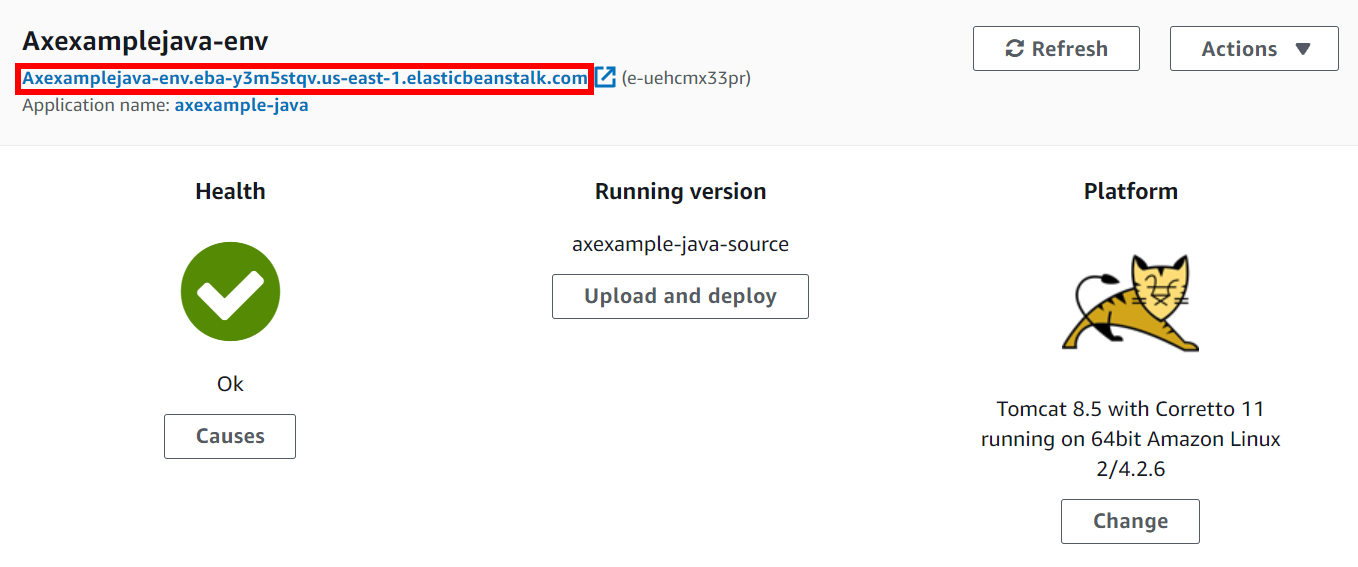
- Take note of your environment's new URL which was created automatically by AWS Elastic Beanstalk:
- You need this to create a CNAME to point to this URL.
- In this example, we would create a CNAME for
eb.invictiexample.comto point toaxexamplejava-env.eba-y3m5stqv.us-east-1.elasticbeanstalk.com.
- Once the CNAME record has been added (giving time for DNS records to propagate), you can see the web application you have created by browsing to your URL (in this example
http://eb.invictiexample.com).
Step 5: Test and scan your web application
- Point your browser to your web application - in this example, http://eb.invictiexample.com - to confirm it's running as intended.
- Finally, run a scan on your Target. The Vulnerability detail confirms that Invicti IAST was detected and used for the scan.
Need help?
Contact the support team for help. Go to Help Center