SCIM provisioning
Package: Invicti Ultimate
Overview
SCIM integration automates user and team lifecycle management in Invicti Platform. When your IdP creates, updates, or removes a user or team, the changes are applied immediately, reducing manual work and ensuring correct access levels.
Invicti Platform supports SCIM 2.0 provisioning, allowing identity providers (IdPs) to automatically create, update, and deactivate accounts.
For complete API reference, refer to the Identity SCIM API documentation.
Assigning permissions when using SCIM
When you use SCIM for automatic provisioning, Invicti Platform creates teams and users but doesn't assign any permissions by default (roles or collections).
To ensure users receive the correct access levels, follow this workflow:
- Create teams first - either manually, through SCIM, or via the Invicti API.
- Assign the appropriate permissions to each team - for example, roles or collections using the UI
- Provision or deprovision users through SCIM according to your IdP configuration.
With this approach, any user automatically added to a team inherits the correct permissions that you configured in advance.
Authenticate (required)
You must authenticate before creating users or teams.
- In your API client, create a new request.
- Name it (for example Login), change the method to POST, and use this URL: https://platform.invicti.com/api/identity/v1/userCredentials/login.
- Open the Body, select JSON, and paste:
{
  "emailAddress": "email-address",
  "password": "password",
  "client": "FrontEnd",
  "organizationId": ""
}
- Enter the email address and password you use for Invicti Platform.
- Run the request.
- Copy the
accessTokenfrom the response and enter it in the Auth tab under Token. All following requests are going to use this token.
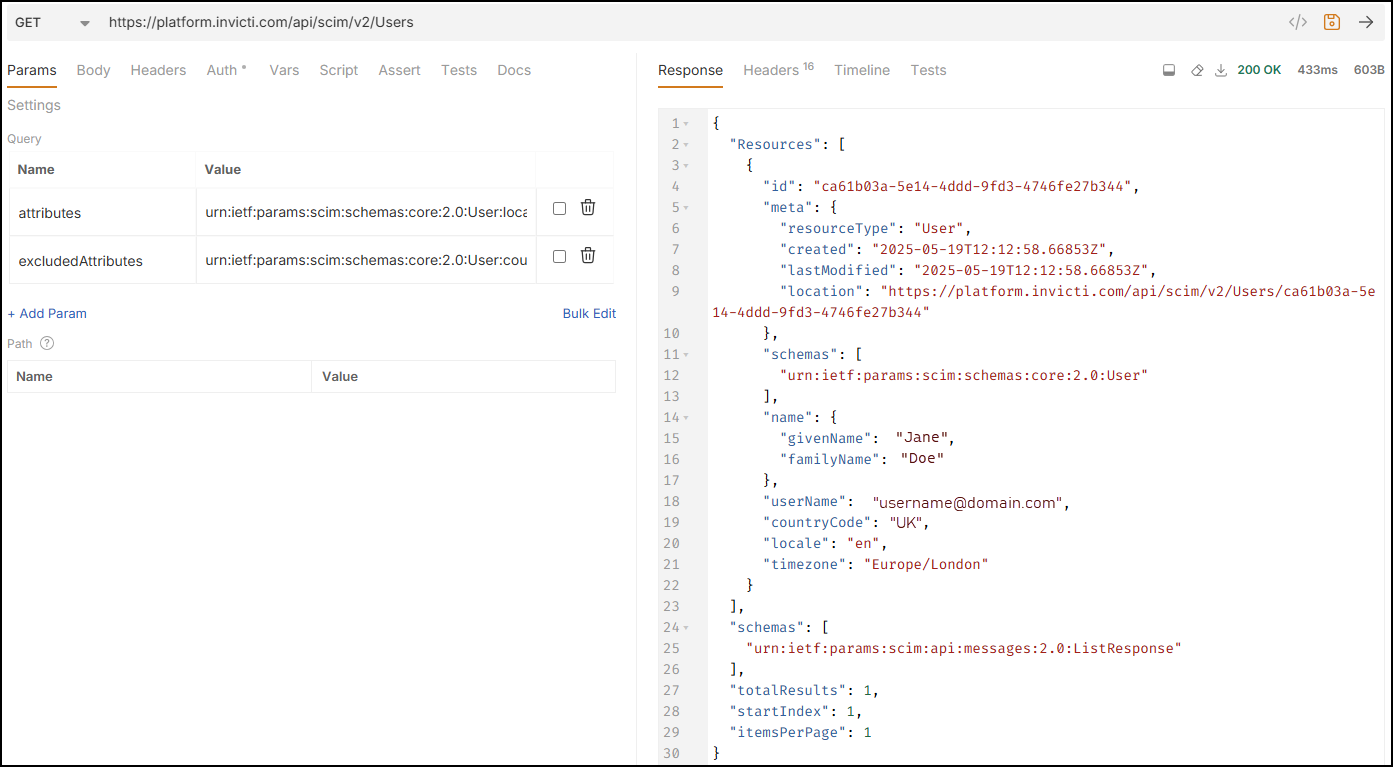
Get a list of users
- Send a GET request to: https://platform.invicti.com/api/scim/v2/Users
- The response lists all users currently configured in Invicti Platform.
Add a user
We recommend you use SCIM together with SSO, so that once users are provisioned, they can log in with your SSO (SAML) provider.
- Send a POST request to: https://platform.invicti.com/api/scim/v2/Users
- Provide the user details in the Body:
{
  "schemas": ["urn:ietf:params:scim:schemas:core:2.0:User"],
  "userName": "email-address",
  "name": {
    "givenName": "first-name",
   "familyName": "last-name"
 },
 "externalId": "external-id"
}
- Run the request.
- The response confirms that Invicti created the user and includes additional details.
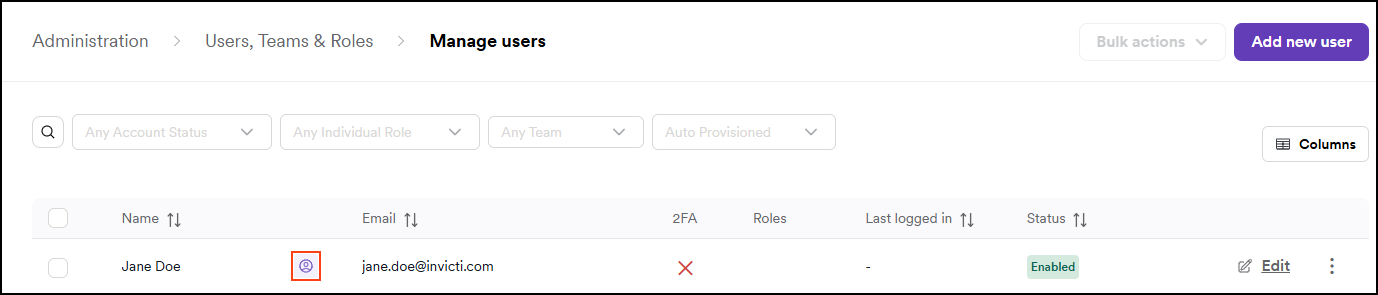
- You can now see the user in Users, teams and roles > Manage users. For SCIM provisioned users, an icon is added. Use the filters to only display users that were auto-provisioned.
- Tell the user their account is active. Invicti doesn't send onboarding notifications for SCIM-created users.
- Invicti sets the user status to enabled immediately after provisioning.
If you created a user through auto-provisioning, you must amend their first name, last name, and email the same way. User roles can be assigned through Invicti Platform UI.
Remove a user
You can delete only one user at a time.
- Send a DELETE request to:
https://platform.invicti.com/api/scim/v2/Users/<user-id>. Update<user-id>with the actual user's id. - The response remains empty.
- When you remove a user in your IdP, SCIM removes the corresponding account in Invicti Platform list of users.
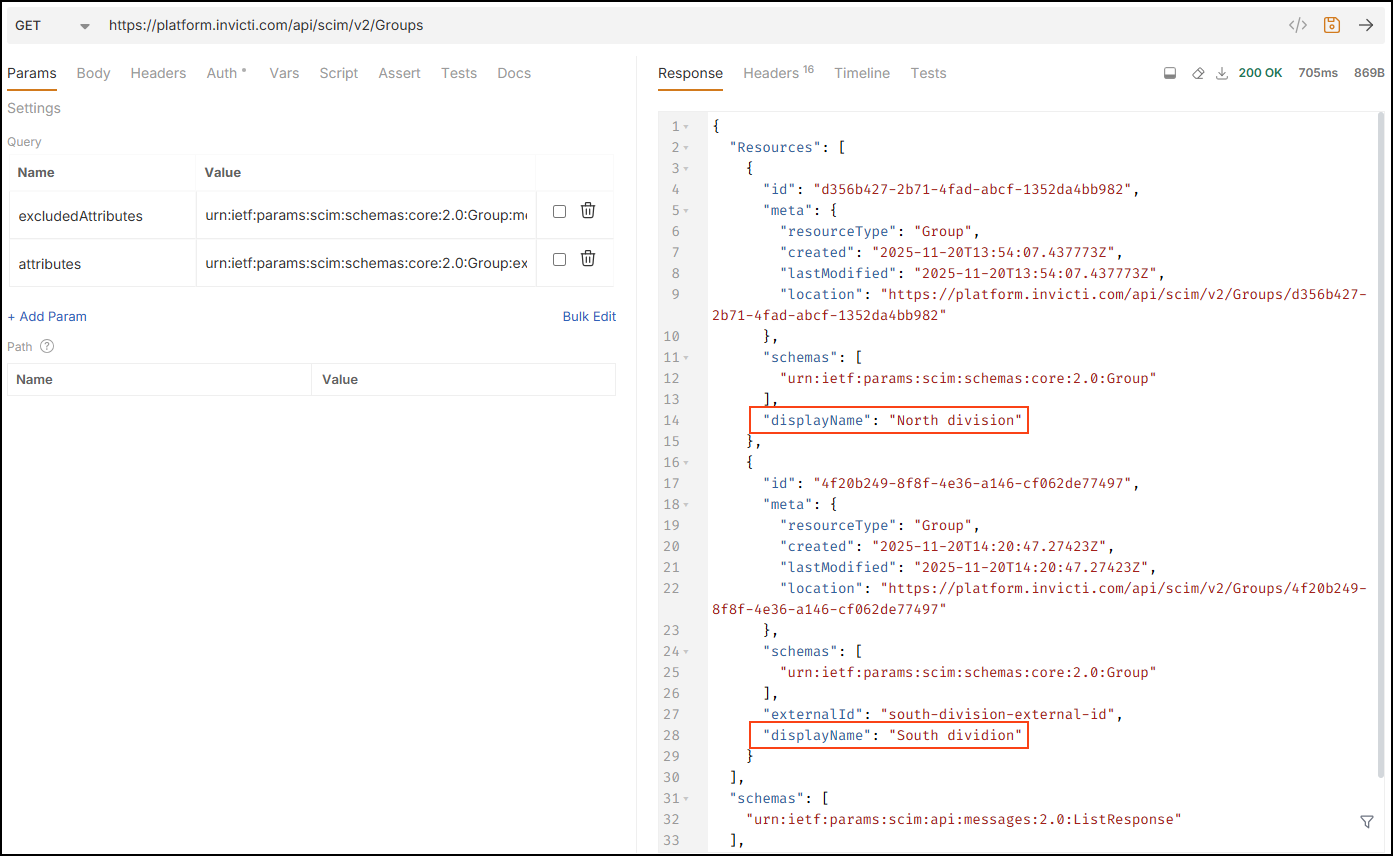
Get a list of teams
- Send a GET request to:
https://platform.invicti.com/api/scim/v2/Groups - The response lists all existing teams.
Add a team
- Send a POST request to:
https://platform.invicti.com/api/scim/v2/Groups - Provide the team name and external ID:
{
  "schemas": ["urn:ietf:params:scim:schemas:core:2.0:Group"],
  "displayName": "display-name",
  "externalId": "external-id"
}
- Invicti creates the team and displays it on the Manage teams page.
By default, Invicti assignes no default role the teams created via SCIM, which provides no privilege levels. You need to go the team configuration and assign Access managment, for example viewer, owner, or admin.
Add users to a team
- Collect the IDs of the users you want to add.
- Send a PATCH request to:
https://platform.invicti.com/api/scim/v2/Groups/<group-id>. Update<group-id>with the actual group id. - Add the user IDs in the Body:
{
  "schemas": ["urn:ietf:params:scim:api:messages:2.0:PatchOp"],
  "Operations": [
    {
      "op": "add",
      "path": "members",
      "value": [
        { "value": "user-1-id" },
        { "value": "user-2-id" }
      ]
    }
  ]
}
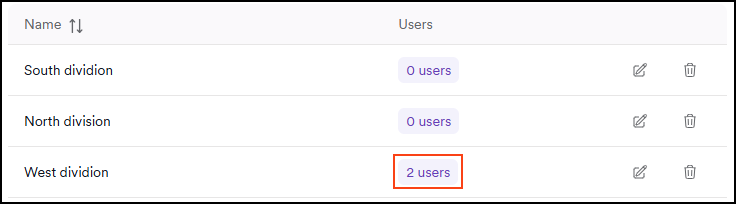
- Invicti updates the team accordingly. You can verify the changes on the Manage teams page.
Need help?
Invicti Support team is ready to provide you with technical help. Go to Help Center