Add, edit or delete API authorization
Deployment: Invicti Platform on-demand, Invicti Platform on-premises
Package: Invicti API Security Standalone or Bundle
Access requirements: access to API Security in Invicti Platform requires either an Administrator, Owner, Security Analyst, Security Manager role, or a custom role with the API Security permission.
To scan APIs that require authentication, add the appropriate authorization credentials so Invicti can reach and test every protected endpoint. Providing several sets of credentials at different privilege levels also lets Invicti run multi-session scans that detect access control vulnerabilities such as IDOR, BOLA, and BFLA.
This document explains how to add, edit, or delete API authorization credentials from the API catalog in Invicti Platform.
The more robust, recommended way to authorize an API target is from the target's Authentication settings, using the IDOR / BOLA authentication method. Credentials you enter there go straight to the scan preparator when you save the target configuration, so they're applied from the moment scanning starts, and you can provide several user accounts at different privilege levels for multi-session access control testing.
For the full step-by-step instructions, refer to the IDOR/BOLA authentication document.
Why this matters
APIs that enforce authentication reject unauthenticated requests, so without valid credentials a scan can't reach protected endpoints and large parts of your API go untested. Adding accounts at different privilege levels is also what makes access control testing possible - Invicti compares what each user can reach to surface IDOR, BOLA, and BFLA issues.
Add authorization from the API catalog
You can add, edit, and delete API authorization directly from the API catalog.
Add authorization credentials
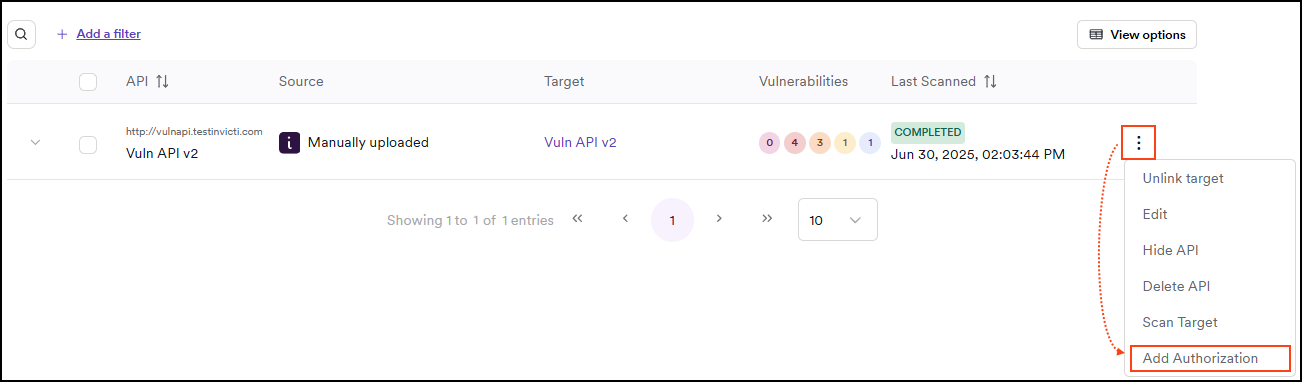
- Select Inventory > API catalog from the left-side menu.
- Locate your target and use the three-dot menu (⋮) to select Add authorization.
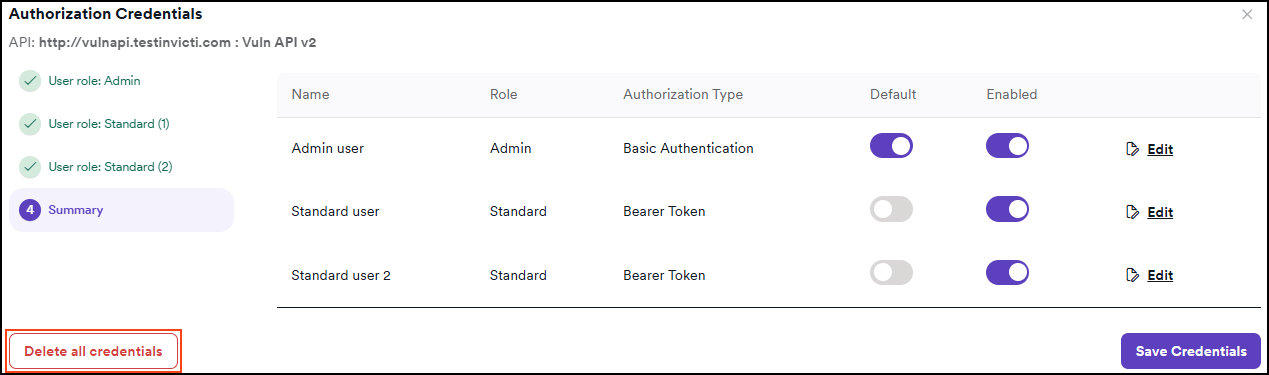
- In the dialog that opens, enter the Admin and Standard users' credentials:
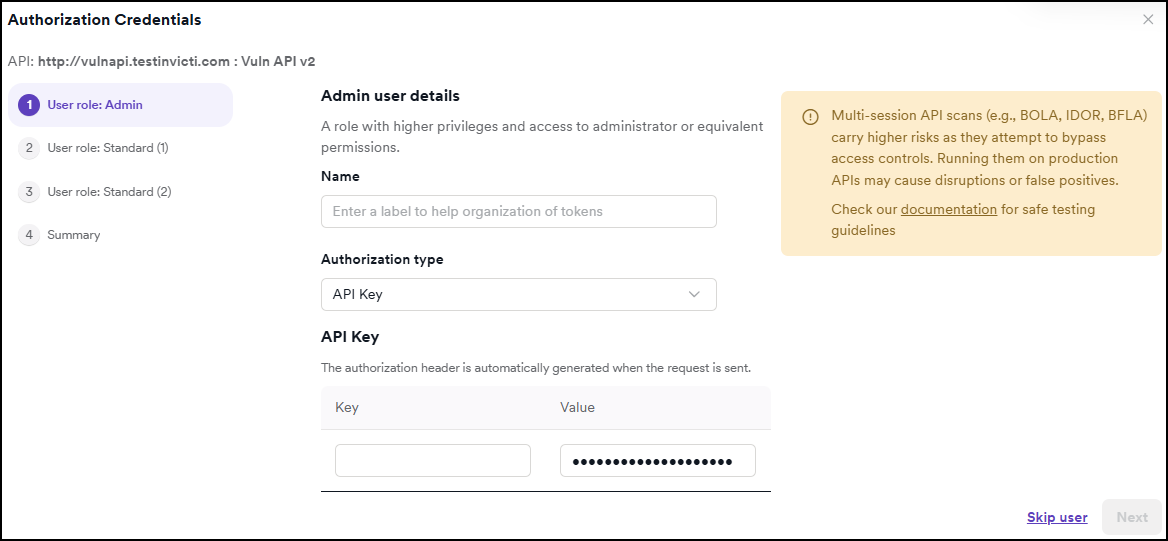
- Name - enter a label to help organize your credentials.
- Authorization type - select one of the following options:
- API key - enter the key-value pair required by the API.
- Basic authentication - enter the username and password.
- Bearer token - enter the bearer token used for authorization.
- Enter the login credentials for the selected users. You can skip any users for whom you don't want to provide credentials.
- You can set only one user as the default.
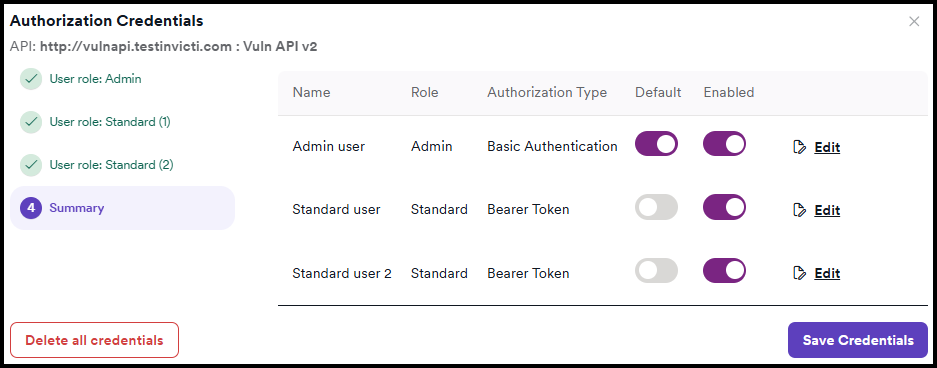
- Click Save credentials to complete the process.
- The API catalog now shows a small key icon next to the API.
Edit authorization credentials
- Select Inventory > API catalog from the left-side menu.
- Locate your target and use the three-dot menu (⋮) to select Edit authorization.

- In the dialog that opens, use the Edit button to amend the user details such as name, authorization type, and authentication. Or, use the toggles to turn a user off and on.
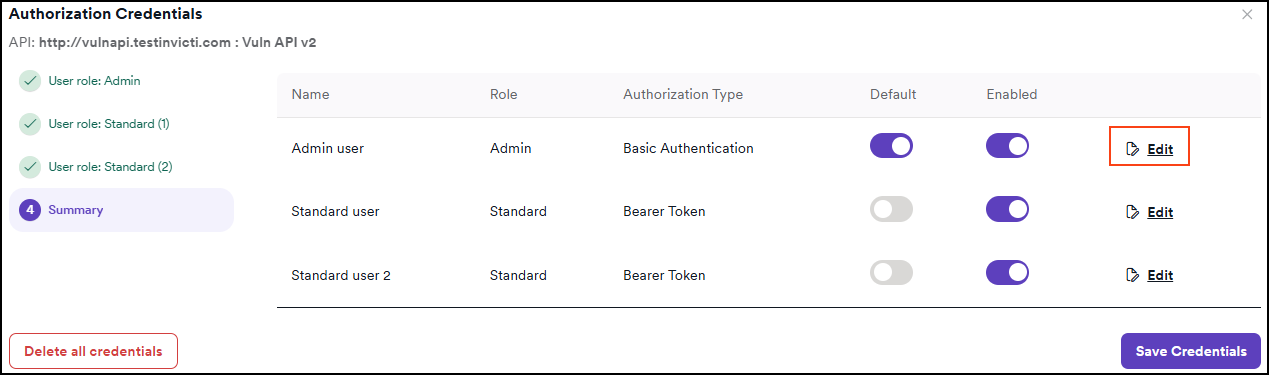
- Click Save credentials to save the changes.
Delete authorization credentials
To remove credentials for a single user, toggle off that user's entry. To delete the entire authorization, follow these steps.
- Select Inventory > API catalog from the left-side menu.
- Locate your target and use the three-dot menu (⋮) to select Edit authorization.

- In the dialog that opens, click Delete all credentials. Invicti deletes the credentials immediately, without a warning message.
Troubleshooting
Credentials are saved in the API catalog but the scan can't reach protected endpoints
Confirm that one user is set as the default and that the relevant users are toggled on. If endpoints stay unauthorized, the API may expect the credentials in a different form - reopen the authorization dialog and check the Authorization type and values match what the API requires. For the most reliable results, configure authorization from the target's Authentication settings instead, as described in the IDOR/BOLA authentication document.
Need help?
Invicti Support team is ready to provide you with technical help. Go to Help Center