Deployment: Invicti Platform on-demand, Invicti Platform on-premises
HashiCorp Vault integration
Connect Invicti Platform to HashiCorp Vault so that Invicti Platform retrieves scan credentials directly from your vault when authenticating scans. Credentials remain in Vault as the single source of truth - Invicti Platform stores only a reference to each secret, never the value itself.
This document explains how to configure the HashiCorp Vault integration and how to add vault-sourced secrets for use in scans.
Why this matters
When scan credentials are stored directly in Invicti Platform, rotation requires updating every target configuration individually. By connecting Invicti Platform to HashiCorp Vault, credential management stays consolidated in your vault. Invicti Platform resolves each secret at scan time, so it always uses the current value - no manual updates needed when passwords rotate.
Before you begin
Before configuring the integration, have the following ready:
- The public URL of your HashiCorp Vault instance.
- An admin token or TLS certificate with the minimum permissions required.
- The namespace name, if you use HCP Vault Dedicated (typically
admin) or HashiCorp Vault Enterprise with namespaces.
The Vault URL you enter must be accessible from Invicti Platform. Scans can't retrieve credentials from a vault that's unreachable at scan time.
- On-demand: The vault must be reachable from Invicti Platform's cloud infrastructure. If your vault is behind a firewall, add Invicti Platform's IP addresses to your allowlist. Refer to the Trustlist requirements documents for the addresses for your region.
- On-premises: The vault must be reachable from the server where Invicti Platform is installed.
To reduce security risk, configure a dedicated policy in HashiCorp Vault with only the minimum paths Invicti Platform needs:
auth/*- for TLS certificate authenticationsecret/*- for reading key-value secretsauth/{certUploadedPath}/login- for TLS certificate login
Attach this policy to the admin token or TLS certificate you use for the integration.
Configure the HashiCorp Vault integration
Token authentication
- Select Integrations from the left-side menu.
- Find the HashiCorp Vault card and click Configure.
- Enter an Integration name to identify this connection in Invicti Platform. Use only letters, numbers, hyphens, and underscores - spaces aren't allowed (for example,
HC-VaultorHC_Vault). - Enter the URL of your HashiCorp Vault instance.
- Under Authentication type, select Token.
- Enter your HashiCorp Vault admin Token.
- If you use HCP Vault Dedicated or HashiCorp Vault Enterprise with namespaces, enter the namespace name in the Namespace field. HCP Vault Dedicated typically requires
admin. Leave this field empty if your vault doesn't use namespaces.
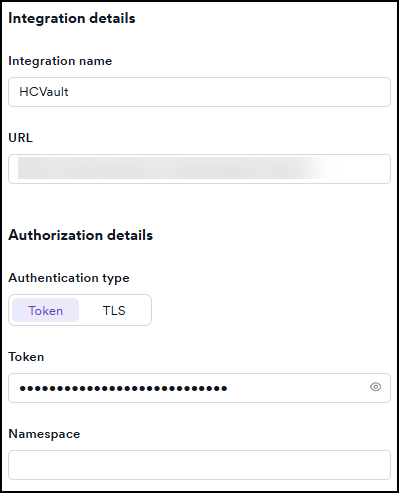
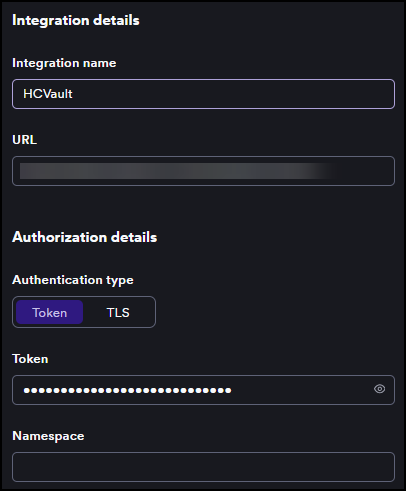
- Click Validate and save. Invicti Platform tests the connection before saving.
TLS certificate authentication
- Select Integrations from the left-side menu.
- Find the HashiCorp Vault card and click Configure.
- Enter an Integration name to identify this connection in Invicti Platform. Use only letters, numbers, hyphens, and underscores - spaces aren't allowed (for example,
HC-VaultorHC_Vault). - Enter the URL of your HashiCorp Vault instance.
- Under Authentication type, select TLS.
- Click the Upload certificate area and upload your
.pfxcertificate file. - If your certificate is password-protected, enter the password in the Certificate password field. Leave it empty if your certificate doesn't require one.
- If your certificate auth engine is mounted at a path other than the default (
cert), enter the path in the Path field. Leave it empty to use the default. - If you use HCP Vault Dedicated or HashiCorp Vault Enterprise with namespaces, enter the namespace name in the Namespace field. HCP Vault Dedicated typically requires
admin. Leave this field empty if your vault doesn't use namespaces.
- Click Validate and save. Invicti Platform tests the connection before saving.
Add a vault-sourced secret
Once the integration is configured, you can add secrets that Invicti Platform retrieves from your vault. Vault-sourced secrets work the same way as secrets stored in Invicti Platform - you reference them by name in any credential field.
The secret must already exist in your HashiCorp Vault before you can reference it in Invicti Platform. Refer to the HashiCorp Vault documentation for instructions on creating secrets.
- Open a target's authentication settings by selecting Inventory > Targets from the left-side menu, then opening the target and clicking Edit.
- Select an authentication method - for example, Simple form - to display the credential fields.
- In a credential field (for example, Username or Password), click the key icon to open the secret picker.
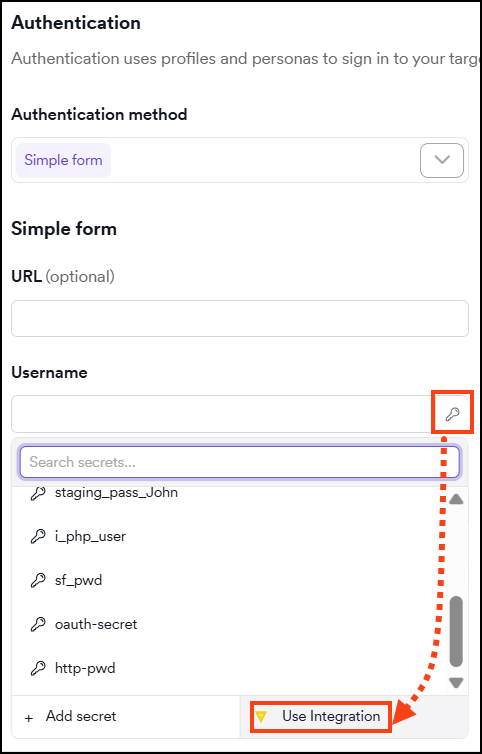
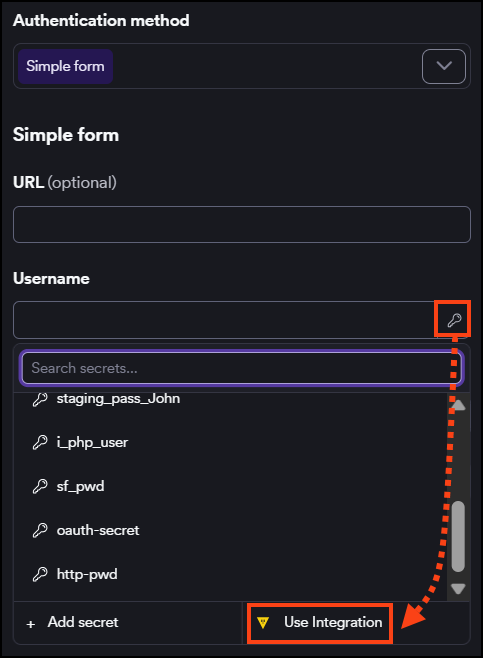
- Click Use integration at the bottom of the picker.
- In the Use integration dialog, complete the fields:
- Integration name - the vault connection to use. If you have only one connection configured, this field is pre-selected.
- Name - a name for this secret in Invicti Platform. Use something descriptive, for example
prod_db_password. - Secret path - the path to the secret in your HashiCorp Vault, for example
secret/myapp. - Secret key - the key within the secret at that path that holds the value, for example
password. - Secret availability - who can use this secret:
- Only me - only you.
- Entire org - all users in your organization.
- Specific teams - users in selected teams only.
- Specific users - selected users only.
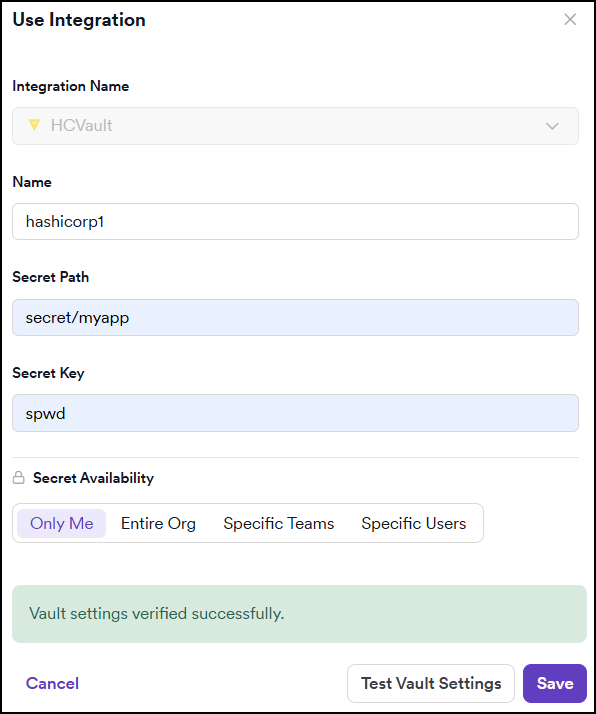
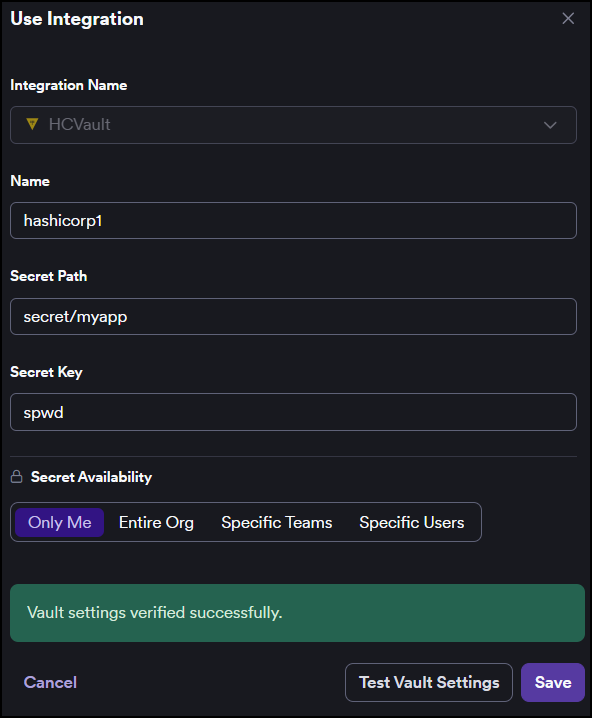
- Click Test vault settings to verify that Invicti Platform can reach the vault and find the secret at the specified path.
- Click Save. The credential field shows the secret name in
{{secretName}}format. - Save the target configuration. The secret is now active for scans on this target.
The secret also appears on the Scans > Secrets page with Source listed as Vault integration.
To use vault-sourced secrets in other authentication methods such as LSR, refer to Using secrets in scans. For full details on secret availability options and how secrets work across scan configurations, refer to the Secrets document.
Troubleshooting
Validate and save fails with a connection error
Check that the Vault URL is correct and publicly reachable from outside your network. The Invicti Platform infrastructure must be able to reach the URL you enter - a vault hosted only on your internal network won't be accessible.
If the URL is reachable, verify that your token or TLS certificate has the required permissions. Refer to the Before you begin section for the minimum required Vault paths.
Test vault settings fails in the Use integration dialog
Confirm that the Secret path and Secret key values match exactly what's configured in your vault, including case. The test checks both connectivity and whether the secret exists at the specified path.
Vault connection name is invalid
Integration names may only contain letters, numbers, hyphens, and underscores, and must be 100 characters or fewer. Spaces are not allowed. Use a name such as HC-Vault or HC_Vault instead of HC Vault.
Validate and save shows "An unexpected error occurred while testing the connection"
Check the following:
- Trailing space in the URL - paste the URL into the field and confirm there are no leading or trailing spaces.
- Wrong ngrok port - if you are using ngrok to expose a local Vault instance, make sure ngrok is forwarding to port 8200. Stop ngrok and restart it with the correct port:
ngrok http 8200. - Vault not running - confirm the Vault server is still running and hasn't stopped or crashed.
The Use integration button doesn't appear in the secret picker
The Use integration button appears only when at least one secret manager integration is configured. Confirm the HashiCorp Vault integration was saved successfully under Integrations. If it was deleted or failed to save, configure it again following the steps in this document.
Need help?
Invicti Support team is ready to provide you with technical help. Go to Help Center