Deployment: Invicti Platform on-premises
Moving from Acunetix on-premises to Invicti Platform on-premises
This document explains how to move your existing data from Acunetix on-premises to your new Invicti Platform on-premises installation. By following this guide, you can transition your security posture to Invicti Platform while retaining critical historical data, including targets, scan profiles, and vulnerability reports.
Migrating from Acunetix on-premises involves a two-stage process:
- Exporting your data from the source Acunetix environment.
- Importing that data into the destination Invicti Platform environment.
Before you begin
Invicti Platform on-premises must be installed on a server before you can import data.
Don't complete the registration process. Invicti Platform can only have one account, and the import won't be allowed if a user is already registered. Your previous account will be registered in the new platform.
For installation instructions, refer to the Helm installation document or the Windows installation guides.
Exporting data from Acunetix
To move your data, you must first extract it from your current Acunetix environment using the Invicti exporter tool. The following sections describe how to download and run the tool on your platform.
Download and run on Windows
Download the exporter tool for Windows:
After downloading, right-click the file and select Run as administrator.
Download and run on Linux
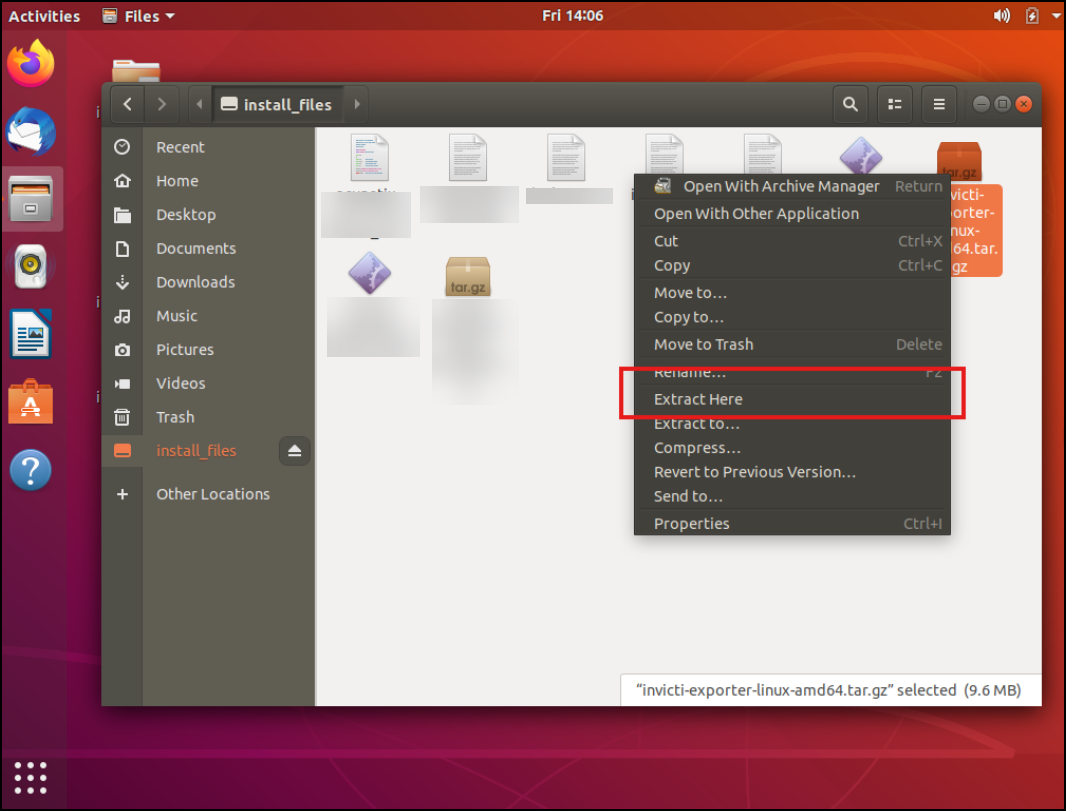
- Download invicti-exporter-linux-amd64.tar.gz.
- Extract the archive.
- Confirm that the Acunetix service is active:
systemctl status acunetix - Run the exporter tool:
sudo ./invicti-exporter-linux-amd64 - Follow the Export data steps.
Download and run on Docker
Download the exporter tool inside the Docker container:
wget -P /tmp "https://static-platform.invicti.com/upgrade-tools/invicti-exporter-linux-amd64.tar.gz"
Or copy it from your local machine:
docker cp "/path/to/invicti-exporter-linux-amd64.tar.gz" <container-id>:/tmp/invicti-exporter-linux-amd64.tar.gz
Open a root shell inside the container:
docker exec -u 0 -it <container-id> bash
-u 0- runs as the root user (ID 0)-it- opens an interactive terminalbash- opens the bash shell
Extract the archive:
tar -xzvf /tmp/invicti-exporter-linux-amd64.tar.gz -C /tmp
Run the exporter tool:
./tmp/invicti-exporter-linux-amd64
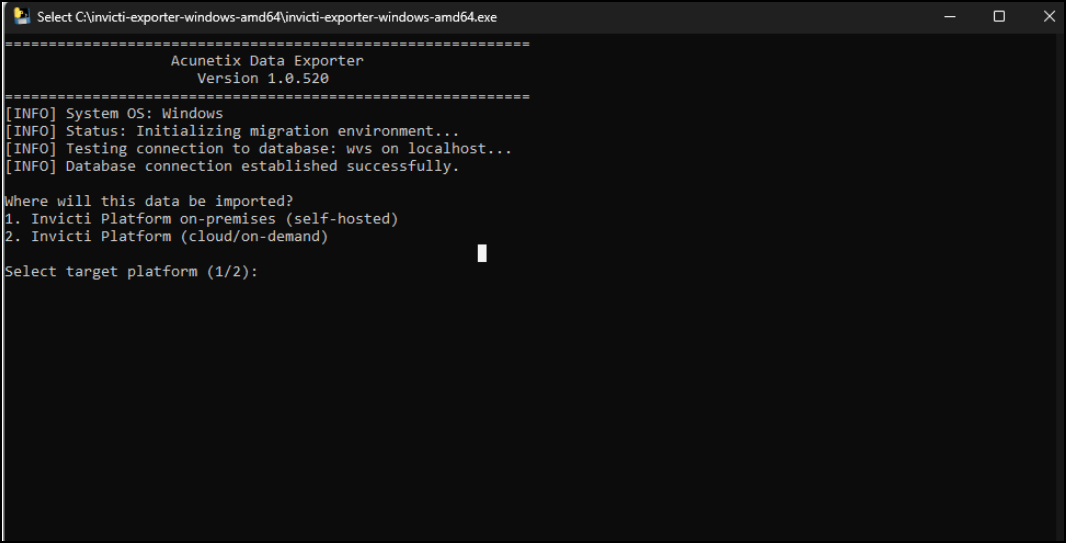
Export data
To move your data to Invicti Platform on-premises, select 1 and press Enter.
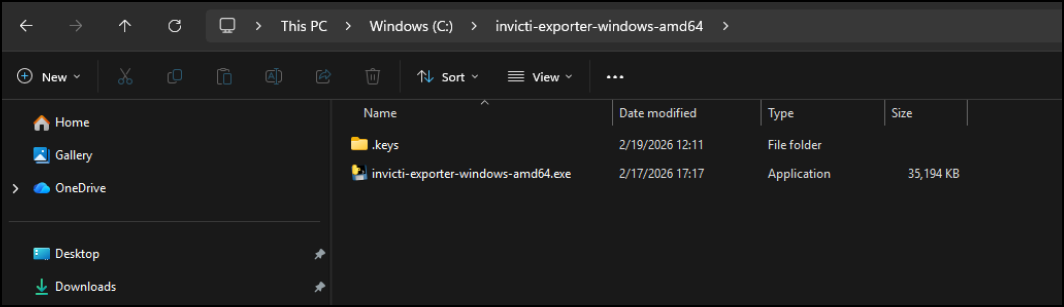
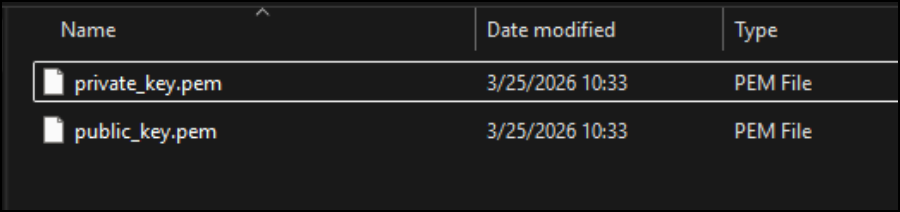
The tool creates a certificate to encrypt the sensitive data.
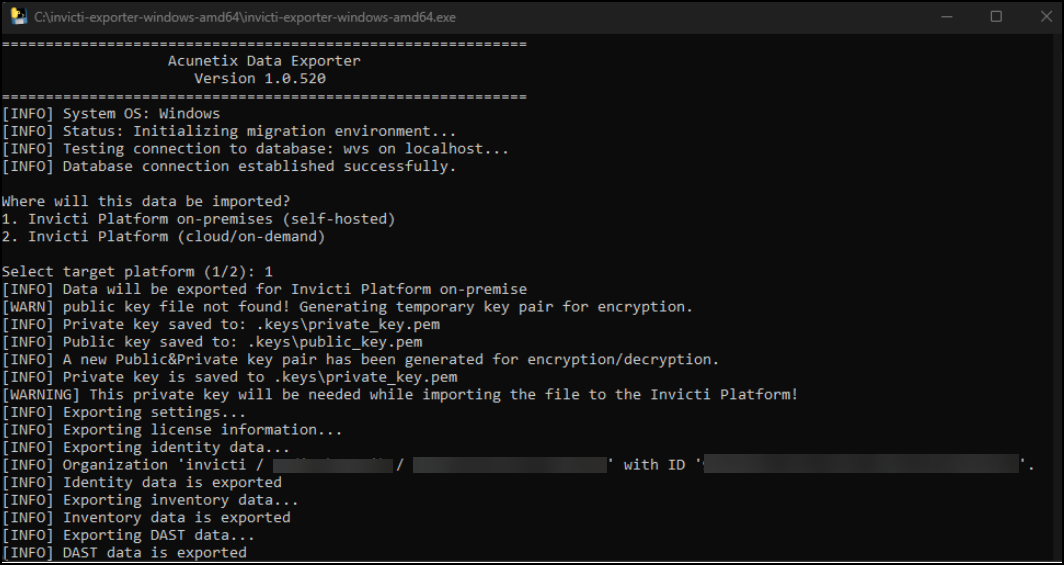
The certificate files are saved to the .keys folder in the same directory.
The private key is needed for the import process.
A zip archive is created in the temp folder.
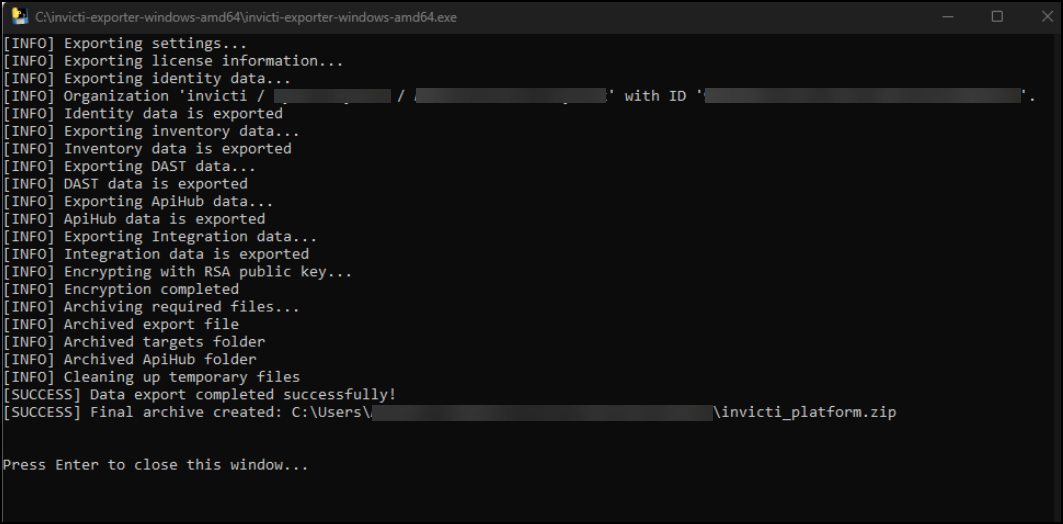
Use this archive and the private key in the import service of Invicti Platform on-premises.
Import data to Invicti Platform on-premises
Navigate to the import page at https://[YOUR-INVICTI-PLATFORM-URL]/import.
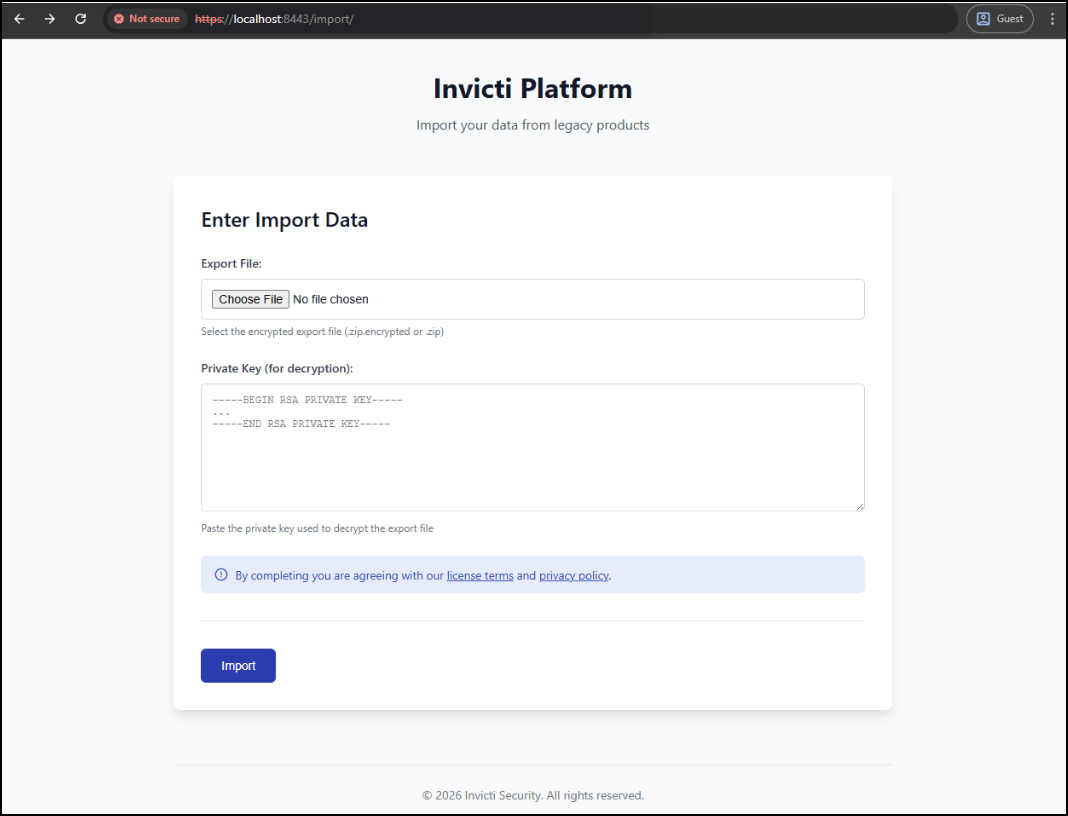
Enter the export file and private key, then submit the form. Invicti Platform uploads the files to the server and starts the import process immediately.
Once it's finished, open the login page and continue using Invicti Platform on-premises with your existing credentials.
What is carried over
Carried over from Acunetix on-premises
- Root Account and Child Users (including their password)
- User Profile settings
- User Notification settings
- User Groups (Teams)
- RBAC settings
- User Access Settings
- SSO Settings (redirect URL needs to be re-configured on UP and reactivated manually. SSO User permissions are retained)
- Targets (including Target settings, LSRs, BLRs, Import files)
- Target Groups
- Recurring / Future Scans
- Discovery Settings
- Scan Profiles
- WAF settings
- Excluded Hours
- Internal Scanning Agent configuration
- Settings
- Jira Integration
- Only the HTTP Basic Token is supported. The integrations that require other authentication methods need to be updated by the user.
- The fields in UP and ACX are not the same. The user might need to check the integration after the migration is completed.
- The Owner is mandatory, so the first user returned from the Jira service related to the project is added as the reporter. The user might want to update it.
What isn't carried over
- Audit events from OVS
- Notifications (bell) items
- Paused scan status
- Past Scans (including data on HTTP requests / Responses, and Scan Activity)
- Issue Tracker integrations (TBC)
- Vulnerabilities
- Reports
Need help?
Invicti Support team is ready to provide you with technical help. Go to Help Center