Deployment: Invicti Platform on-demand, Invicti Platform on-premises
New automation
Automations define how Invicti Platform interacts with your other systems. This document explains how to create a new automation by specifying a scope and the events within that scope that trigger actions.
The following configurations are necessary before creating automations:
- An established integration with an issue tracker, such as JIRA.
- Allowed email domains configured under Settings > Email. Automation email notifications can only be configured and sent to domains that have been added to the email settings.
For documentation purposes, this document demonstrates how to create an automation rule that sends discovered vulnerabilities to an issue tracker.
Step 1: Specify scope and targets
This is where you enter a name for the automation and specify the targets or collections.
-
While you're logged in as an Owner or Administrator, select Automations from the left-side menu.
-
Click Add new automation.

-
Complete the following fields:
- Name: Enter a meaningful name for the automation.
- Description: Briefly describe what the automation is for.
- Scope: Choose where the automation should apply:
- All targets - Applies to all targets.
- Specific collections - Choose from the existing collections.
- Specific targets - Choose individual targets.
- Targets / Collections drop-down: This field updates based on your Scope selection. Use it to choose the relevant targets or collections the automation applies to.
Invicti Platform doesn't have a direct option to scope automations by application. As a workaround, add your applications to a collection and select that collection as the scope. For more information, refer to Create a collection.
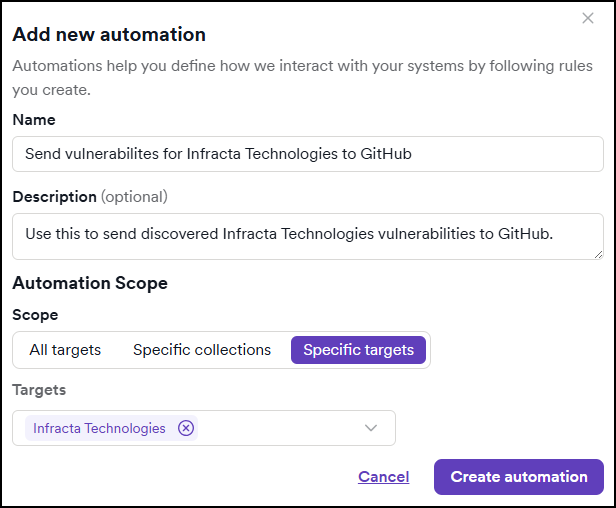
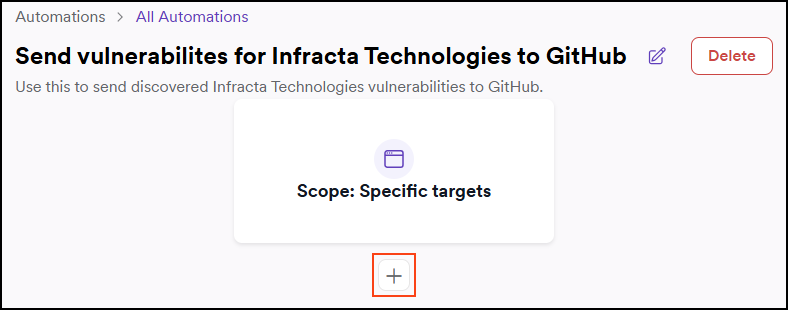
- Click Create automation to confirm. Invicti Platform takes you to the automation configuration page. Continue with the following step.
Step 2: Add an event
This is where you add an event (scan completed, scan failed, etc.) to the automation.
- Use the plus button to add an event:
-
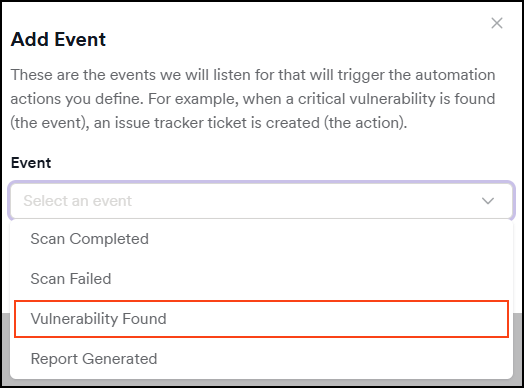
On the Add event dialog, use the drop-down and choose Vulnerability found. The other options are:
- Scan completed
- Scan failed
-
Based on the event you selected, configure the additional fields:
- Vulnerability severity: Send only vulnerabilities that match the selected severity level.
- Vulnerability confidence: Send only vulnerabilities with the selected confidence level or higher.
- Target's business criticality: Choose the business criticality of the target to further filter the results.
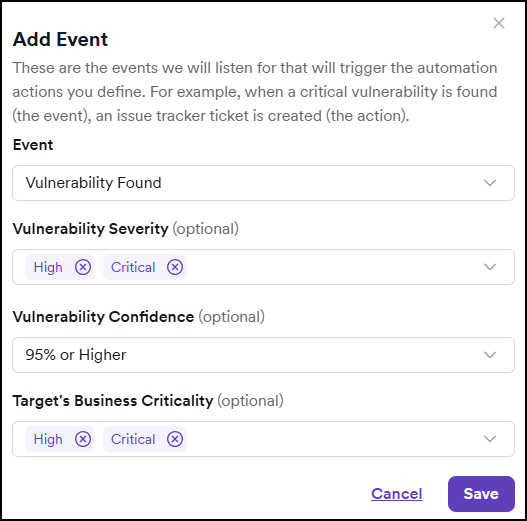
- Click Save to confirm the event configuration.
Step 3: Add an action
-
Use the plus button that appears after the event to enter an action.
-
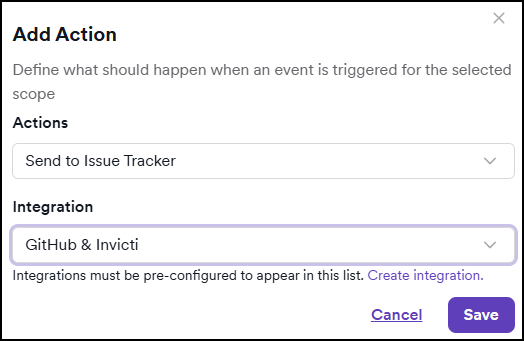
Use the drop-down and choose an action. Depending on the event, you may see Send to issue tracker or Send email. For this document, the example uses Send to issue tracker.
-
Specify the integration.
-
Save to confirm the action.
-
Optionally, repeat previous steps to add additional events and actions to your automation.
-
Click Save changes to save the entire automation.
Your automation is now configured and automatically enabled.
Examples
The following examples demonstrate common automation scenarios you can implement to streamline your security workflow.
Example 1: Email a report when scan completes
Use case: Automatically send a scan report to your security team after every scan finishes.
- Event: Select Scan completed
- Action: Select Send email
- Enter the recipient email addresses
- Choose Yes in the Attach scan report to email?
- Select the report template you want to attach
- Result: Every time a scan completes successfully, the specified recipients receive an email with the scan report attached.
Example 2: Notify team when scan fails
Use case: Alert your team immediately when a scan fails so issues can be investigated and resolved quickly.
- Event: Select Scan failed
- Action: Select Send email
- Enter the email addresses of team members who should be notified
- Result: Team members receive an email notification whenever a scan fails, enabling quick troubleshooting.
Example 3: Send compliance report to stakeholders after scan completion
Use case: Automatically send a compliance report to management and auditors after each scan to demonstrate ongoing security assessment activities.
- Event: Select Scan completed
- Action: Select Send email
- Enter the email addresses of stakeholders (e.g., security managers, compliance officers)
- Choose Yes in the Attach scan report to email?
- Select a compliance report type (e.g., PCI DSS, OWASP Top 10)
- Result: Stakeholders receive an automated email with the compliance report attached after each scan completes, providing visibility into security posture without manual effort.
Need help?
Invicti Support team is ready to provide you with technical help. Go to Help Center