Record a login sequence with standalone LSR
This document shows you how to record a login or business logic sequence for an internal target after you have installed the Invicti standalone LSR.
There are three stages to recording a login sequence (.lsr file):
- Record login actions
- Record any restrictions
- Detect a user session
Follow the instructions in the sections following to record a login sequence using the standalone LSR. Then upload the .lsr file to your target in Invicti for use when scanning with an internal agent.
Record login actions
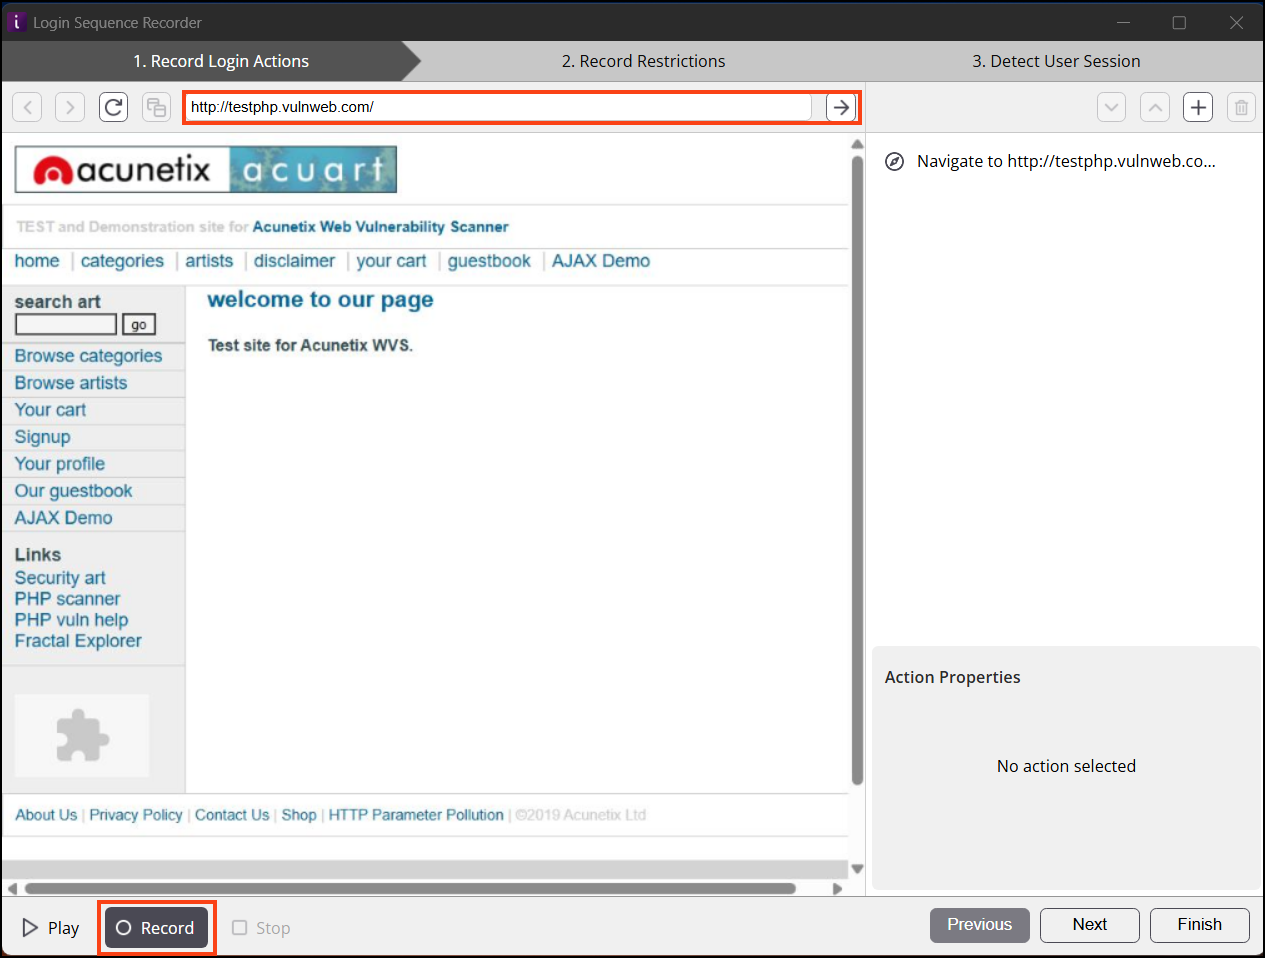
Open the LSR recorder then follow the steps following to begin recording login actions:
-
Click the Record button if it is not already selected.
-
Enter your target URL, then click the arrow icon to load the web page within the Invicti LSR.
-
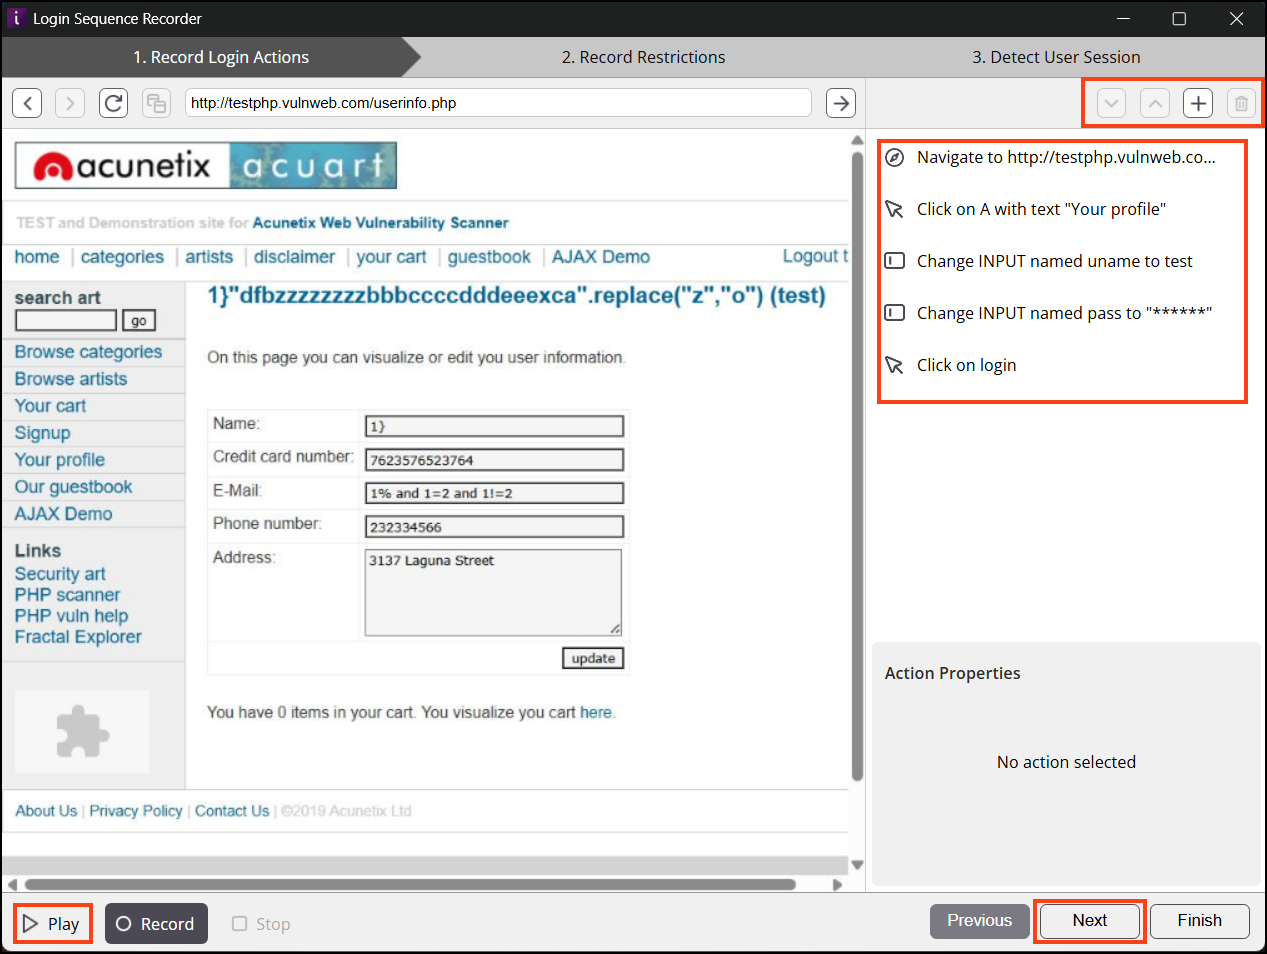
Navigate to the area of the page where you need to record the login sequence or business logic and carry out the necessary actions such as entering login credentials or filling in a form.
-
The right-hand side panel displays each action that has been recorded. Select any action to edit:
a. Select the arrows (↑ or ↓) to change the order of actions in the recording.
b. Select ➕ to add a new action to the recording or ➖ to delete an action from the recording.
c. From the Action Properties section, modify the target, timeout, or value.
-
Select Play to playback the recording.
-
When you are satisfied with your recording, click Next and continue with the instructions following to record restrictions.
Record restrictions
Restrictions instruct the crawler and scanner not to follow specific links during a scan. Typically, you would restrict logout links or other links that might destroy a valid session to ensure that the scanner does not get logged out during the scan. The LSR also supports restrictions on HTTP methods commonly used in RESTful web services such as PATCH, PUT, and DELETE in addition to the standard GET and POST requests.
If the link you are restricting contains a nonce or a one-time token, you can use wildcards (*) to restrict links with changing values.
-
Click any buttons or links on your web page that you do not want Invicti to click when it is crawling and scanning the website.
-
Upon clicking a button or link, a dialog appears asking if you want Invicti to:
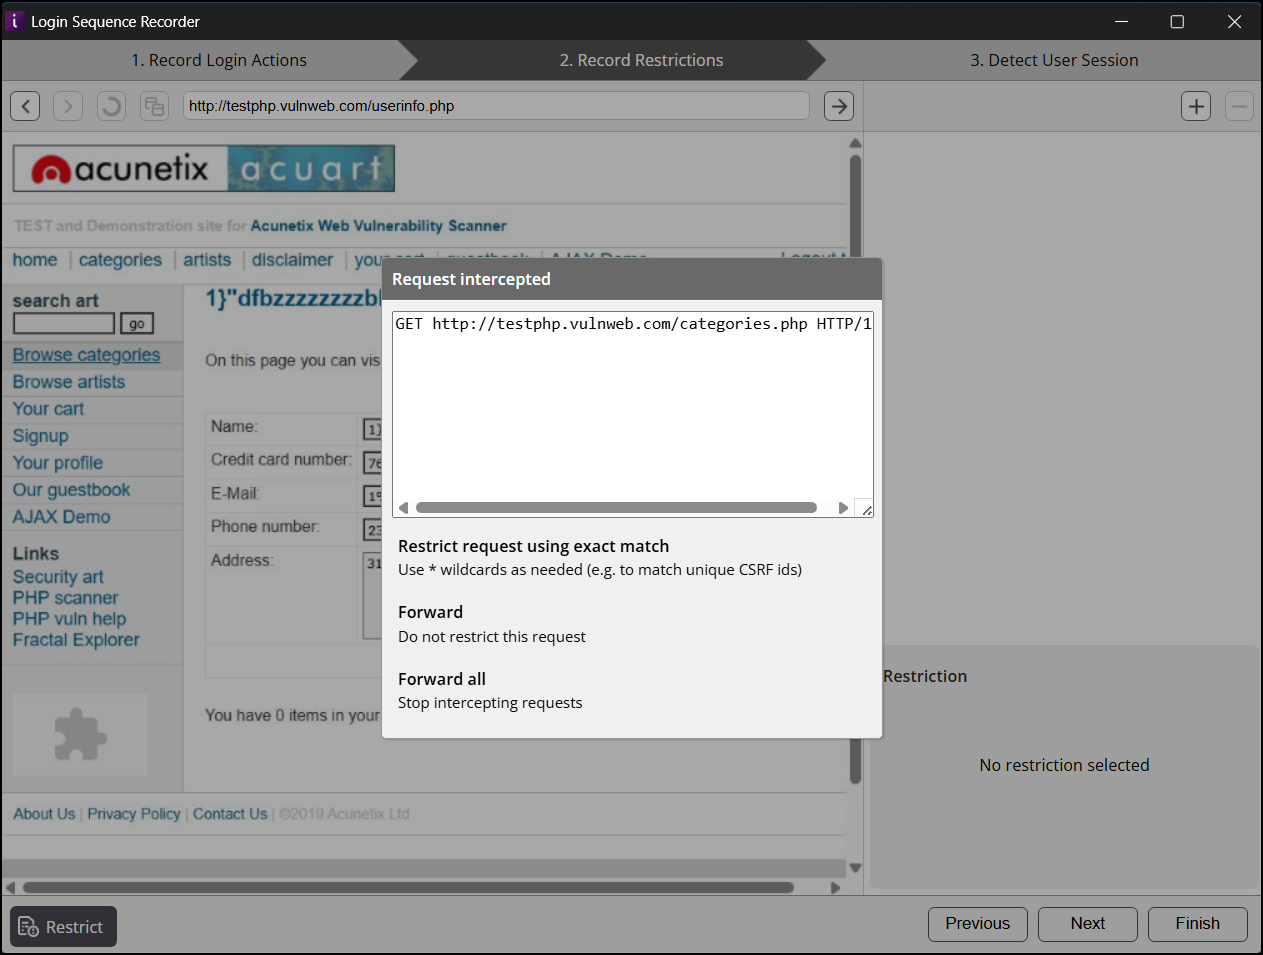
- Restrict request using exact match (or by using wildcards)
- Forward requests that match this request (Do not restrict this request)
- Forward all requests, meaning that there are no restrictions (Stop intercepting requests)
-
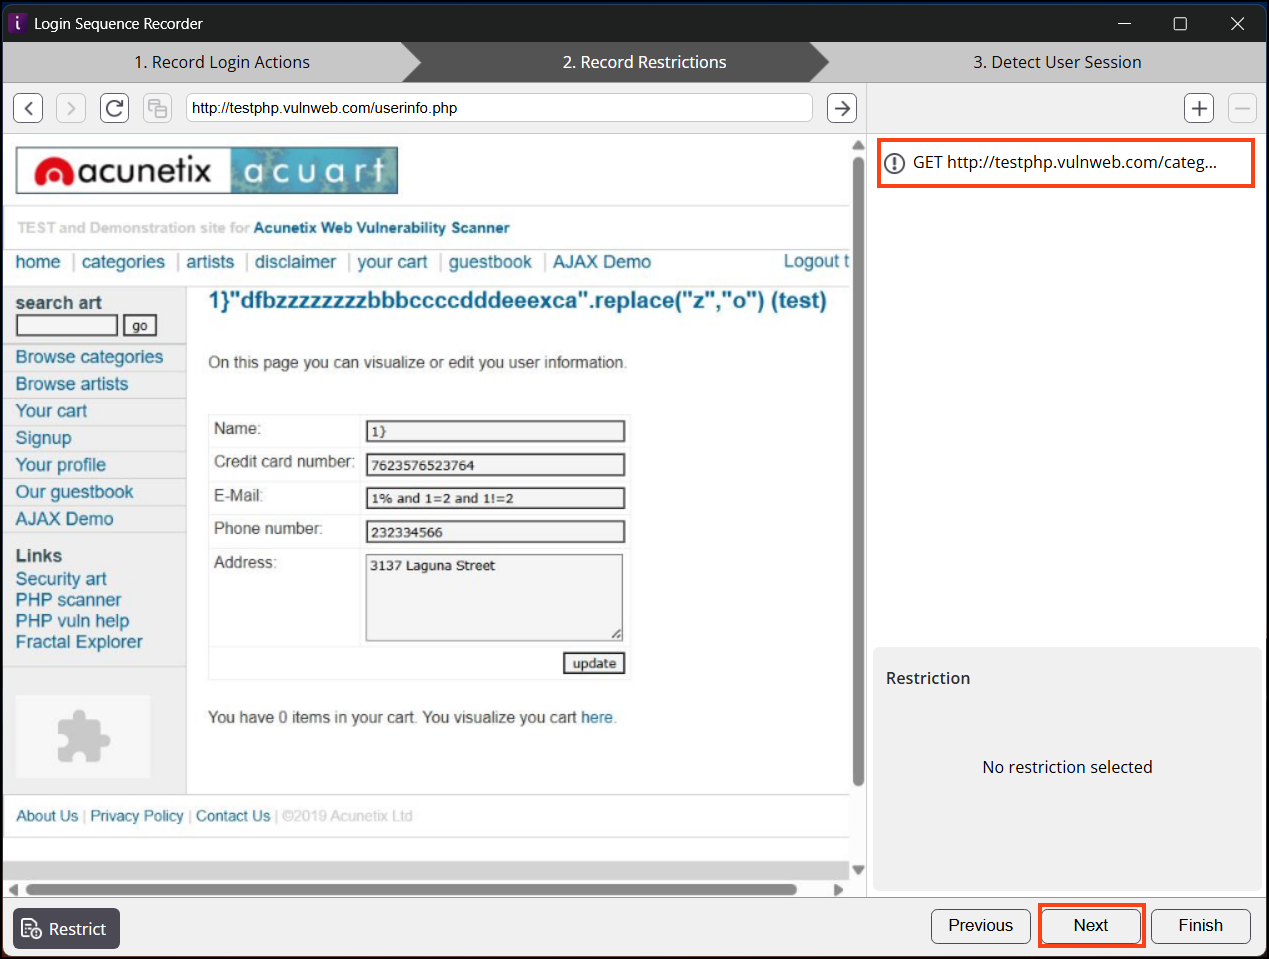
Select your preferred option. The restriction is recorded and shown in the panel on the right. You can add as many restrictions as you need.
-
Click Next to proceed to the valid session detection phase.
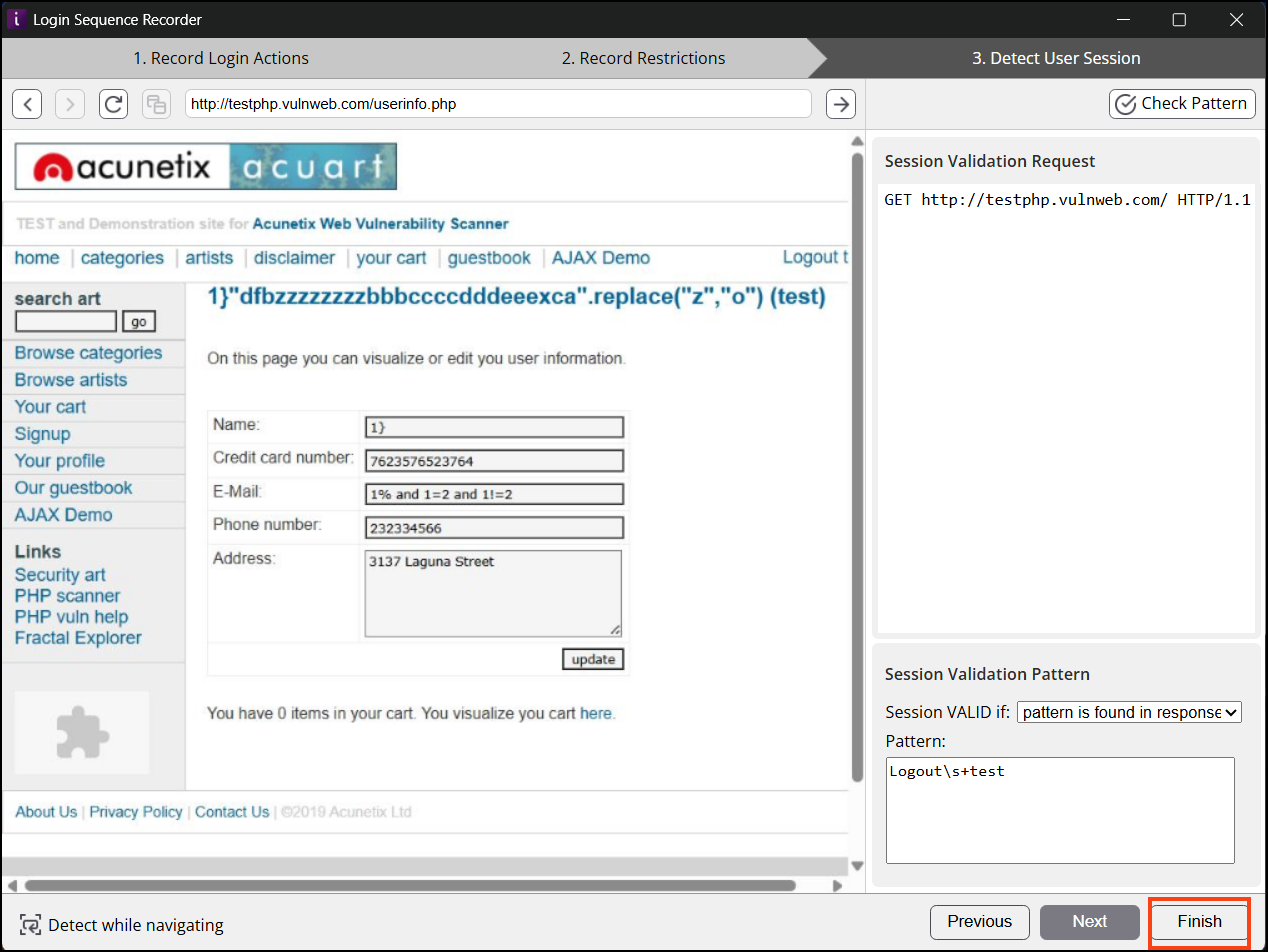
Detect a user session
The LSR immediately starts to determine if the request and pattern combination can be used to identify a valid session. The scanner uses the session pattern to identify the difference between an invalid (logged out) and a valid (logged in) session. If the scanner determines that the session has been invalidated, it can replay the login sequence and validate the session again.
-
A confirmation message is displayed when the LSR has successfully identified a pattern to use for detecting session validity. Click OK to continue.
-
There may be cases where the LSR cannot immediately identify a user session pattern. In such cases, you can still get Invicti to identify a valid authentication session by browsing to authenticated areas of the website that return a different response depending on the user being logged in or logged out. For example, a response from the website contains the text Logout if the user is logged in. If it is not found in the response, it means that the user is not logged in.
When you have identified and configured the session pattern, you can verify it by clicking Check Pattern at the top of the right-hand-side panel.
-
If the LSR is still unable to identify a user session pattern, you have to configure one manually.
-
Click Finish, then save your .lsr file.
Your login sequence is now ready to upload to your target for scanning with an internal agent.
How to manually configure a user session
For manual configuration of a user session, you need to identify a reliable difference that the scanner can use to verify whether or not it is logged into the site. The responses sent by the web server need to differ between those of a logged-in user and those of a user who is not logged in. In addition to authentication mechanisms that rely on cookies, the LSR also supports authentication mechanisms that rely on HTML5 LocalStorage.
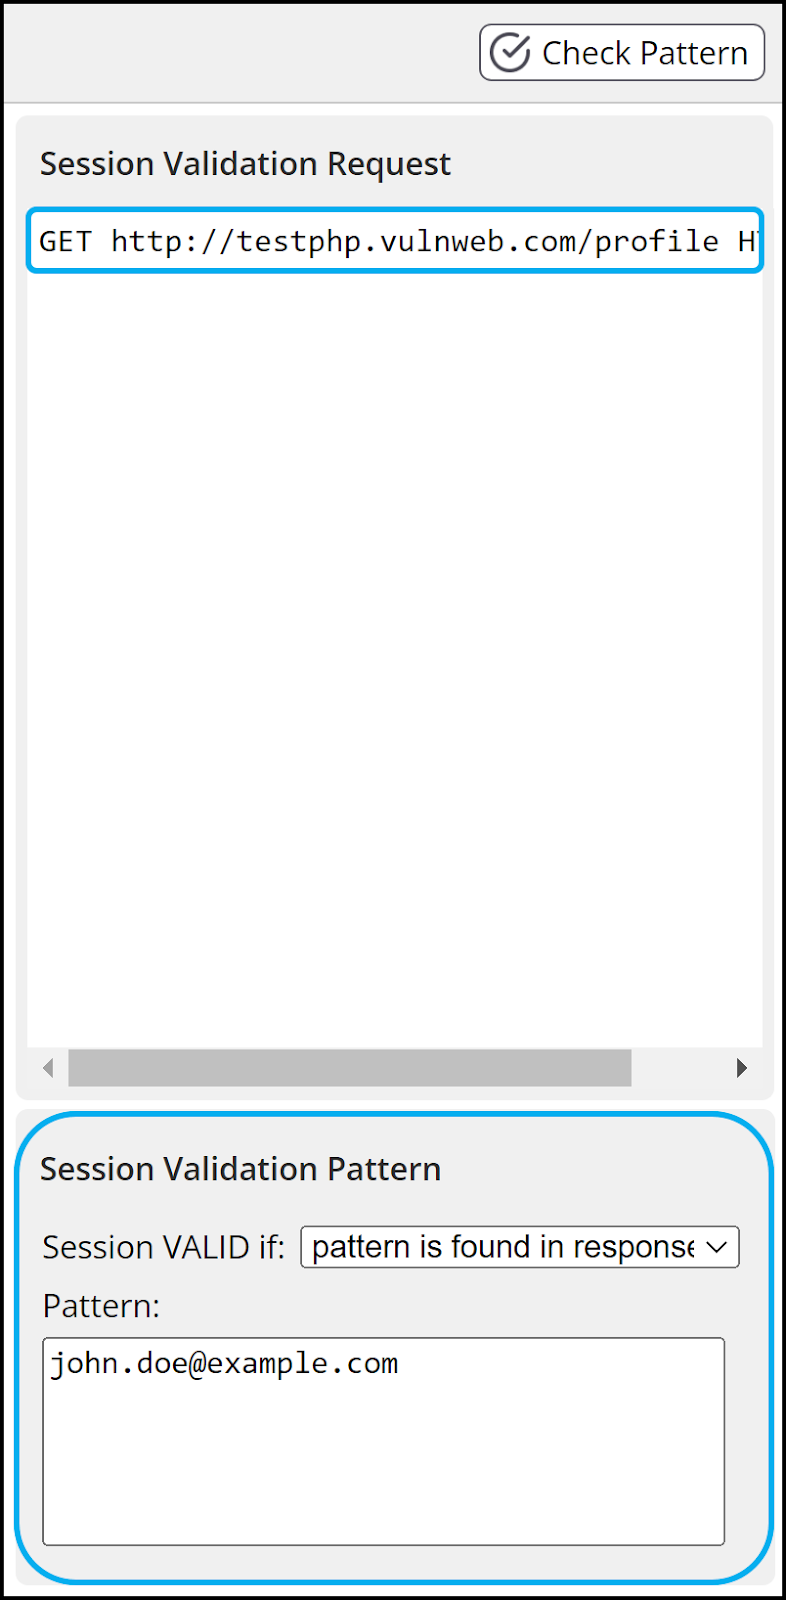
There are 3 main options for session pattern validation. When you have identified and configured the session pattern, you can verify it by clicking Check Pattern at the top of the right-hand-side panel.
Option 1: identify a visual difference on one of the web pages. For example, some web pages show the name of the logged-in user or a Your Basket link only for logged-in users. In such cases, you can instruct the LSR which page to go to such as GET http://testphp.vulnweb.com/profile HTTP/1.1). Then set the 'Session VALID if' drop-down to pattern is found in response and set the 'Pattern' to the logged-in specific text or user name.
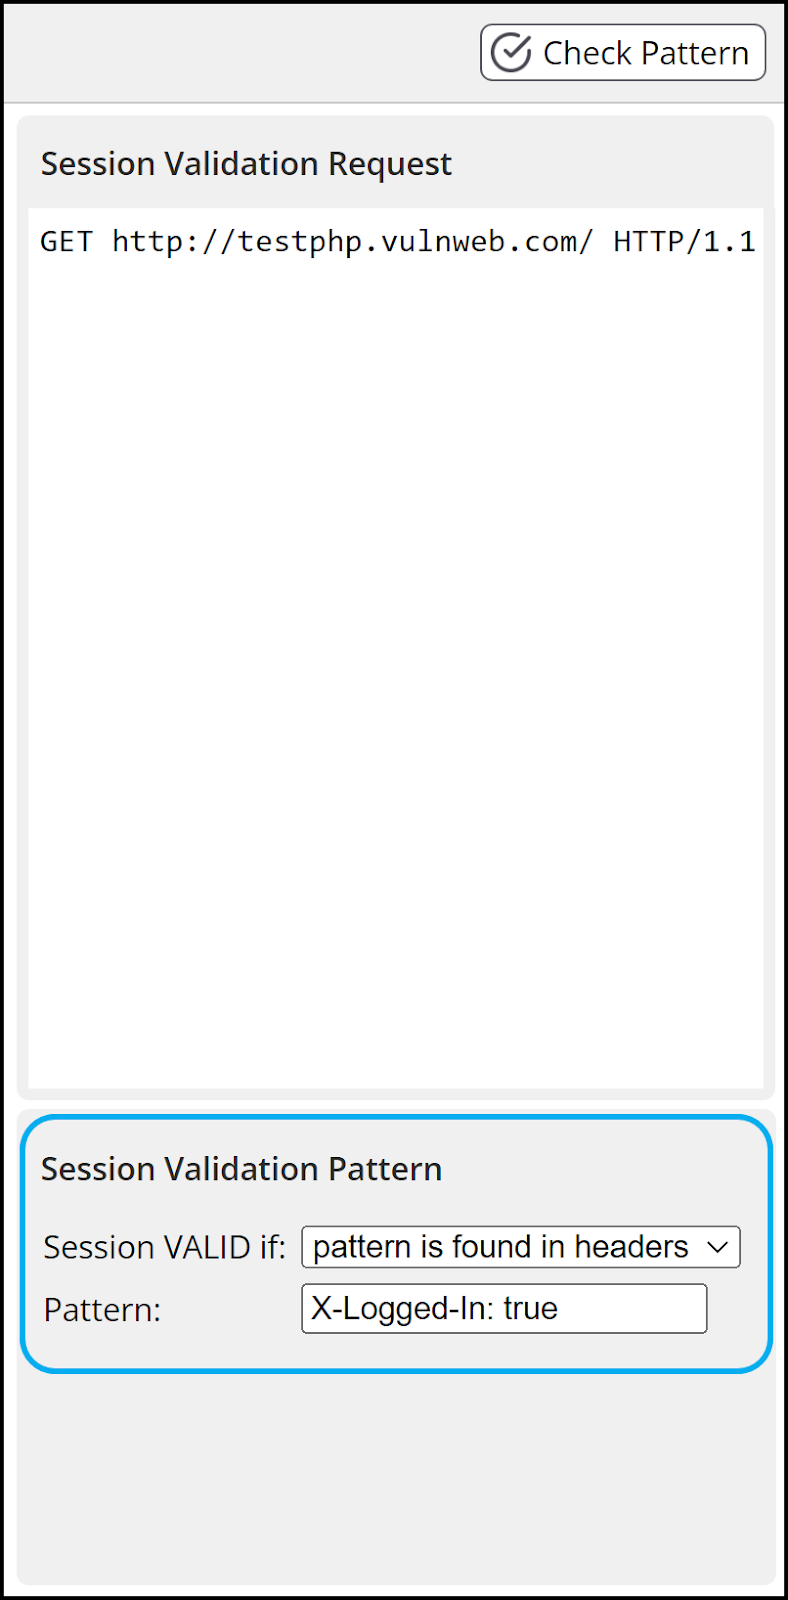
Option 2: identify a difference in the HTTP response headers in the logged-in web pages compared to the not-logged-in version. You can review this with Google Chrome, for example, by using the Inspect feature. The Network tab shows a Response Headers section that could include a header such as X-Logged-In: true, but would be absent or have a different value such as X-Logged-In: false. Set the 'Session VALID if' drop-down to pattern is found in headers and set the 'Pattern' to the identified header value (X-Logged-In: true in this example).
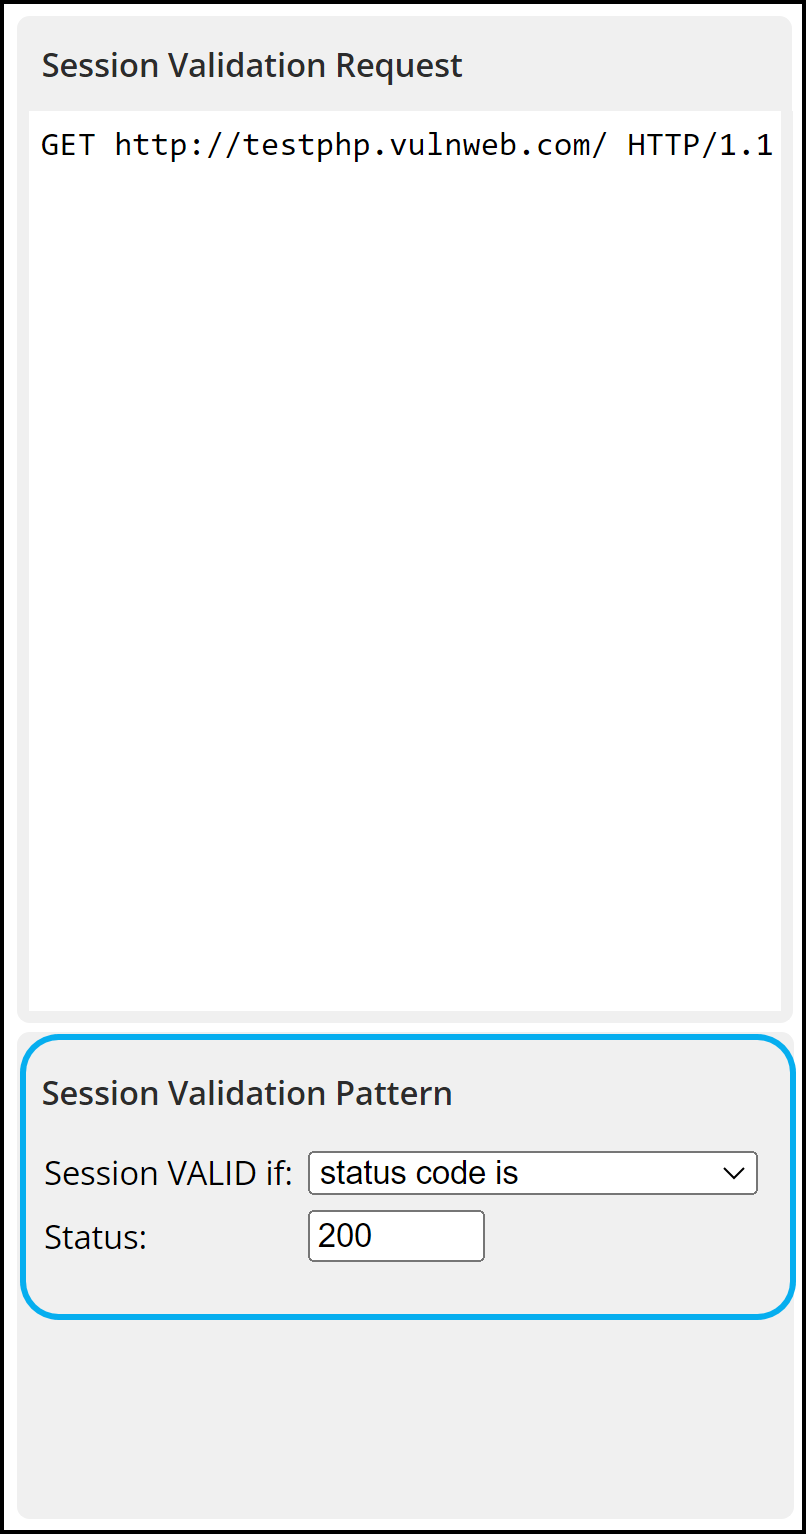
Option 3: identify a web page that receives a numeric response when logged in (typically 200) and some other response when not logged in, such as a 404 (not found) or a 500 (server error). Set the 'Session VALID if' drop-down to: status code is and set the 'Status' value to the numeric response when logged in (200 in this example).
Need help?
Invicti Support team is ready to provide you with technical help. Go to Help Center