Upload LSR recording to internal target
When configuring your target settings, you can upload a pre-recorded login sequence instead of recording one directly in the platform UI. This document explains how to upload an .lsr file to a target in Invicti Platform.
Use this flow when you recorded the login sequence outside the platform with the standalone LSR - for example, on a separate machine with direct network access to an internal target. For targets that use an internal scanning agent, you can also record directly in the platform UI; see Record a login sequence.
Before following the steps in this document, you need to have:
- Installed the standalone LSR on Windows or Linux.
- Recorded a login sequence with the Invicti Platform standalone LSR.
Refer to the linked documents for more information about these steps.
Upload a login sequence to an internal target
-
Select Inventory > Targets from the left-side menu.
-
Open the internal target you would like to edit.
-
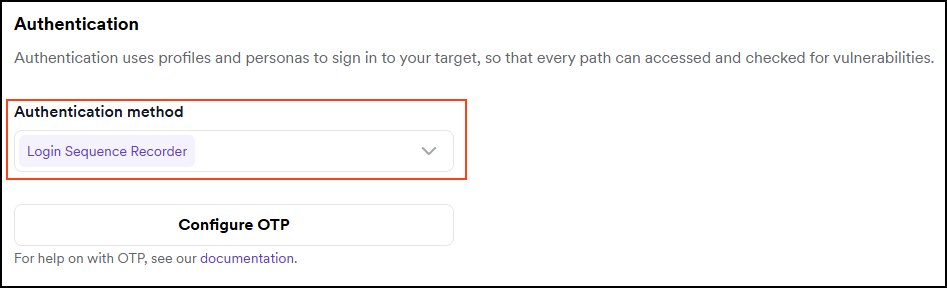
Navigate to the Authentication section.
-
In the Authentication method, choose Login Sequence Recorder.
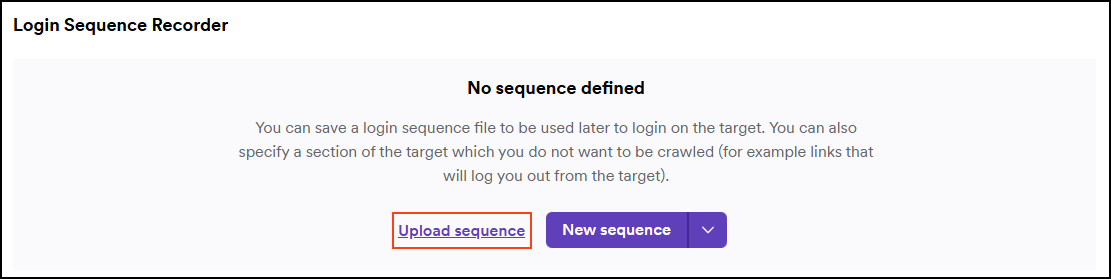
- In the Login Sequence Recorder, click Upload sequence and upload your saved .lsr file.
- Save target configuration.
The next time you scan the target, your uploaded login sequence is applied during the scan.
Need help?
Invicti Support team is ready to provide you with technical help. Go to Help Center