Deployment: Invicti Platform on-demand, Invicti Platform on-premises
Azure Key Vault integration
Connect Invicti Platform to Azure Key Vault so that Invicti Platform retrieves scan credentials directly from your vault when authenticating scans. Credentials remain in Azure Key Vault as the single source of truth - Invicti Platform stores only a reference to each secret, never the value itself.
This document explains how to configure the Azure Key Vault integration and how to add vault-sourced secrets for use in scans.
Why this matters
When scan credentials are stored directly in Invicti Platform, rotation requires updating every target configuration individually. By connecting Invicti Platform to Azure Key Vault, credential management stays consolidated in your vault. Invicti Platform resolves each secret at scan time, so it always uses the current value - no manual updates needed when passwords rotate.
Before you begin
You need a vault URL, a Microsoft Entra ID app registration with a client secret, and the app must have read access to your vault's secrets.
Before configuring the integration, have the following ready:
- The URL of your Azure Key Vault instance - available in the Azure portal on your vault's overview page. It follows the format
https://<vault-name>.vault.azure.net. - A Microsoft Entra ID app registration with the Tenant ID, Client ID (Application ID), and a Client secret value:
- Tenant ID - the Directory ID, found on the app registration's overview page in the Azure portal.
- Client ID - the Application (client) ID, also on the app registration's overview page.
- Client secret - the secret value (not the secret ID), found under Certificates & secrets after you create the secret. Copy the value immediately - the Azure portal doesn't show it again after you leave the page.
- The app registration must have at least Get and List permissions on secrets in the Key Vault. Refer to the Azure Key Vault RBAC guide for instructions on granting an app registration access to Key Vault.
The Key Vault URL you enter must be accessible from Invicti Platform. Scans can't retrieve credentials from a vault that's unreachable at scan time.
- On-demand: The vault must be reachable from Invicti Platform's cloud infrastructure. If your vault is behind a firewall, add Invicti Platform's IP addresses to your allowlist. Refer to the Trustlist requirements documents for the addresses for your region.
- On-premises: The vault must be reachable from the server where Invicti Platform is installed.
Configure the Azure Key Vault integration
- Select Integrations from the left-side menu.
- Find the Azure Key Vault card and click Configure.
- Enter an Integration name to identify this connection in Invicti Platform.
- If you want all users in your organization to be able to select this integration when creating a secret, enable the Visible to everyone toggle. When enabled, other users can select the integration in the secret picker but can't edit or delete it - only you and users with the Integrations permission can manage the connection.
- Under Authorization details, enter the URL of your Azure Key Vault instance.
- Enter your Microsoft Entra ID Tenant ID.
- Enter your app registration Client ID.
- Enter the Client secret value.
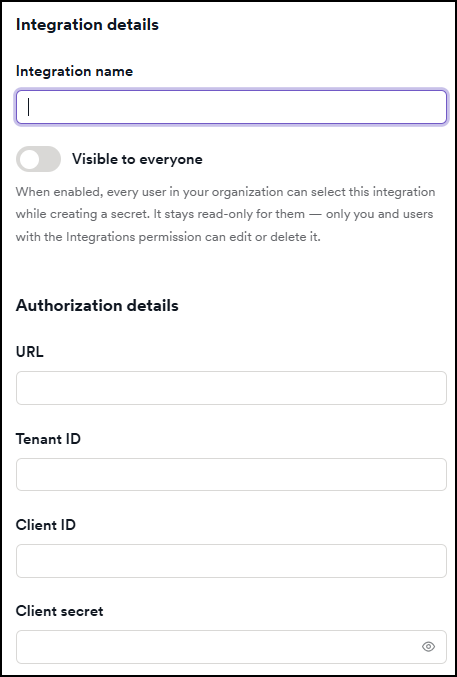
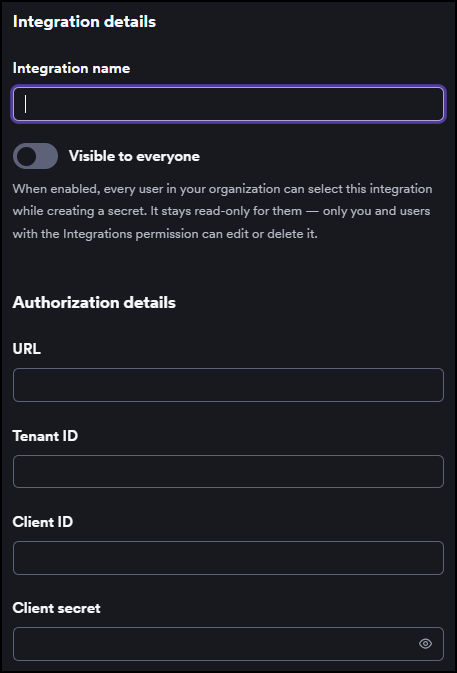
- Click Validate and save. Invicti Platform checks that all required fields are correctly filled in and saves the configuration.
Validate and save doesn't test whether Invicti Platform can reach your vault - it only validates the fields. To verify connectivity after saving, open the integration in edit mode and click Test connection. A message appears inline confirming the connection succeeded, or describing what failed.
Add a vault-sourced secret
Once the integration is configured, you can add secrets that Invicti Platform retrieves from your vault. Vault-sourced secrets work the same way as secrets stored in Invicti Platform - you reference them by name in any credential field.
The secret must already exist in your Azure Key Vault before you can reference it in Invicti Platform. Refer to the Microsoft Azure documentation for instructions on creating secrets.
- Open a target's authentication settings by selecting Inventory > Targets from the left-side menu, then opening the target and clicking Edit.
- Select an authentication method - for example, Simple form - to display the credential fields.
- In a credential field (for example, Username or Password), click the key icon to open the secret picker.
- Click Use integration at the bottom of the picker.
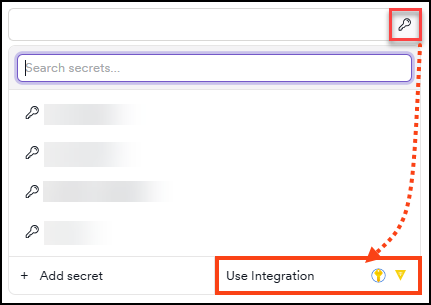
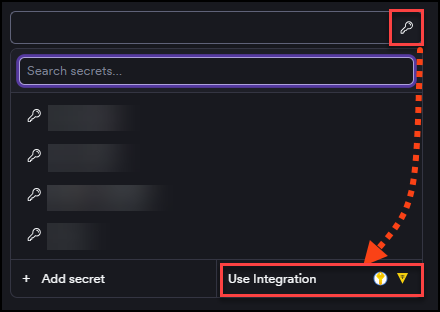
- In the Use integration dialog, complete the fields:
- Integration name - the vault connection to use. If you have only one connection configured, this field is pre-selected.
- Name - a name for this secret in Invicti Platform. Use something descriptive, for example
prod_db_password. - Secret key - the name of the secret in your Azure Key Vault. Find it under Objects > Secrets in the Azure portal - use the value in the Name column, for example
my-db-password. To reference a specific version, append the version ID after a slash:my-db-password/{version}. Without a version, Invicti Platform always retrieves the latest enabled version. - Secret availability - who can use this secret:
- Only me - only you.
- Entire org - all users in your organization.
- Specific teams - users in selected teams only.
- Specific users - selected users only.
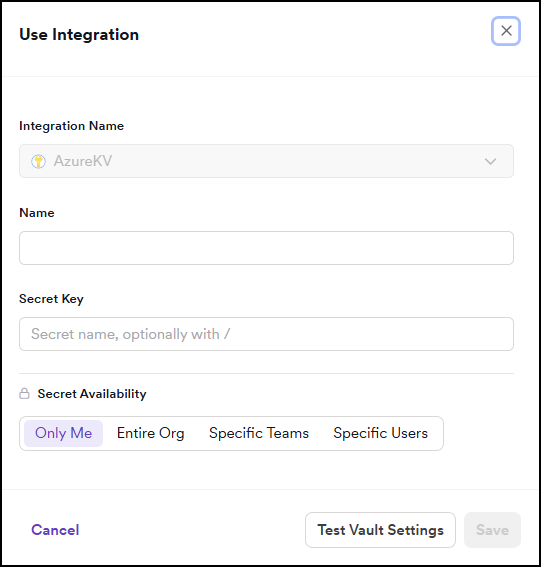
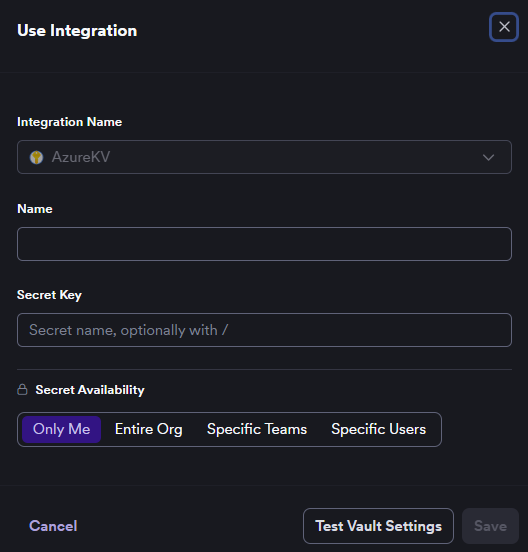
- Click Test vault settings to verify that Invicti Platform can reach the vault and find the secret.
- Click Save. The credential field shows the secret name in
{{secretName}}format. - Save the target configuration. The secret is now active for scans on this target.
The secret also appears on the Scans > Secrets page with Source listed as Vault integration.
To use vault-sourced secrets in other authentication methods such as LSR, refer to Using secrets in scans. For full details on secret availability options and how secrets work across scan configurations, refer to the Secrets document.
Troubleshooting
The integration can't be deleted
The integration can't be deleted while active secrets still reference it. Open Scans > Secrets and remove or reassign any secrets that use this integration, then try deleting the integration again.
Validate and save fails
Check that all fields are filled in and that the values are in the correct format:
- The URL must follow the format
https://<vault-name>.vault.azure.net. - The Tenant ID and Client ID must be GUIDs in the format
xxxxxxxx-xxxx-xxxx-xxxx-xxxxxxxxxxxx. - The Client secret must be the secret value, not the secret ID.
If all fields look correct, use Test connection (available when editing the integration) to check whether Invicti Platform can reach the vault.
Test connection fails
Check that the Key Vault URL is publicly reachable from outside your network. Invicti Platform must be able to reach the URL at scan time - a vault accessible only within your internal network won't work.
If the URL is reachable, verify that your Tenant ID, Client ID, and Client secret are correct and that the app registration has at least Get and List permissions on secrets in the Key Vault.
Test vault settings fails in the Use integration dialog
Confirm that the Secret key value matches the name of the secret in your Azure Key Vault exactly, including case. If you're referencing a specific version, verify the version ID is correct and the version is enabled.
The client secret has expired or been revoked
Client secrets in Microsoft Entra ID expire. When a secret expires or is revoked, Test connection fails even if the URL, Tenant ID, and Client ID are correct. Open the integration in edit mode, enter the new Client secret value, and click Validate and save to update the configuration, then click Test connection to confirm connectivity is restored.
To avoid disruption, update the client secret in Invicti Platform before it expires in the Azure portal.
The Use integration button doesn't appear in the secret picker
The Use integration button appears only when you have at least one secret manager integration configured. Confirm you saved the Azure Key Vault integration successfully under Integrations. If it was deleted or failed to save, configure it again following the steps in this document.
Need help?
Invicti Support team is ready to provide you with technical help. Go to Help Center