Deployment: Invicti Platform on-demand, Invicti Platform on-premises
Package: Ultimate
Workspace overview
Workspaces let you divide a single Invicti Platform account into separate, independently managed environments. Each workspace has its own users, targets, scans, and scan data. Your organization holds a central fully qualified domain name (FQDN) license, with a configurable limit allocated to each child workspace.
This document explains how workspaces work, how to use the workspace switcher, and how to create, edit, activate, deactivate, and delete workspaces. The workspace switcher and all workspace management tasks are only available to users with the Owner role.
Invicti doesn't activate workspaces by default. Contact your Invicti Customer Success Manager to activate this feature for your account.
Workspace switcher
The workspace switcher at the top of the page is only available to users with the Owner role. It shows the name of your current workspace and lets you move between workspaces or open the Workspaces page.
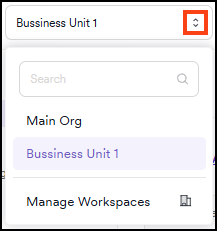
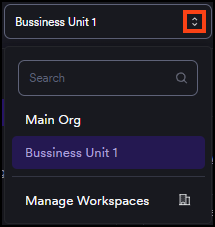
To switch to a different workspace, select the workspace switcher at the top of the page, then select a workspace from the list. The page reloads in the context of the selected workspace.
To open the Workspaces management page, select the workspace switcher, then select Manage workspaces at the bottom of the switcher.
Workspaces page
The Workspaces page lists all workspaces in your organization. To access it, select the workspace switcher at the top of the page, then select Manage workspaces.


The table shows the following information for each workspace:
| Column | Description |
|---|---|
| Name | The workspace name. The root workspace displays the Main badge. Your current workspace displays the Current badge. |
| Users | The number of users assigned to the workspace. |
| Allocated FQDNs | The maximum number of FQDNs allocated to this workspace. Set when creating or editing a child workspace. A value of 0 means no limit is configured. |
| Configured FQDNs | The number of FQDNs currently in use in this workspace. |
| % utilization | The percentage of the allocated limit currently in use. |
| Enabled | Whether the workspace is active and accessible to its users. |
Create a workspace
- Select the workspace switcher at the top of the page, then select Manage workspaces to open the Workspace page.
- Select Add new workspace.
- In the Workspace details section, fill in the workspace information:
- Name (required): A name for the workspace.
- Maximum FQDNs (optional): The maximum number of FQDNs this workspace can use. Leave at 0 for no limit.
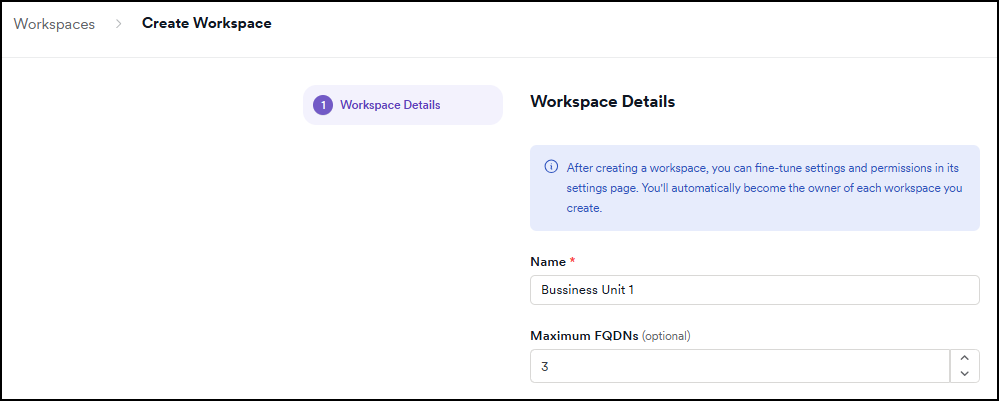
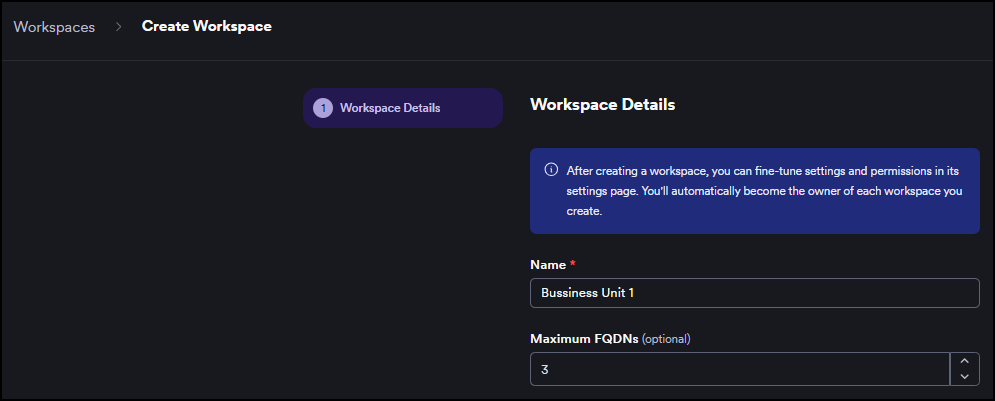
- Select Save and continue.
The value for Maximum FQDNs is limited by your organization's number of licensed FQDNs. Different workspaces can have any value as long as it's within your license, but the actual FQDNs available for any workspace may be further limited by the total FQDNs used across all workspaces. By assigning individual limits that don't add up to more than your organization's licensed FQDNs, you make sure each workspace has a dedicated amount of FQDNs available.
If the combined FQDN limits across all workspaces exceed your organization's licensed total, FQDNs beyond that total may not be available. To increase your license, contact your Customer Success Manager.
Invicti automatically assigns you as the owner of each workspace you create. To configure workspace-specific settings and permissions, switch to that workspace first and then navigate to Settings.
Edit a workspace
- Select the workspace switcher at the top of the page, then select Manage workspaces.
- Select Edit (pencil icon) next to the workspace you want to update.
- Update the Name or Maximum FQDNs as needed.
- Select Save and continue.
Activate or deactivate a workspace
- Select the workspace switcher at the top of the page, then select Manage workspaces.
- In the workspace row, select the Enabled toggle to activate or deactivate the workspace.
The toggle isn't available for the main workspace or the workspace you're currently in. To deactivate your current workspace, switch to a different workspace first.
Delete a workspace
Deleting a workspace permanently removes all its targets, scans, users, and vulnerability data. You can't reassign license slots used by that workspace until the license reset date. To keep the data, deactivate the workspace instead of deleting it.
You can't delete the main workspace or the workspace you're currently in. To delete your current workspace, switch to a different workspace first.
- Select the workspace switcher at the top of the page, then select Manage workspaces.
- Select Delete (trash can icon) next to the workspace.
- Review the deletion warning in the confirmation dialog.
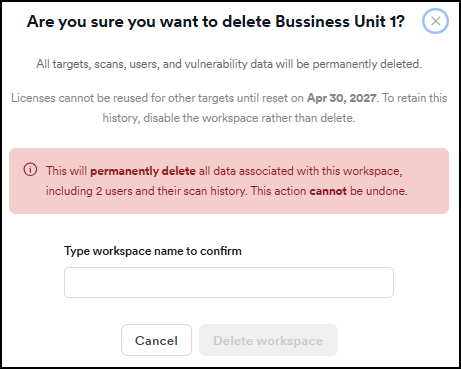
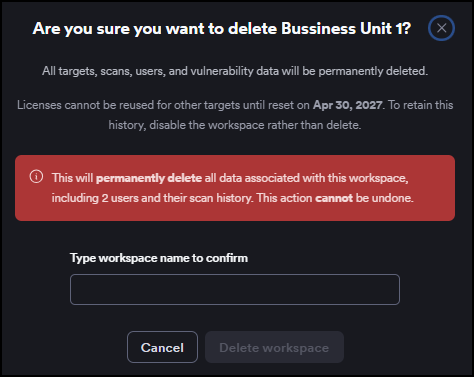
- In the Type workspace name to confirm field, enter the workspace name exactly as shown.
- Select Delete workspace.
Need help?
Invicti Support team is ready to provide you with technical help. Go to Help Center