Package: Invicti AppSec Core (on-demand)
Custom scan profiles
Each time you start a scan on a target, you can specify which scan profile to use. By default, Invicti AppSec uses the Full scan profile. You can choose from the built-in profiles or use a custom scan profile.
This document explains how to create a custom scan profile for use when scanning a target.
Why this matters
Default scan profiles are broad by design. A custom scan profile lets you concentrate on particular areas of concern by choosing the precise tests you require. This helps ensure your scans fully cover your web applications and increases the overall efficacy of your security testing efforts.
To see what checks you can add to your scan profile, refer to the Checks for custom scan profiles section of this document.
Create a custom scan profile
You can create a custom scan profile in two ways:
- New profile - start with a blank profile and select only the checks you need.
- Clone an existing profile - duplicate an existing built-in or custom profile and modify it to suit your needs.
When you enable a category in a scan profile, Invicti AppSec automatically includes any new security checks added to that category in future updates.
Create a new profile
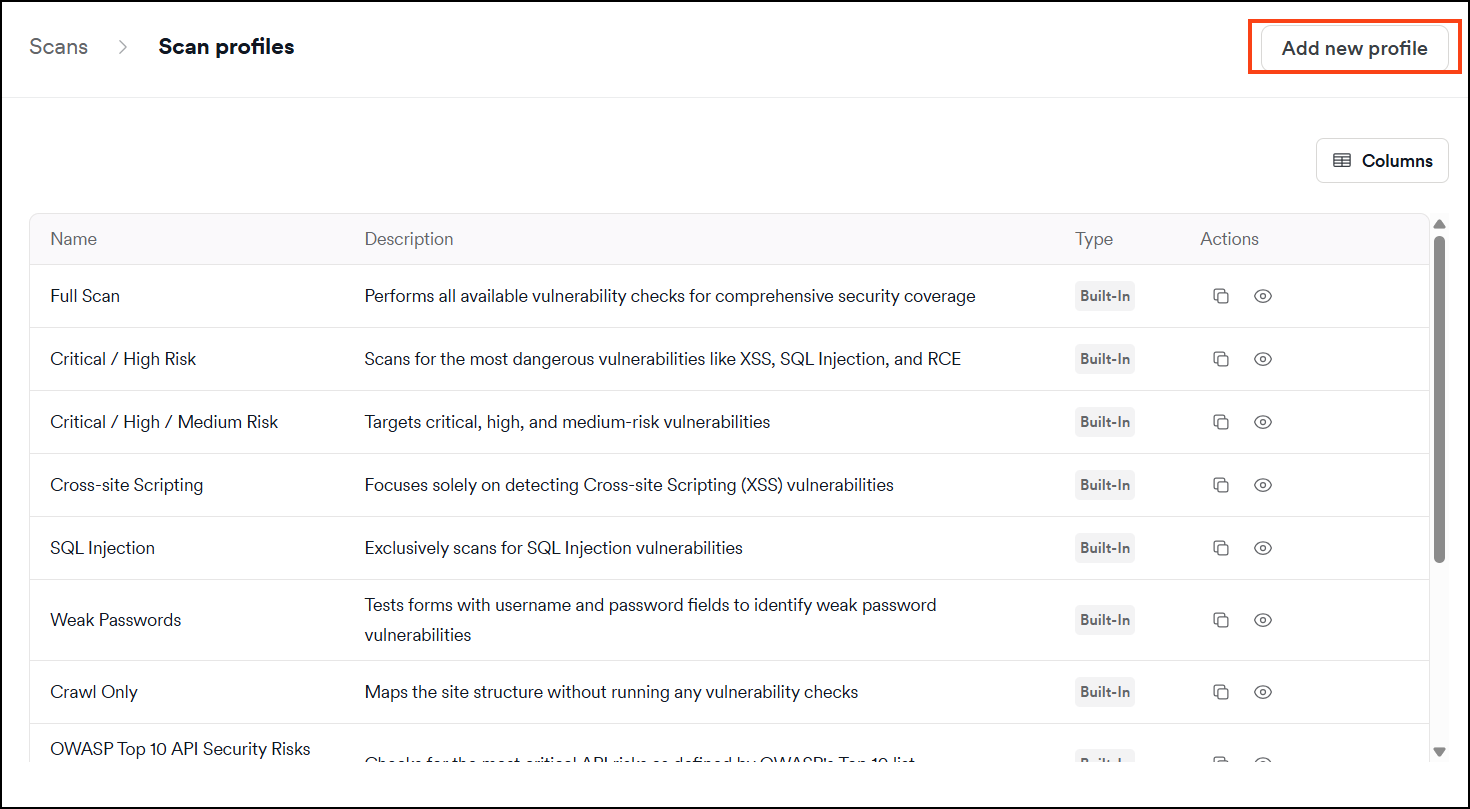
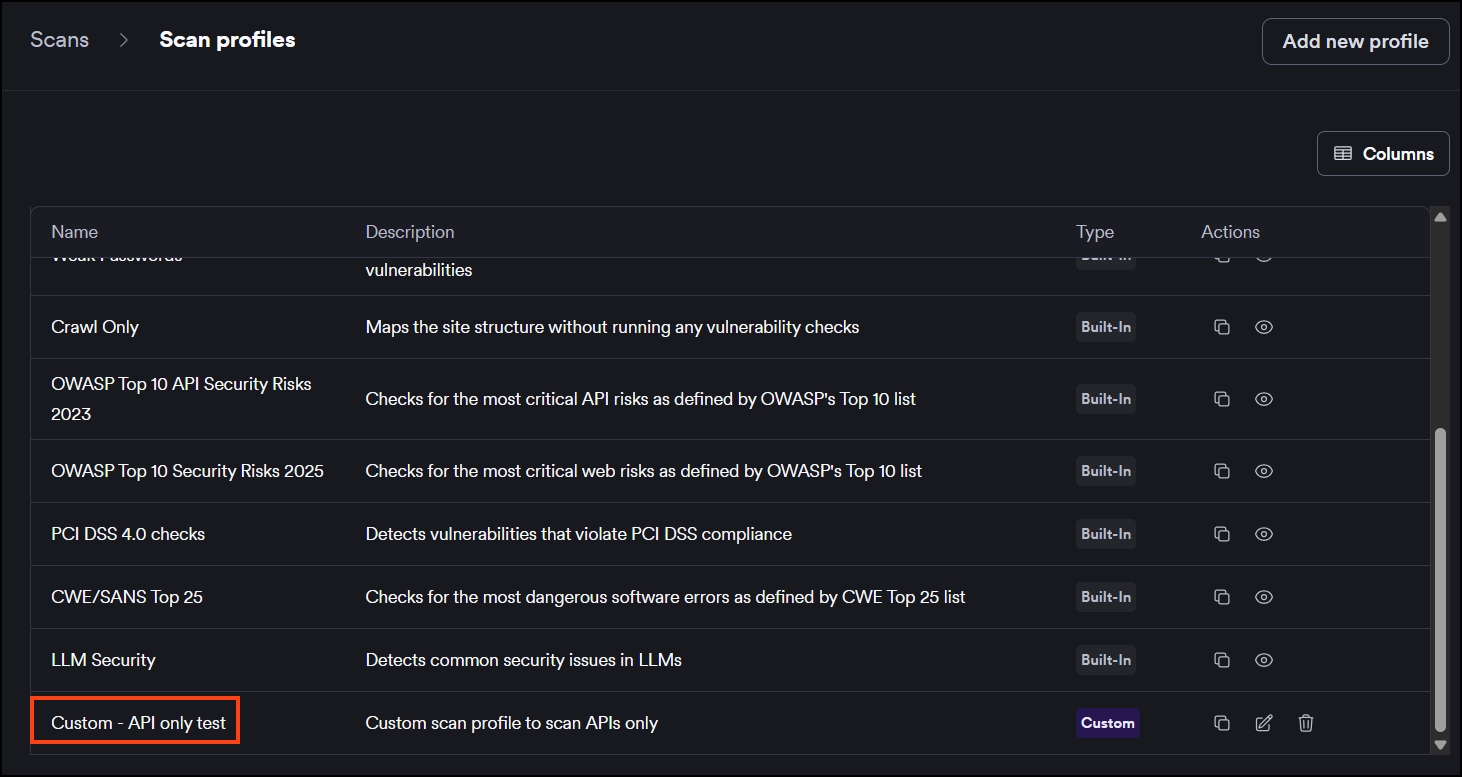
- Select Scans > Scan profiles from the left-side menu.
- Click Add new profile.
- Enter the profile Name.
- Optionally, enter a Description to explain the purpose of this profile.
- Click the up and down arrows to expand the sections for more granularity.
- Enable the checkbox next to each check you want to include in your custom scan profile. Each check displays the highest severity it can report. To narrow the list, use the Severity filter to show only checks that can report at a specific severity level.
You can also use the search field to find checks and tests. For example, searching for "xss" shows you all the available checks for cross-site scripting.
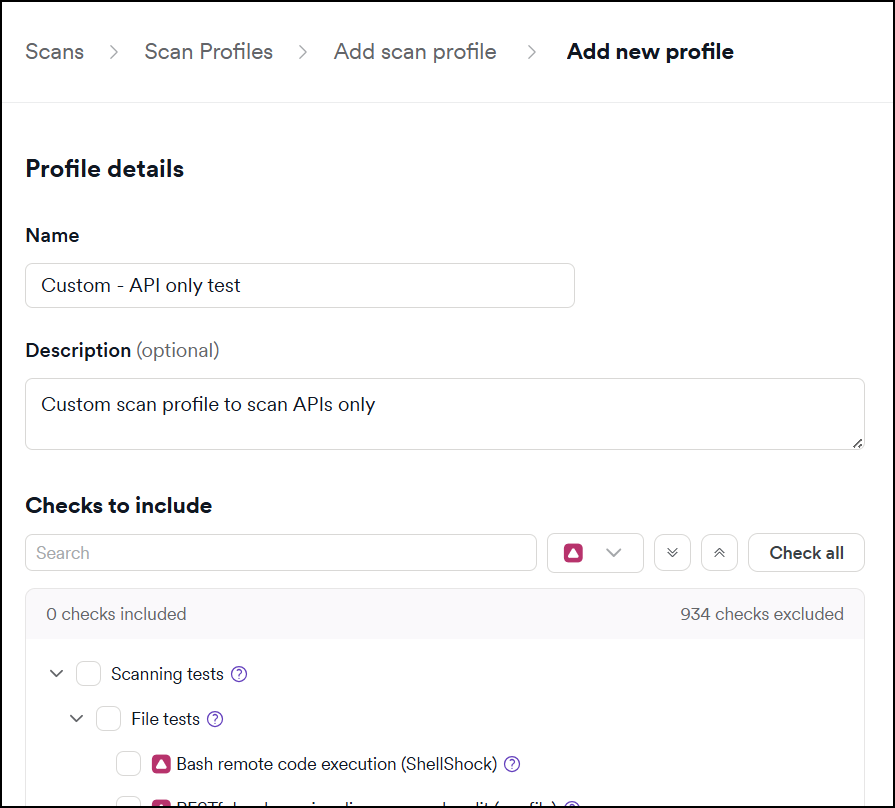

- Click Add profile.
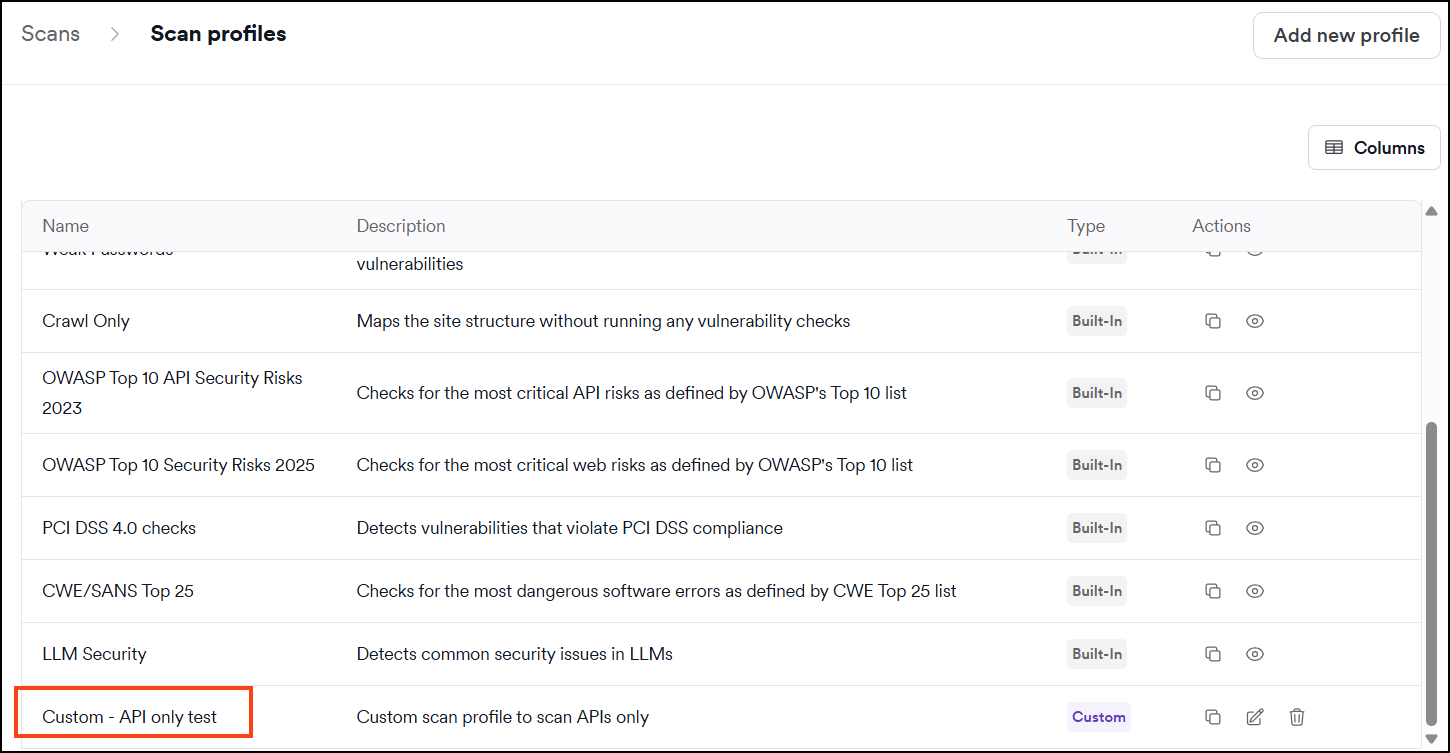
Your new custom scan profile appears at the bottom of the Scan profiles page.
Clone an existing profile
Clone an existing built-in or custom scan profile to use it as a starting point for your new profile.
- Select Scans > Scan profiles from the left-side menu.
- Find the profile you want to clone and click the clone icon in the Actions column. The Add new profile dialog opens with the checks from the original profile pre-selected.
- Update the profile Name. By default, the name is set to "[Original profile name] - copy."
- Optionally modify the Description if needed. The description from the original profile is copied by default.
- Modify the checks as needed by selecting or deselecting checkboxes.
You can also use the search field to find checks and tests. For example, searching for "xss" shows you all the available checks for cross-site scripting.
- Click Add profile.
Your new custom scan profile appears at the bottom of the Scan profiles page.
Edit a custom scan profile
- Select Scans > Scan profiles from the left-side menu.
- Click the name of the custom scan profile you want to edit.
- Make your changes to the custom profile by selecting or deselecting checks for inclusion.
- Click Update profile.
Delete a custom profile
- Select Scans > Scan profiles from the left-side menu.
- Find the scan profile you want to delete and click the trash icon to delete it.
- Click Delete profile to confirm.
Run a scan using a custom scan profile
When starting a new scan, you can choose a built-in profile or your custom scan profile from the Profile drop-down. For detailed instructions, refer to the New scan document.
Checks for custom scan profiles
Here are the checks you can add to your custom scan profiles:
Scanning tests
Scanning tests include the following types:
- File tests check vulnerabilities in files identified on the website.
- Directory tests check vulnerabilities on directories identified on the website.
- Input scheme tests check vulnerabilities on various parts of the website, such as GET parameters, form inputs, and HTTP headers.
- Server tests check vulnerabilities that are related to the server hosting the website.
- Structure tests include the tests executed at the end of the crawl session, which identify vulnerabilities in the website's structure.
- Post-scan tests include checks that are carried out at the end of the scan, such as checking for any stored cross-site scripting that might have been injected during the scan.
- Known web application tests include security audits for various well-known web applications, such as WordPress or SAP products.
Runtime passive analysis
Includes vulnerability checks run passively during the crawl. For example, checks for situations where the website insecurely transitions from HTTPS to HTTP.
Crawler analysis
Includes vulnerability checks that act upon the responses from the web server to the crawler requests.
Location tests
Include tests that are executed on each unique location identified.
HTTP data tests
Include vulnerability checks executed on all requests. These checks look for very specific content in the request/response and proceed to further verifications in specific scenarios. For example, the SAML signature audit checks are only executed when a SAML response is found.
Target tests
Include vulnerability checks executed only once on the target being scanned.
Input parsing tests
Include checks targeting input parsing vulnerabilities, such as prototype pollution.
Client-side checks
Include checks executed using the browser capabilities provided by DeepScan. An example of such vulnerabilities is DOM cross-site scripting.
API related checks
Include checks executed on API endpoints.
LLM related checks
Include checks for LLM-powered applications provided by DeepScan. Example checks include prompt injection and leakage or insecure output handling. For specialized testing scenarios such as AI-powered applications, you can create profiles targeting specific vulnerability types like LLM-based app vulnerability testing.
Custom scripts
Include scripts that execute any custom scripts found in the custom scripts folder.
Malware scanner
Includes checks of the web application for malicious links and malware.
Requires an internal agent.
Troubleshooting
You can't find a specific check in the profile editor
Use the search field at the top of the checks list to find checks by keyword. For example, searching for "xss" filters the list to all cross-site scripting checks. If the check still doesn't appear, it may be part of a category that's collapsed - click the up and down arrows to expand sections and reveal individual checks.
A custom profile doesn't appear in the profile drop-down when starting a scan
Custom profiles appear at the bottom of the profile list. If yours isn't visible, verify it was saved successfully by navigating to Scans > Scan profiles and confirming the profile appears there. If it doesn't appear in the list, recreate it and click Add profile to save.
Changes to a custom profile aren't saved
After editing a custom profile, you must click Update profile to save your changes. Navigating away from the page without clicking Update profile discards any changes you made.
Need help?
Invicti Support team is ready to provide you with technical help. Go to Help Center