Package: Invicti AppSec Enterprise (on-premise, on-demand)
Qualys VMDR
Qualys VMDR (Vulnerability Management, Detection and Response) is a cloud-based vulnerability management platform. In Invicti AppSec, the integration connects to your Qualys subscription to import vulnerability scan results into your projects, with support for binding to existing scans, fetching historical results, or launching new scans.
Prerequisites
| Field | Description |
|---|---|
| Username | Qualys account username |
| Password | Qualys account password |
| URL | the base URL of your Qualys platform API (e.g., https://qualysapi.qualys.com) |
Get credentials (on Qualys side)
- Log in to the Qualys console.
- Use your Qualys username and password for the integration.
- Obtain the correct API URL for your Qualys subscription from the Qualys support documentation or your account page. The API endpoint differs by region (e.g., US, EU, India).
The API URL format is https://qualysapi.<region>.qualys.com — check your Qualys account settings to confirm the correct regional endpoint.
Step 1: Navigate to Integrations
From the left sidebar menu, click Integrations.
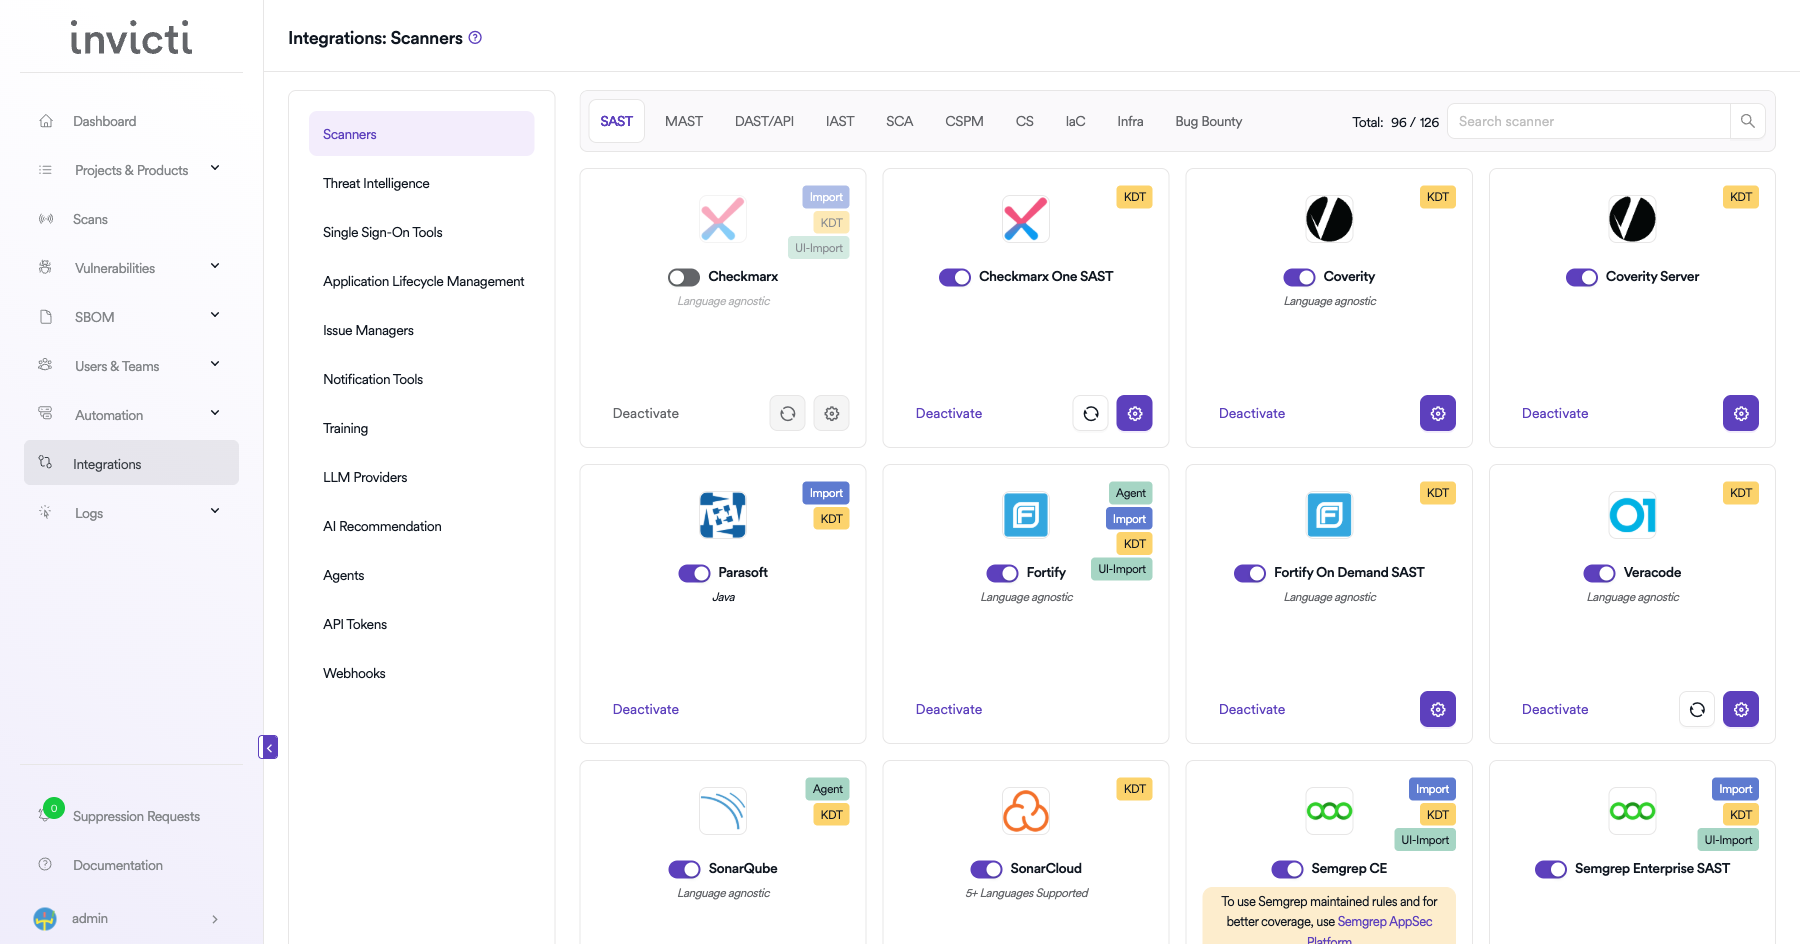
Step 2: Select the Infra tab
On the Integrations > Scanners page, click the Infra tab.
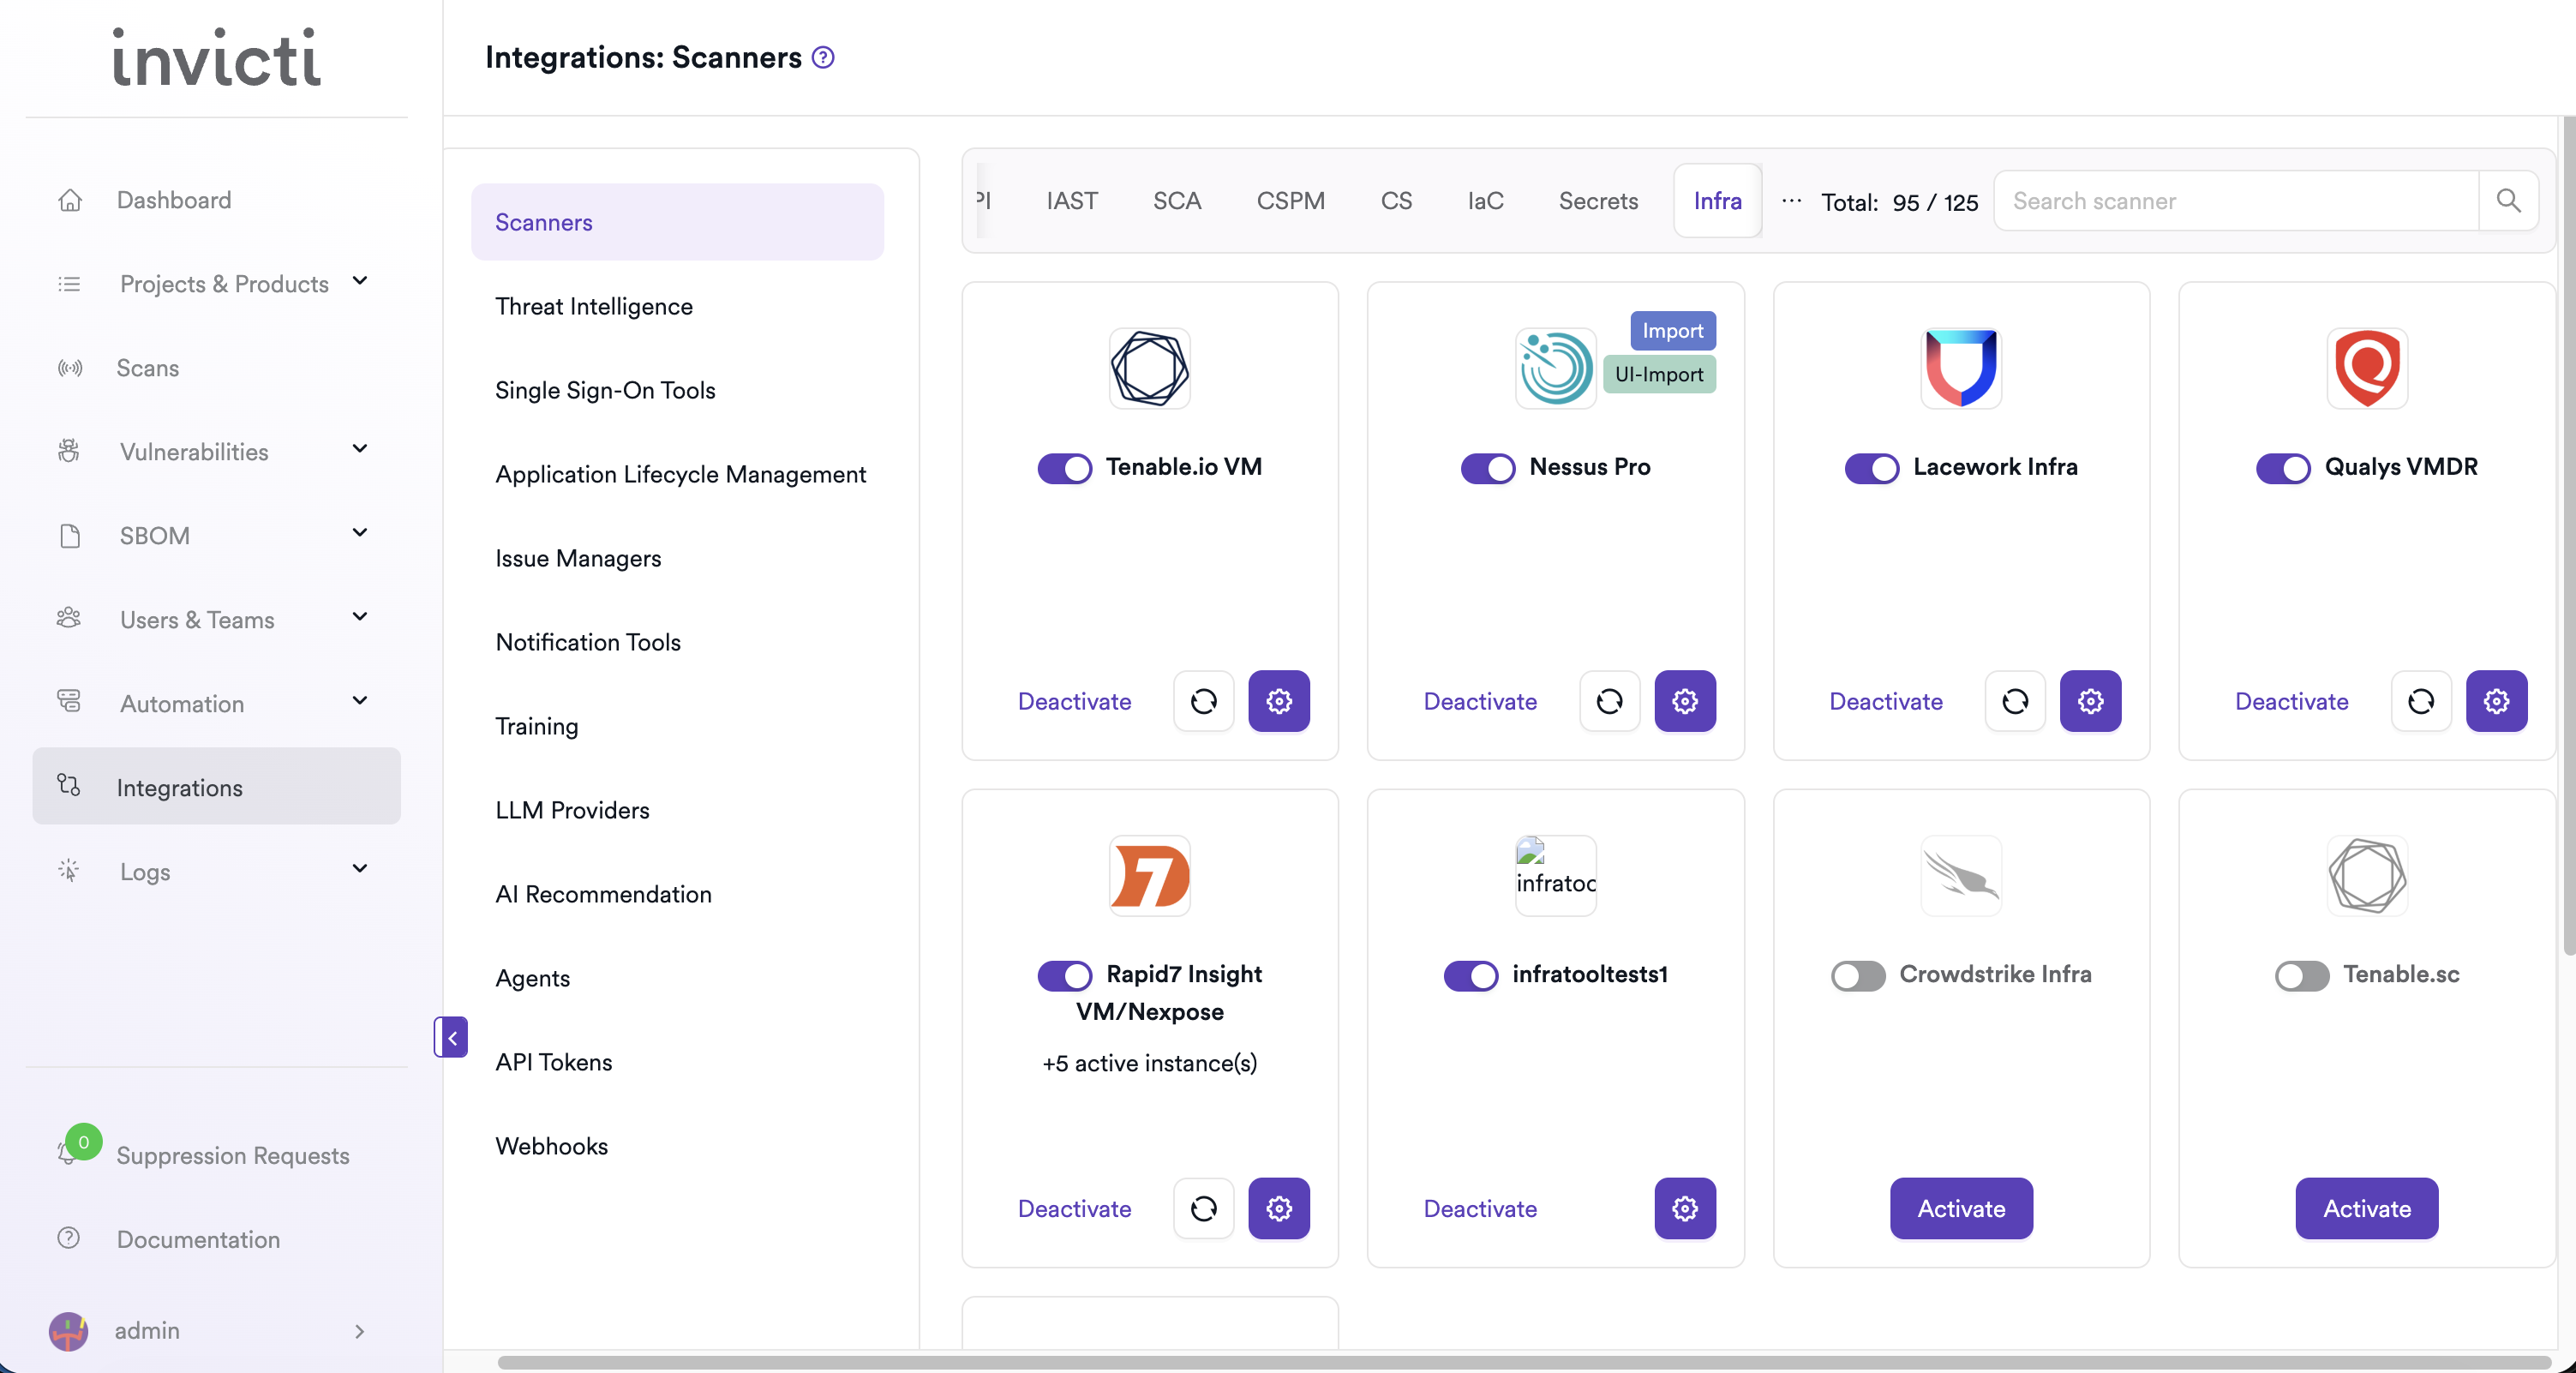
Step 3: Find and activate Qualys VMDR
Scroll through the list of Infra scanners to find Qualys VMDR.
- If Qualys VMDR is not activated, click Activate to enable the integration.
Step 4: Configure connection settings
Click the gear icon on the Qualys VMDR card to open the settings panel. Fill in the required fields:
| Field | Description | Required |
|---|---|---|
| Username | Qualys account username | Yes |
| Password | Qualys account password | Yes |
| URL | base URL of the Qualys API for your subscription | Yes |
| Insecure | skip TLS certificate verification (use only for self-signed certificates) | No |
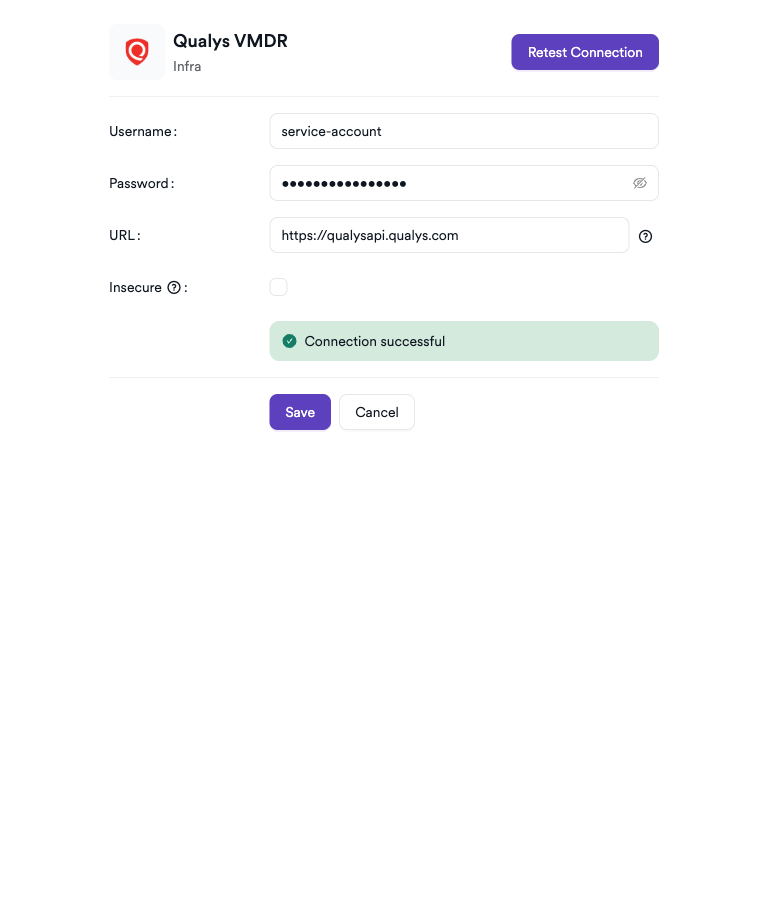
Step 5: Test the connection
Click Test Connection. A green Connection successful message confirms that Invicti AppSec can authenticate with the Qualys API.
Summary
| Step | Action |
|---|---|
| 1 | Navigate to Integrations from the sidebar |
| 2 | Select the Infra tab |
| 3 | Activate Qualys VMDR |
| 4 | Enter Username, Password, and URL |
| 5 | Test the connection |
Create a scan
Navigate to project scanners
- Open a project in Invicti AppSec.
- Go to Settings > Scanners.
- Click Add Scanner.
Add Qualys VMDR scanner
- Select Infra as the scanner type.
- Choose Qualys VMDR from the scanner list.
- Click Add to open the scan configuration drawer.
Scan configuration fields
The Qualys VMDR scan drawer offers three trigger modes:
| Trigger mode | Description |
|---|---|
| Bind to a Qualys VMDR Scan | link to an existing Qualys scan and import its latest results |
| Get Existing Scan Results | fetch results from a completed Qualys scan without triggering a new one |
| Create New Scan | launch a new Qualys scan using a specified option profile and target IP |
Common fields
| Field | Description | Required |
|---|---|---|
| Profile Name | a name to identify this scan configuration | Yes |
| Meta Data | additional metadata to tag the scan | Yes |
| Scan Tag | free-text tag to identify or group scans | No |
| Severity+ | increase severity of imported findings by one level | No |
| Severity- | decrease severity of imported findings by one level | No |
Fields for "Bind to" and "Get Existing Scan Results"
| Field | Description | Required |
|---|---|---|
| Bind to | select the existing Qualys scan to bind to or fetch results from | Yes |
Fields for "Create New Scan"
| Field | Description | Required |
|---|---|---|
| Option Profiles | select the Qualys option profile to use for the new scan | Yes |
| IP | target IP address or hostname for the new scan | Yes |
| Scan Title | a title for the newly created Qualys scan | Yes |
Severity+ and Severity- are mutually exclusive — only one can be enabled at a time.
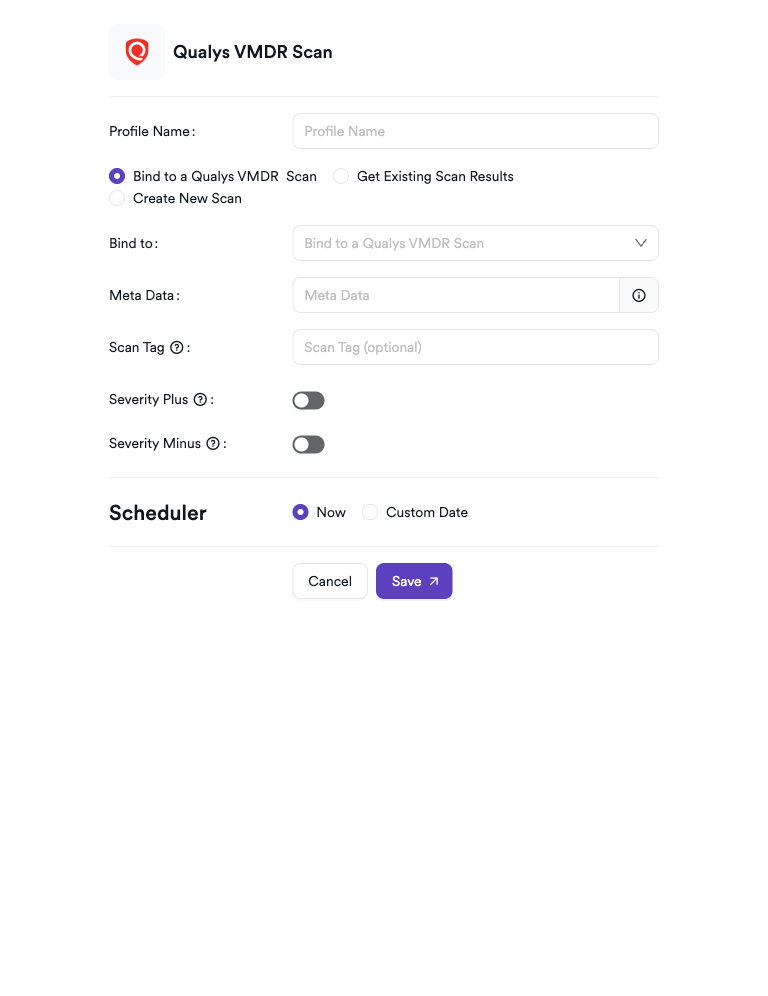
Scheduler
Enable the Scheduler toggle to automatically run Qualys VMDR scans on a recurring schedule.
Webhook (optional)
Add a webhook URL to receive scan completion notifications.
KDT command
kdt scan -p <project_name> -t qualysinfra -b -
Troubleshooting
Connection fails
| Issue | Resolution |
|---|---|
| Invalid username or password | verify the credentials in the Qualys console. Ensure the account is active and has API access enabled. |
| URL unreachable | confirm you're using the correct regional API URL for your Qualys subscription. |
| API access not enabled | Qualys API access must be explicitly enabled for the account in the Qualys admin settings. |
| TLS certificate error | if using a proxy with a self-signed certificate, enable the Insecure option in the connection settings. |
Scan issues
| Issue | Resolution |
|---|---|
| No scans in Bind to dropdown | ensure at least one scan exists in your Qualys subscription and the account has access to it. |
| New scan fails to start | verify that the target IP is within a subscribed Qualys scan scope and the selected option profile is compatible. |
| Scan shows no findings | the bound scan may have no active vulnerabilities, or the scan may not have completed successfully. Check the Qualys console. |
| Scan results are outdated | use Get Existing Scan Results to force a fetch, or enable the Scheduler to pull results automatically. |
Best practices
- Use a dedicated Qualys account for Invicti AppSec with the minimum required API permissions.
- Use the Bind to a Qualys VMDR Scan trigger mode when your scan schedule is managed in Qualys — this avoids creating duplicate scans.
- Use Create New Scan only when you need Invicti AppSec to own the scan lifecycle.
- Rotate Qualys credentials periodically and update the integration settings in Invicti AppSec accordingly.
Limitations
- Qualys VMDR in Invicti AppSec doesn't support scanner appliance management — appliances must be configured in the Qualys console.
- Only scans and option profiles accessible via the provided credentials are available for selection.
- Creating new scans via Invicti AppSec consumes Qualys scan credits — monitor usage in the Qualys console.
Need help?
Invicti Support team is ready to provide you with technical help. Go to Help Center