Integrating Invicti Enterprise with Azure Key Vault
You can integrate Invicti Enterprise with Azure Key Vault to scan your web applications without providing sensitive credentials.
- Azure Key Vault is a cloud service to store and access your secrets in a secure way.
- A secret is anything that you want to tightly control access to, such as API keys, passwords, certificates, or cryptographic keys.
- The Key Vault safeguarded those secrets by industry-standard algorithms, key lengths, and even hardware security modules.
Invicti Enterprise can integrate with Azure Key Vault, so you do not need to provide sensitive credentials to scan your web application, websites, and API.
This article explains how to integrate Invicti Enterprise with Azure Key Vault.
For further information, see What Systems Does Invicti Integrate With? and Privileged Access Management and Invicti.
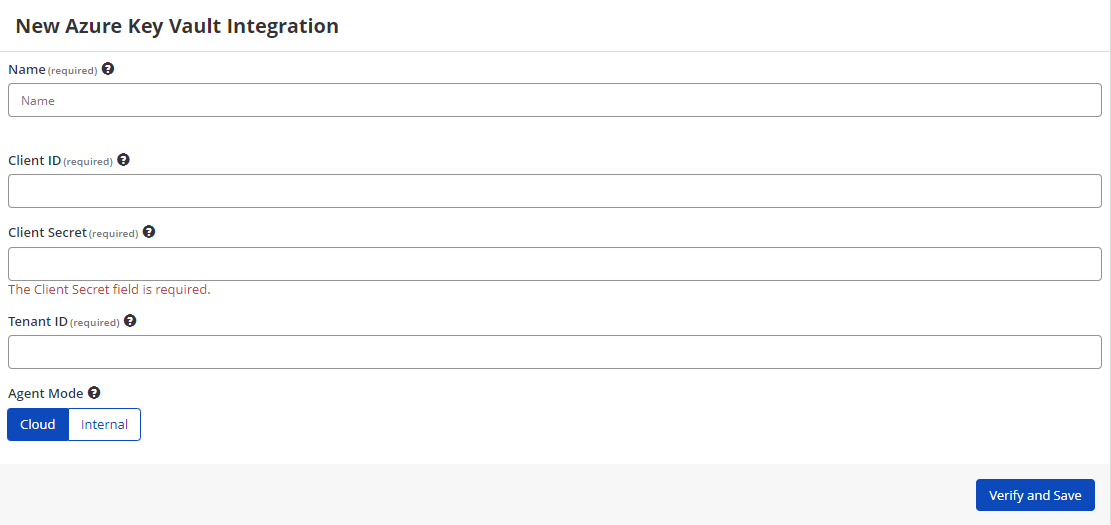
Azure Key Vault fields
This table lists and explains the fields on the Azure Key Vault Integration page.
| Field | Description |
|---|---|
| Name | This is the name of the configuration that will be shown elsewhere. |
| Client ID | This is the Application (Client) ID appearing on the app registrations page. |
| Client Secret | This is the Value of the client secrets that appears on the Certificates&secrets page at the Azure AD. |
| Tenant ID | This is the Directory ID appearing on the Key Vault page. |
| Agent Mode | This is the agent mode that you can select. There are two options:
|
| Verify and Save | This verifies certification and the connection with the service. |
How to integrate Invicti Enterprise with Azure Key Vault
- Log in to Invicti Enterprise.
- From the main menu, select Integrations > New Integration.
- From the Secrets and Encryption Management section, select Azure Key Vault.
-
In the Name field, enter a friendly name for the integration.
-
In the Mandatory section, complete the connection details:
- Azure Key Vault URL
- Client ID
- Secret
- Tenant ID
-
In the Agent Mode, select an option.
-
Select Verify and Save. (If you have more than one authentication verifier agent, you see a drop-down to select the verifier agent.)
If successful, the new integration appears on the Manage Integrations page. Otherwise, Invicti displays an error message.
Verifying form authentication with Azure Key Vault
When you successfully integrate Azure Key Vault, you can use this integration to verify a form authentication before launching a new scan.
This table lists and explains the fields in the Azure Key Vault Settings dialog.
| Field | Description |
|---|---|
| Integrations | This is the name of the integration that you entered in the New Vault Integration window. Select the integration from the drop-down, if necessary. |
| Vault Name | This is the name of your key vault. |
| Use Static Username | Select the Use Static Username checkbox only unless you plan to change a username routinely. This is deselected by default. |
| Username Key | This holds the username value. |
| Password Key | This holds the password value. |
How to use the Azure Key Vault Integration to verify form authentication
- Log in to Invicti Enterprise.
- From the main menu, select Scans > New Scan.
- In the Target URL field, enter the URL.
- Complete the remainder of the fields, as described in Invicti Enterprise New Scan Fields.
- Then from the Authentication settings, select the Form tab.
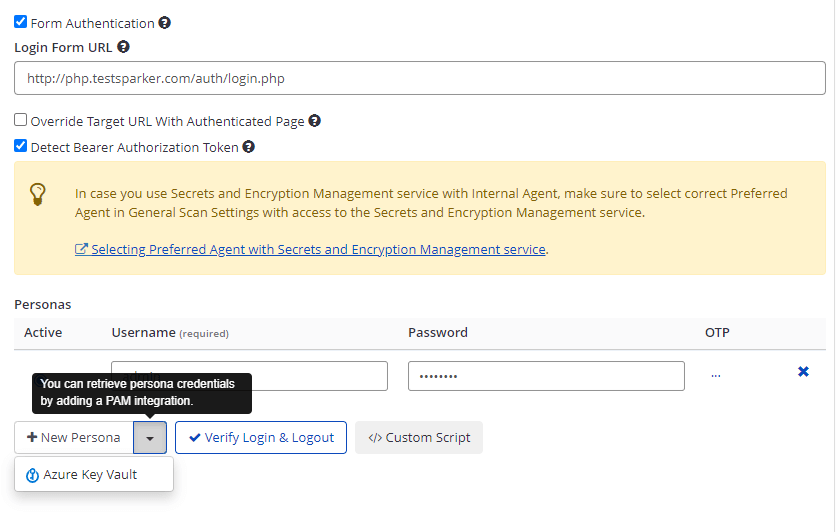
- Select Form Authentication.
- Select the New Persona drop-down, then Azure Key Vault.
- Complete the fields in the dialog.

- Select Save.
- Select Verify Login & Logout to test the new Persona.
Select Test Key Vault Settings to verify the username and password.
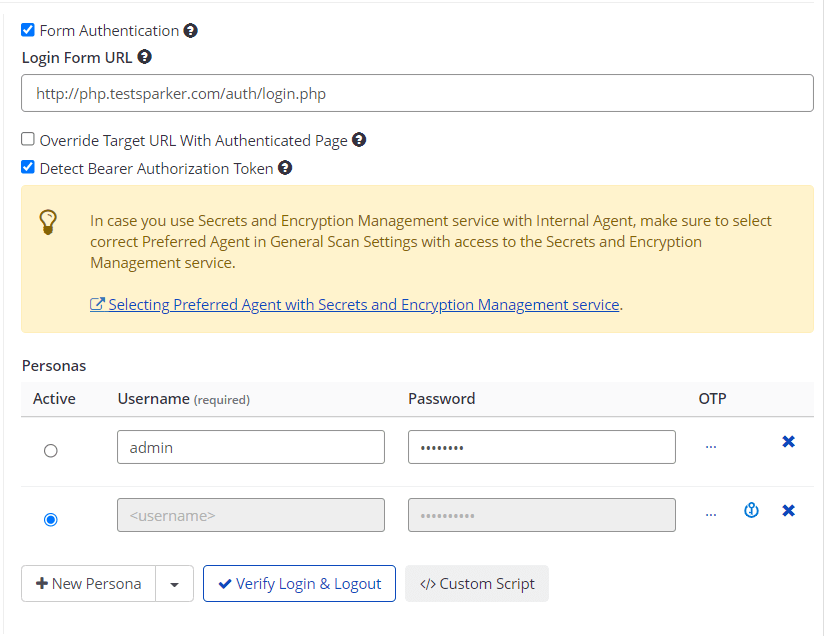
Once the Persona is verified, it is listed under the Personas' list.
Need help?
Invicti Support team is ready to provide you with technical help. Go to Help Center