Enable proxy
This document is for Invicti Platform
If your network requires traffic to go through an HTTP proxy, or you wish to make Invicti Platform send HTTP requests through a proxy server to analyze the traffic later on, you can configure your Target for this by adding proxy server settings.
This document explains how to configure proxy settings for your target.
tip
Proxy settings are only visible for targets that are configured with an internal scan agent.
Add proxy settings to your target
- Select Inventory > Targets from the left-side menu.
- Next to the name of the target you want to edit, select the three-dot menu (⋮) and select Edit.
- In the Agents section, select your internal agent to display the proxy settings.
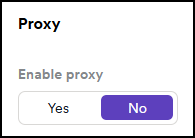
- In the Enable proxy option, select Yes.
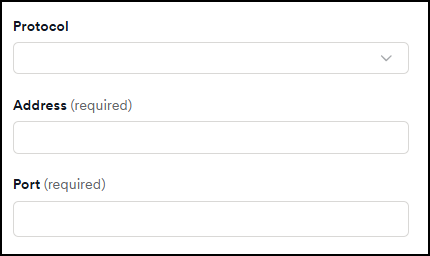
- Set the Protocol, IP address or hostname, and the listening Port for the proxy server.
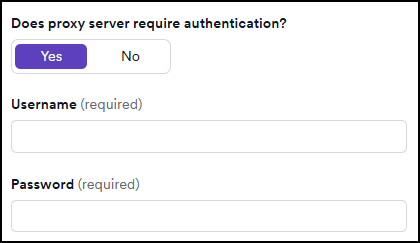
- If your proxy server requires authentication, in the Does proxy server require authentication? section, select Yes to open further configuration.
- Fill in the Username and the Password.
- Select Save target configuration or Save and scan to complete the setup.
Need help?
Invicti Support team is ready to provide you with technical help. Go to Help Center
Was this page useful?