Deployment: Invicti Platform on-demand
Install internal agent with proxy settings
Internal agents integrate with Invicti Platform, enabling scans within your environment for targets not publicly accessible from the internet or when you don't want to trustlist Invicti cloud agents.
This document shows you how to install the Invicti internal agent with proxy settings on Windows and Docker to connect to Invicti Platform.
When the site is internal, and you prefer using internal agents for the scan, you can't create a new Login Sequence Record (LSR) or Business Logic Record. However, you can import them. For further information about recording and downloading an LSR, refer to the Standalone login sequence recorder overview.
Prerequisites
System requirements
To run scans successfully, the agent requires sufficient system resources. The agent only initiates a new scan if the following minimum resources are available:
- CPU: 2 free cores on a 64-bit processor
- Memory (RAM): 6 GB available
- Disk space: 50 GB free
Access requirements
- Administrator privileges for command execution
- Invicti Platform Administrator role
Trustlisting requirements
- Trustlist requirements for the CA region
- Trustlist requirements for the EU region
- Trustlist requirements for the US region
- Consequences of scanning without trustlisting
Resource allocation behavior
When the agent starts, it checks the available CPU, RAM, and disk space and calculates how many scans it can run in parallel, running the lowest number those resources allow. You can adjust the per-slot thresholds or set a fixed limit. For the calculation details and override options (agent.yaml thresholds, jobs_override, and the --max-jobs flag), refer to Concurrent scans and resource allocation in the internal scanning introduction.
Install an internal agent with proxy settings on Windows
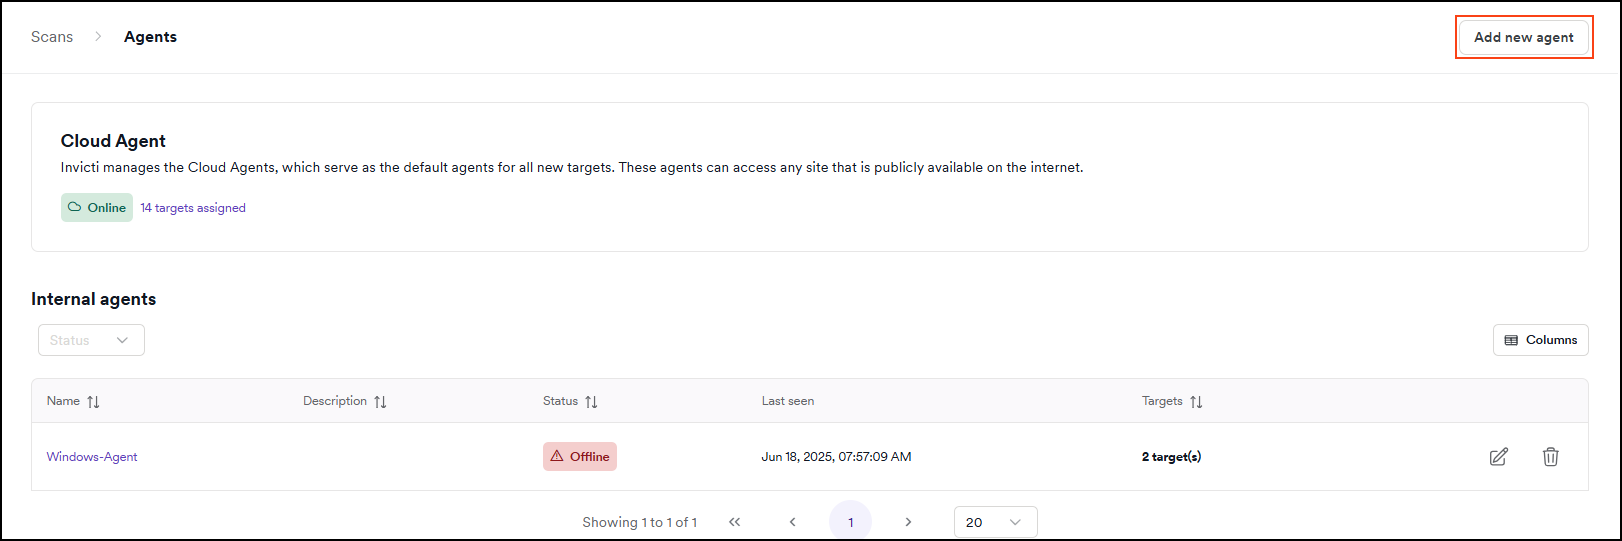
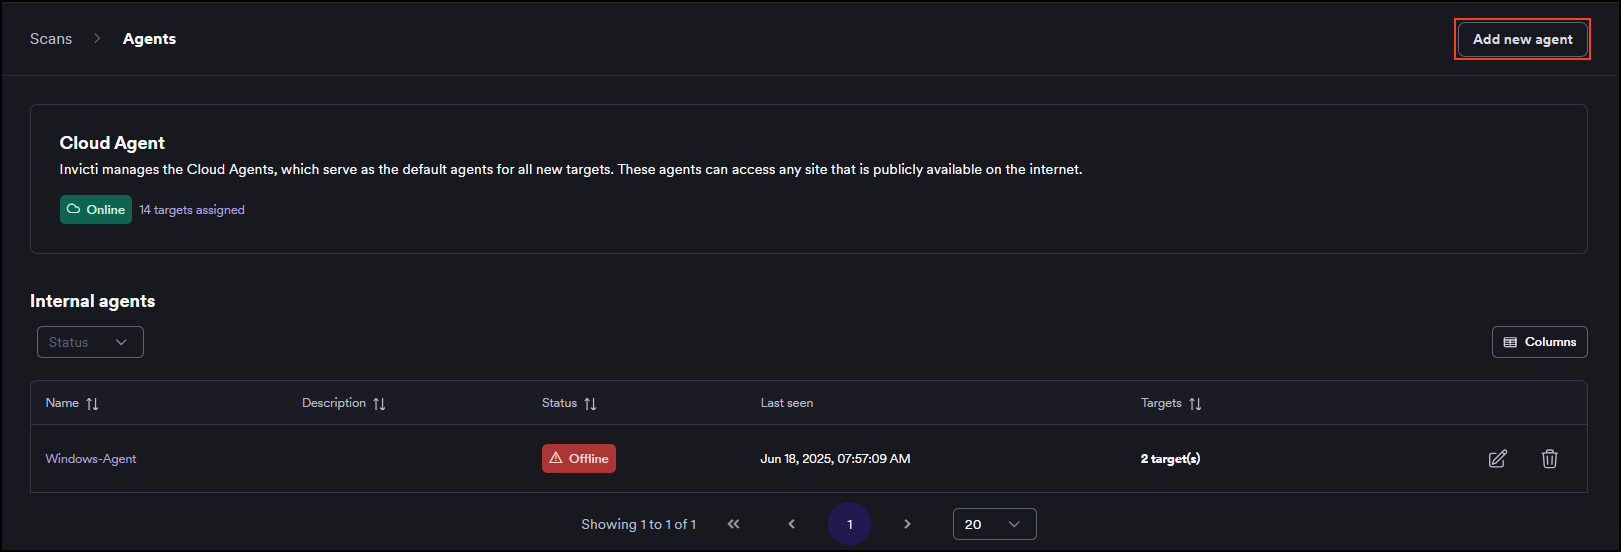
- Select Scans > Agents from the left-side menu.
- Click Add new agent.
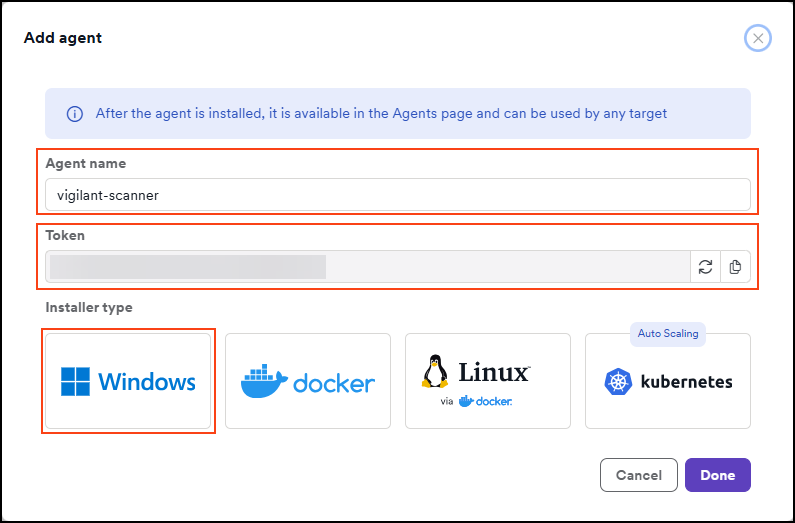
- Enter a name for your internal agent. The agent name must not contain any whitespace characters or special characters.
- Select Windows.

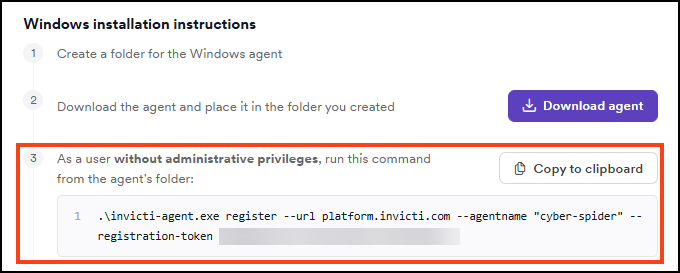
- Create a folder where you save the internal agent. The installation path must not contain any whitespace characters or special characters. Using a simple directory name consisting only of standard alphanumeric characters is recommended to ensure proper installation and execution.
- Click Download agent. When the
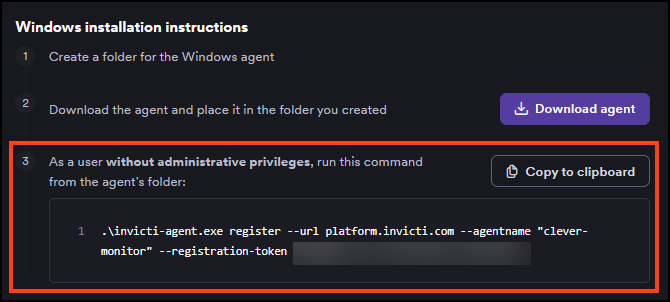
invicti-agent.exefile is downloaded, move it to the folder created in the preceding Step 5. - Copy the command from Step 3 in the Windows installation instructions.
-
Paste the command in a place where you can edit the content, for example, in Notepad.
-
Edit the command to add
-p http://username:pass@proxy_server:portat the end (after the registration token). Ensure that you replace username, pass, proxy_server, and port with your actual proxy settings..\invicti-agent.exe register --url platform.invicti.com --agentname "newagent" --registration-token aaaaaaaa-bbbb-cccc-dddd-eeeeeeeeeeee -p http://username:pass@proxy_server:port -
As a user without administrative privileges, open Terminal and navigate to the folder where you saved the downloaded
invicti-agent.exefile. Alternatively, right-click the folder with the file and select 'Open in Terminal.' -
Copy and paste the edited command from Step 9 to your Terminal window and execute the command.
-
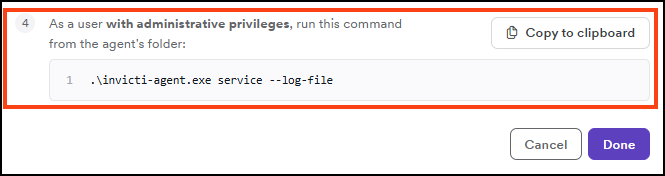
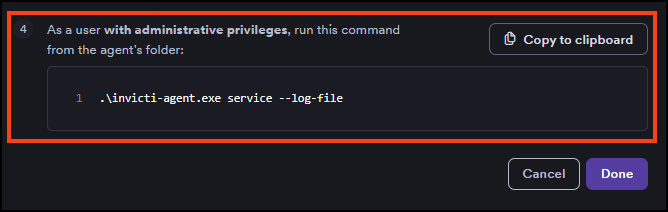
Copy the command from Step 4 in the Windows installation instructions.
- As a user with administrative privileges, open Terminal and navigate to the folder where you saved the downloaded
invicti-agent.exefile. Alternatively, right-click the folder with the file and select 'Open in Terminal.' - Paste and run the command copied in Step 12. This installs the agent as a service so it's ready to start executing scans.
Your internal agent is now installed. You can view your internal agents in Invicti by going to the Scans > Agents page.
You can now assign targets to the installed internal agent and start scanning your targets.
Install an internal agent with proxy settings using Docker
Ensure Docker Desktop is installed on your host OS by verifying with the command docker -v in Terminal. If version information is displayed, you're all set. Otherwise, refer to the Docker support documentation for installation guidance.
-
Select Scans > Agents from the left-side menu.
-
Click Agent Installation Instructions.
-
Select Docker.
-
Enter a name for your internal agent. The agent name must not contain any whitespace characters or special characters.
-
Copy the command from Step 3 in the Agent Installation Instructions.
-
Paste the command in a place where you can edit the content, for example, in Notepad.
-
Edit the command to add
-e INVICTI_AGENT_HTTP_PROXY=http://username:pass@ip:portafter the name parameter. If the proxy doesn't have any authentication, then use-e INVICTI_AGENT_HTTP_PROXY=http://ip:portinstead.Ensure that you replace username, pass, ip, and port with your actual proxy settings.
docker run -d --name "my-agent" -e INVICTI_AGENT_HTTP_PROXY=http://username:pass@ip:port invicti/internal-agent --url platform.invicti.com --agentname "agent-name" --registration-token XXXXXXXX-XXXX-XXXX-XXXX-XXXXXXXXXXXX -
Copy the full text of your newly edited command.
-
Open Terminal and paste the command. Press Enter to execute the command.
If you see the error tls: failed to verify certificate: x509: certificate signed by unknown authority, your proxy CA certificate isn't trusted by the agent container. To solve this, refer to the Import a certificate within Docker section.
Your internal agent is now installed. You can view your internal agents in Invicti by going to the Scans > Agents page.
You can now assign targets to the installed internal agent and start scanning your targets.
Import a certificate within Docker
To import a certificate within Docker, follow those steps:
-
Create a new folder. For example,
C:\users\name\my_agent -
Copy the certificate you would like to import to this new folder. For example,
C:\users\name\my_agent\my_certificate.pem -
Navigate to this folder:
C:\users\name\my_agent -
Create the following Dockerfile and name it 'Dockerfile':
FROM invicti/internal-agent
USER root
COPY my_certificate.pem /usr/local/share/ca-certificates/my_certificate.crt
RUN update-ca-certificates
USER invicti
ENTRYPOINT ["/usr/local/bin/invicti-agent","register-run"] -
Run the command
docker build -t my_agent .to build the image -
Run the following command to start the agent with the new certificate and proxy. Note that '-p' is used for the agent proxy.
docker run -d --env REQUESTS_CA_BUNDLE=/etc/ssl/certs/ --name "dockeragent" my_agent --url platform.invicti.com --agentname "dockeragent" --registration-token XXXXXXXX-XXXX-XXXX-XXXX-XXXXXXXXXXXX -p http://myproxy
Explanation of parameters
Below is a table detailing the parameters necessary to configure a Docker container for installing an internal agent.
| Parameter | Description |
|---|---|
| -d | This indicates detached mode, allowing the container to operate in the background. |
| --name | Assigns a name to the container. |
| -e | Sets the environment parameters to add the proxy. |
| --url | Specifies the Invicti URL. |
| --agentname | Defines the agent name in the Invicti UI, changeable later. If installing multiple agent instances, assign a unique agent name for each instance. (Max 50 characters) |
| --registration-token | Obtain from Agents > Agent installation > Docker. Your registration token is displayed in Step 2: Get your token. |
Need help?
Invicti Support team is ready to provide you with technical help. Go to Help Center