Deploy Invicti Shark for PHP - AWS Elastic Beanstalk
AWS Elastic Beanstalk allows you to deploy a web application that can scale to match end-user demand. This simple example demonstrates how you can deploy Invicti Shark together with your web application into AWS Elastic Beanstalk.
Step 1: Create your target in Invicti Enterprise
For this example, assume that the URL for your target is http://eb.acunetixexample.com/.
- Create a target with your URL.
- Select Scans > New Scan from the left-side menu and choose this URL for the scan.
- Enable Invicti Shark.
- Download the Shark agent file
acusensor.php, and save this file for use later on.
Step 2: define the web application source bundle
This simple web application is defined through the following file structure:
/.ebextensions/
/.ebextensions/acusensor.config
/acusensor/
/acusensor/acusensor.php
/public/
/public/index.php
/public/test.php
- Create the folders for your source bundle:
mkdir ~/axexample
mkdir ~/axexample/.ebextensions
mkdir ~/axexample/acusensor
mkdir ~/axexample/public
- Create your
~/axexample/.ebextensions/shark.configfile to read as follows:
files:
  "/etc/php.d/shark.ini" :
    mode: "000755"
    owner: root
    group: root
    content: |
      auto_prepend_file=/var/www/html/acusensor/acusensor.php
- Create your
~/axexample/public/index.phpfile to read as follows:
<?php
    echo "<h1>Test PHP Site Example for AWS Elastic Beanstalk</h1>";
    echo "<br>";
    echo "Welcome to the main page.";
    echo "<br>";
    echo "<a href='test.php'>Go to the test page.</a>";
?>
- Create your
~/axexample/public/test.phpfile to read as follows:
<?php
    echo "<h1>Test PHP Site Example for AWS Elastic Beanstalk</h1>";
    echo "<br>";
    echo "Welcome to the test page.";
    echo "<br>";
?>
-
Copy the
shark.phpfile and build the source bundle: -
Copy the
shark.phpfile into~/axexample/acusensor/acusensor.php. -
Build the source bundle with the following:
cd ~/axexample
zip -rq axexample.zip .
Step 3: deploy your web application to Beanstalk
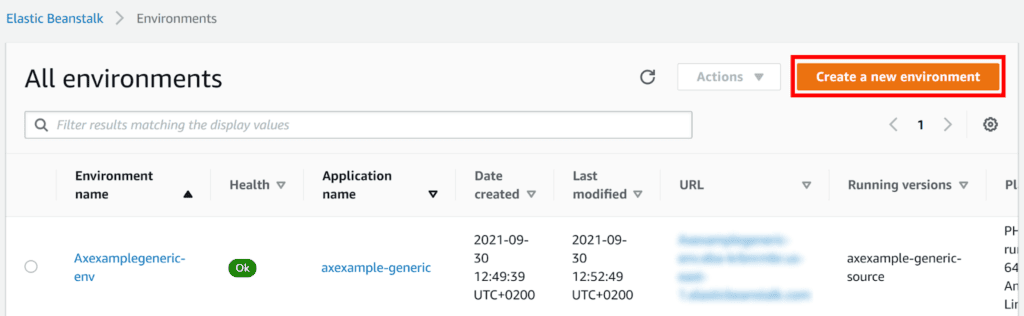
- From your AWS Dashboard, navigate to Elastic Beanstalk > Environments.
- Click Create a new environment.
- Set your environment tier to the Web server environment.
- Click Select.
- On the Elastic Beanstalk > Create environment page:
- Enter a friendly name for your app. (For this illustration, use
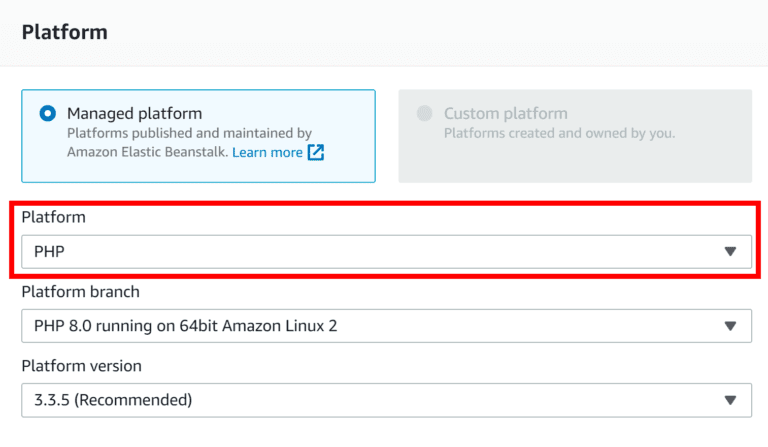
axexample-php.) - From the Platform drop-down, choose PHP.
- Enter a friendly name for your app. (For this illustration, use
- Enable Upload your code
- Click Choose file.
- Choose your
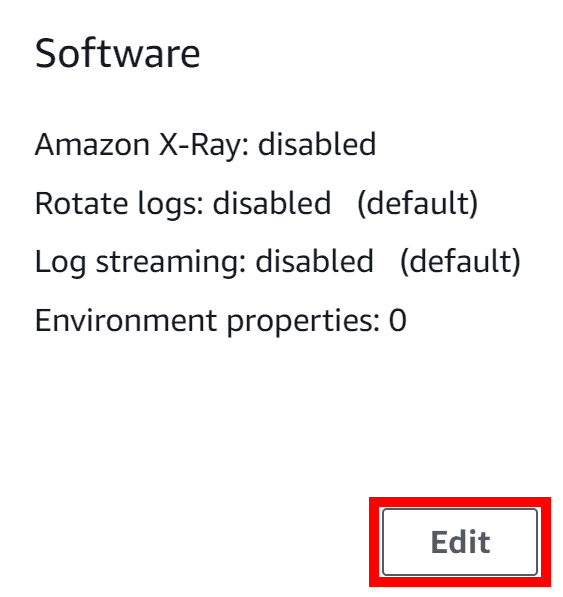
axexample.zipsource code bundle for upload. - Click Configure more options.
- On the Software panel page, click Edit.
- On the Modify software page, set the Document root field to
/public.
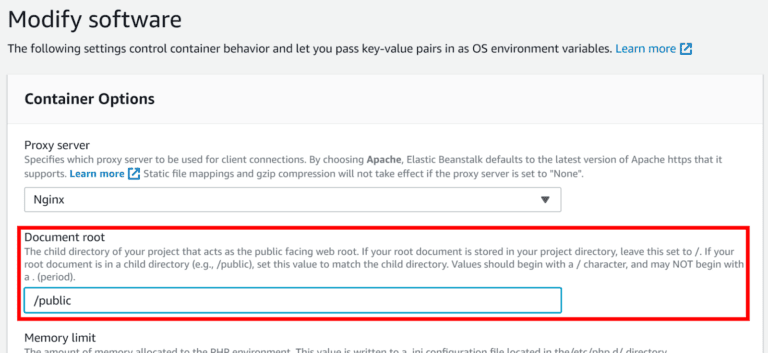
- On the Modify software page, select Save.
- On the Configure environment page, select Create environment.
- AWS Elastic Beanstalk creates your environment; this can take a few minutes.
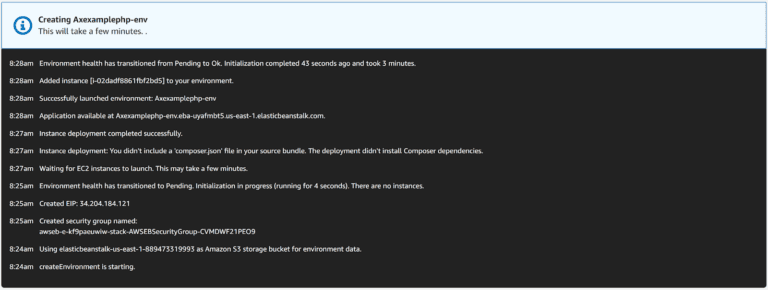
- When the process is complete, you are redirected to your environment's dashboard.
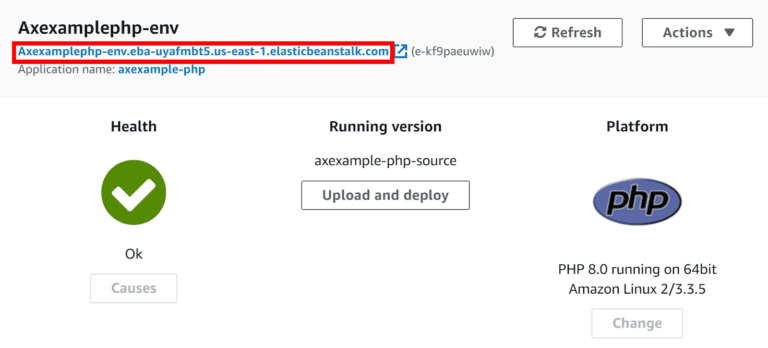
- Take note of your environment's new URL created by AWS Elastic Beanstalk:
- You need this to create a CNAME to point to this URL
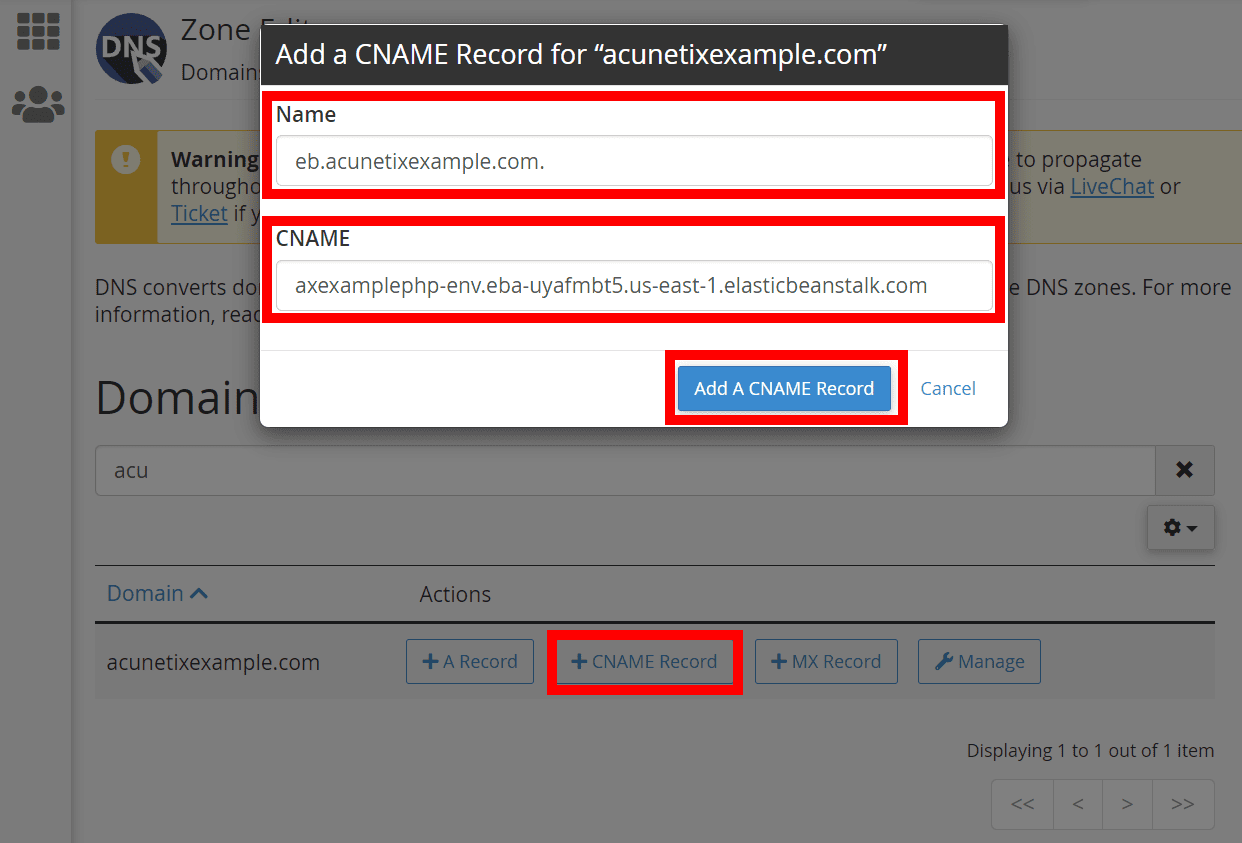
- In this example, create a CNAME for
eb.acunetixexample.comto point toaxexamplephp-env.eba-uyafmbt5.us-east-1.elasticbeanstalk.com; here is an example using the Namecheap cPanel interface:
- Once the CNAME record has been added (giving time for DNS records to propagate), you can see the web application you have created by browsing to your URL (in this example
http://eb.acunetixexample.com):
Step 4: Test and scan your web application
- Point your browser to your web application—in this example
http://eb.acunetixexample.comto confirm it's running as intended. - You can run a scan on your target.
Need help?
Invicti Support team is ready to provide you with technical help. Go to Help Center
Was this page useful?