Deployment: Invicti Platform on-demand, Invicti Platform on-premises
Webhook integration
Integrating Invicti Platform with a webhook endpoint as a Team communicator enables real-time notifications when scans complete or fail. You can deliver scan summary data directly to any internal tool, ticketing system, or custom application that accepts HTTP requests.
Prerequisites
To set up this integration, you need:
- A publicly reachable HTTP/HTTPS endpoint that can receive HTTP requests from Invicti. The integration supports POST, GET, and PUT methods. If your endpoint requires authentication, Basic authentication (username and password) is supported.
Multiple integrations for different notification types
You can create multiple webhook integrations to route scan notifications to different endpoints. Each integration targets one webhook URL. Consider these example configurations:
- High-risk scans: a dedicated integration posting to your incident management system when scans find critical vulnerabilities
- All scans: a broader integration posting to your central logging or SIEM platform with all scan results
This allows you to configure different notification rules based on:
- Severity thresholds: Post only when critical or high vulnerabilities are found
- Specific targets, collections, or applications: Route notifications from different asset groups to different systems
Step 1: Configure Invicti Platform integration
-
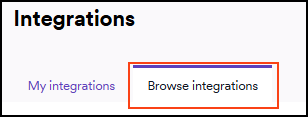
In Invicti, select Integrations from the left-side menu.
-
Switch to the Browse integrations tab.
-
Find the Webhook tile under Team communication and select Configure.
-
Under Webhook details:
- Enter an Integration name.
- Enter your Webhook URL (must be a valid HTTP or HTTPS URL, for example
https://example.com/webhook).
-
Under Authorization Details, choose an Authentication Type:
- None: (default) no authentication required.
- Basic: enter your username and password.
-
Under Webhook request details:
- HTTP method: Choose POST (recommended, default), GET, or PUT.
- POST: Sends data in the request body. Standard method for webhooks. Use for most integrations.
- GET: Appends data as URL query parameters. Limits data amount, not ideal for complex payloads.
- PUT: Updates an existing resource. PUT replaces the entire resource, whereas POST creates a new resource or performs an action.
- Parameters encoding: Choose JSON (recommended, default), Form, or QueryString.
- JSON: Modern standard, best for complex payloads, nested data structures, and sensitive information.
- Form: Traditional HTML form encoding (application/x-www-form-urlencoded). Use only if endpoint requires it.
- QueryString: Appends data to URL as query parameters. Avoid for complex payloads or sensitive data (limited URL length, visible in logs).
- HTTP method: Choose POST (recommended, default), GET, or PUT.
-
Under Webhook request data, optionally configure:
-
Custom HTTP headers: add any headers your endpoint requires as key-value pairs (for example,
X-Api-Key/your-token). Headers support placeholder substitution. You can use placeholder IDs as values (likeX-Severity: {Severity}) and they'll be replaced with live data at send-time. You can also add multiple rows with the same header name, and the backend will send each separately.Headers are always sentCustom HTTP headers are always included in the request, even when you select None for the authentication type. You can use this to set headers like
Authorization: Bearer your-tokenas a manual override. -
Custom data fields: customize the data your webhook endpoint receives by mapping Invicti placeholder fields to the payload structure your endpoint expects. For each field:
- Key: Enter a field name (can be plain text like
scan_idor use dot notation for nesting like{data.scan.id}) - Value: Enter either a placeholder ID (like
{Scan ID}) or a literal string (likemy-service)
The system substitutes known placeholder IDs with live data at send-time and passes literal strings through unchanged. For example, if you map
severity: {Severity}, your endpoint receivesseverity: "high"when a high-severity event triggers the webhook.Only Scan fields are substitutedFor Team communicator webhooks triggered by Scan completed or Scan failed events, only Scan fields are substituted. All other placeholder fields will appear as literal text in your payload. For asset and vulnerability data, use an Issue tracker webhook (triggered by "Vulnerability found" events) or query the Scan API separately using the Scan ID.
Available Scan fields
Use these placeholders in your Custom data fields to map Invicti scan data to your payload:
View available Scan fields
Placeholder Description Type {Scan ID}Unique identifier of the completed scan string {Scan Session}Scan session identifier from the event source string {Scan Address}Scan address or IP value provided by the event source string {Scan Target ID}Internal target identifier associated with the scan string {Scan Status}Final scan status (Completed, Failed, etc.) string {Scan Profile}Name of the scan profile used for the run string {Vulnerabilities Critical}Total count of critical vulnerabilities found number {Vulnerabilities High}Total count of high severity vulnerabilities found number {Vulnerabilities Medium}Total count of medium severity vulnerabilities found number {Vulnerabilities Low}Total count of low severity vulnerabilities found number {Vulnerabilities Info}Total count of informational vulnerabilities found number Built-in template fields
Use these pre-formatted templates as values in your Custom data fields for ready-made output formatting:
View built-in template fields
Placeholder Description {Slack scan template}Pre-formatted plain-text scan summary optimized for Slack-style messages {MS Teams scan template}Pre-formatted HTML scan summary optimized for Microsoft Teams-style messages {Issue detail template}Pre-formatted vulnerability detail block including URL, name, severity, confidence, and detail link Payload formatting examples
Here are common payload structures you can build using Custom data fields:
View payload formatting examples
Flat structure: Map placeholders directly to top-level field names:
{
  "scan_id": "{Scan ID}",
  "scan_session": "{Scan Session}",
  "scan_target": "{Scan Address}",
  "scan_status": "{Scan Status}",
  "critical_vulns": "{Vulnerabilities Critical}"
}
Your endpoint receives:
{
  "scan_id": "f850ae7c-8572-407d-8aba-227405c24g65",
  "scan_session": "cf7e7335-46ca-4666-8935-93d16a9fved8",
  "scan_target": "http://example.com",
  "scan_status": "completed",
  "critical_vulns": "4"
}
Nested objects: Wrap the key in braces and use dot notation to create nested JSON:
{
  "{data.scan.id}": "{Scan ID}",
  "{data.scan.session}": "{Scan Session}",
  "{data.scan.target}": "{Scan Address}",
  "{data.scan.status}": "{Scan Status}"
}
Your endpoint receives:
{
  "data": {
    "scan": {
      "id": "f850ae7c-8572-407d-8aba-227405c24g65",
      "session": "cf7e7335-46ca-4666-8935-93d16a9fved8",
      "target": "http://example.com",
      "status": "completed"
    }
  }
}Arrays: Use index notation
[0],[1], etc., to build arrays:{
"{severity_counts[0]}": "{Vulnerabilities Critical}",
"{severity_counts[1]}": "{Vulnerabilities High}",
"{severity_counts[2]}": "{Vulnerabilities Medium}",
"{tags[0]}": "scan",
"{tags[1]}": "security"
}Your endpoint receives:
{
  "severity_counts": ["4", "13", "17"],
  "tags": ["scan", "security"]
}
Mixed flat and nested keys: Combine regular field names with templated nested keys:
{
  "scan_id": "{Scan ID}",
  "scan_target": "{Scan Address}",
  "{metadata.status}": "{Scan Status}",
  "{metadata.profile}": "{Scan Profile}",
  "critical_count": "{Vulnerabilities Critical}"
}
Your endpoint receives:
{
  "scan_id": "f850ae7c-8572-407d-8aba-227405c24g65",
  "scan_target": "http://example.com",
  "metadata": {
    "status": "completed",
    "profile": "Full Scan"
  },
  "critical_count": "4"
}
Nesting depth limitThe maximum nesting depth is 10 levels. Only object keys count toward this limit; array indices do not.
{a.b.c.d.e.f.g.h.i.j}: 10 levels (at the limit){items[0][1][2].field}: 2 levels (itemsandfield)
- Key: Enter a field name (can be plain text like
-
-
Click Send test webhook to verify your configuration. Your endpoint receives a test notification.
-
Click Save and finish to complete the integration.
-
The Webhook integration is now visible in the list of My integrations.
Step 2: Configure notifications
This section provides basic instructions on how to create various automations. For more detailed instructions on how to create an automation, refer to the new automation document.
Click to expand step-by-step instructions
-
Select Automations from the left-side menu.
-
Click Add new automation.
-
In the dialog box populate these fields:
- Name: send a webhook on scan completion.
- Description: sends a webhook notification when a scan completes or fails.
- Automation scope: specify the assets or collections.
-
Click Add automation.
-
Add an event: select Scan completed or Scan failed and click Save.
-
Add an action: select Send to communicator, then select the Webhook integration you created in Step 1.
Optional: Working example - Get additional scan data via API
This section shows how to extend webhook data with API queries.
If you need data beyond what's available in the webhook payload, such as asset information or scan completion timestamps, you can use the Scan ID and Scan Session from your webhook to make additional API requests to retrieve the full scan details.
When to use this pattern
- You need asset data (Asset ID, name, type, business impact) for a scan completion event
- You need the exact scan completion timestamp
- Your external system requires data that isn't exposed as webhook placeholder fields
Retrieve full scan data
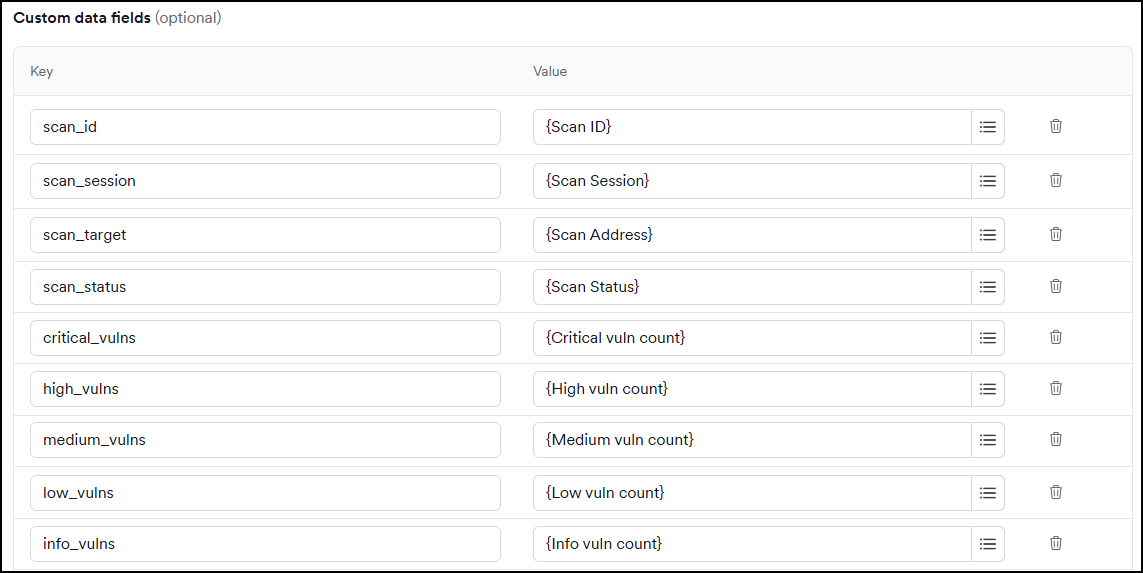
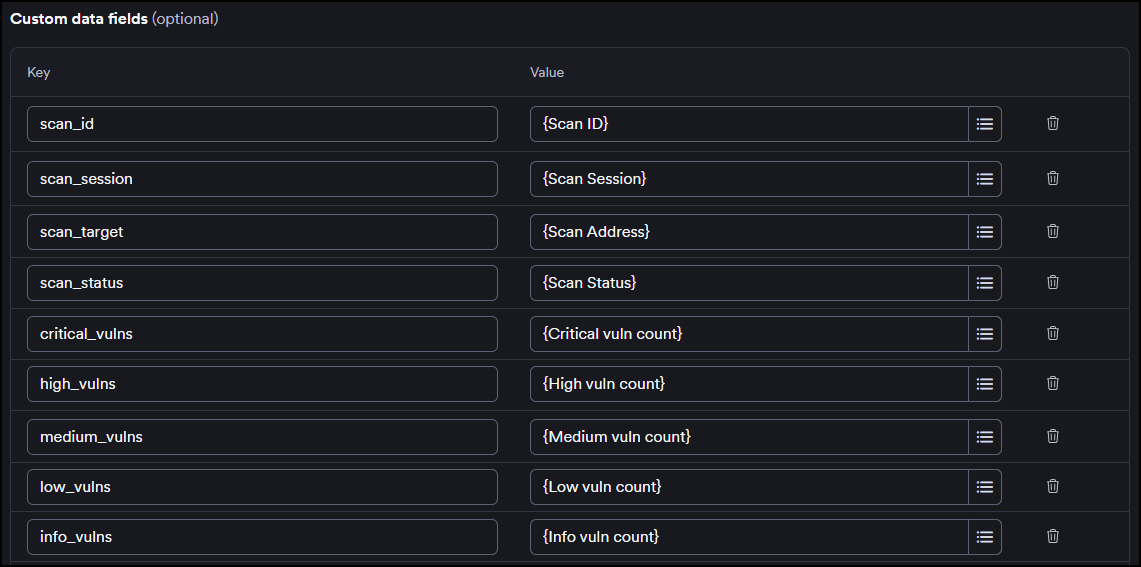
After you complete Step 1: Configure Invicti Platform integration and Step 2: Configure notifications, ensure your webhook includes at least the Scan ID and Scan Session fields in Custom data fields (as shown in the example below), then follow this process:
- Run a scan in Invicti
- Invicti sends a webhook to your endpoint when the scan completes, containing
{Scan ID}and{Scan Session}. Here's an example of the webhook payload:
{
  "scan_id": "f850ae7c-8572-407d-8aba-227405c24g65",
  "scan_session": "cf7e7335-46ca-4666-8935-93d16a9fved8",
  "scan_target": "http://PHP.testinvicti.com",
  "scan_status": "completed",
  "critical_vulns": "4",
  "high_vulns": "13",
  "medium_vulns": "13",
  "low_vulns": "14",
  "info_vulns": "8"
}
- Extract the IDs from the webhook in your endpoint
- Call the Scan API using both IDs to retrieve full scan details, including assets and timestamps:
GET <base-url>/api/v1/scans/<scan-id>/results/<scan-session-id>/statistics
Headers:
  X-Auth: <your-api-token>
  Accept: application/json
Use the Scan ID and Scan Session values from your webhook payload. Refer to Platform URLs for your <base-url>.
- Merge the data in your external system (e.g., TOPdesk, ServiceNow)
Refer to the API documentation for details on authenticating API requests and retrieving your API key.
Troubleshooting
Retry behavior
If your endpoint doesn't return a 200 response, Invicti retries the webhook up to 3 times. Retries are triggered on server errors (5xx). Client errors (4xx) are not retried: a 4xx response is treated as a permanent failure.
Webhook not firing
Test webhook works, but no webhooks are sent when scans complete.
- Verify you've created an automation that triggers the webhook. See Step 2: Configure notifications.
- Check that the automation is enabled (not paused or disabled).
- Verify the automation scope matches the asset or collection you're scanning.
- Ensure the automation event is set to Scan completed or Scan failed.
Payload contains literal placeholder text
Webhook arrives, but fields show literal text like {Scan ID} instead of actual values.
- For Team communicator webhooks (Scan completed/failed): Only Scan fields are substituted. Do not use Vulnerability or Asset fields.
- For Issue tracker webhooks (Vulnerability found): Only Vulnerability and Asset fields are substituted. Do not use Scan fields (except Scan ID, which may appear as literal text).
- Verify field names exactly match the placeholder list. For example, use
{Scan ID}not{scan_id}or{ScanID}. - Test with a real scan, not just a test webhook (test webhooks may not substitute values).
404 or connection errors
Webhook returns a 404 error or fails to connect to the endpoint.
- Verify the Webhook URL is correct and publicly reachable (test by opening it in a browser or using curl/Postman).
- Ensure the URL uses HTTPS (HTTP is supported but HTTPS is recommended).
- Check that your endpoint's firewall allows inbound requests from Invicti's IP ranges.
- Verify the endpoint is running and responds to POST requests.
Test webhook succeeds but real webhooks fail
Clicking "Send test webhook" works, but webhooks don't arrive during actual scans.
- Confirm the automation is created and enabled. See Step 2: Configure notifications.
- Test with an actual scan instead of relying on the test webhook.
- Check your endpoint logs for incoming requests: the webhook may be arriving but your endpoint is rejecting it.
- Verify your endpoint returns a 200 OK response. Invicti retries on 5xx errors, but 4xx responses are treated as permanent failures.
Missing or incomplete payload fields
Some fields you configured in Custom data fields don't appear in the webhook payload.
- Verify the field name matches exactly (case-sensitive). Use the placeholder picker (≡) button in the Custom data fields to select fields from the dropdown.
- Check that the field is available in your webhook's context. For Team communicator webhooks, refer to Available Scan fields.
- Test with a real scan (not a test webhook) to ensure fields have values to substitute.
Authentication or header failures
Webhook returns 401 Unauthorized or authentication-related errors.
- Verify Authentication Type is configured correctly:
- None: No authentication headers sent (except custom headers you add).
- Basic: Username and password are base64-encoded and sent as
Authorization: Basic <credentials>.
- Add required authentication headers in Custom HTTP headers. For example:
Authorization→Bearer <your-token>X-Api-Key→<your-api-key>
- Note that header values are masked in the UI (type: password): paste your token/key carefully.
Webhook retries not working
Webhook fails once and doesn't retry.
Invicti retries up to 3 times on server errors (5xx). Client errors (4xx) are treated as permanent failures and are not retried. Verify your endpoint is returning appropriate HTTP status codes:
- 200: Success: webhook accepted.
- 4xx: Client error: permanent failure, not retried.
- 5xx: Server error: retried up to 3 times.
Need help?
Invicti Support team is ready to provide you with technical help. Go to Help Center