Configure Authentication verifier agent to use a proxy
If your Authentication Verifier agent is in a network with an outbound proxy or WAF, its outbound traffic may get blocked without correct configuration.
You may also see log messages such as the following example:
2024-01-30 18:41:12.0714 | Error | acunetix-687bcf56cf-lm54s | 14 | 34 | 24.1.0 | 8efb914c-a49b-4cba-92ca-b1070402272a | Invicti.Cloud.Agent.Scanning.TaskManager| Unable to launch scan task 8efb914c-a49b-4cba-92ca-b1070402272a

 System.ArgumentNullException: Value cannot be null. (Parameter 'path')
The preferred way to handle your scenario is to implement the appropriate trustlisting to allow outbound traffic for your agent.
Confirm that outbound traffic is being blocked
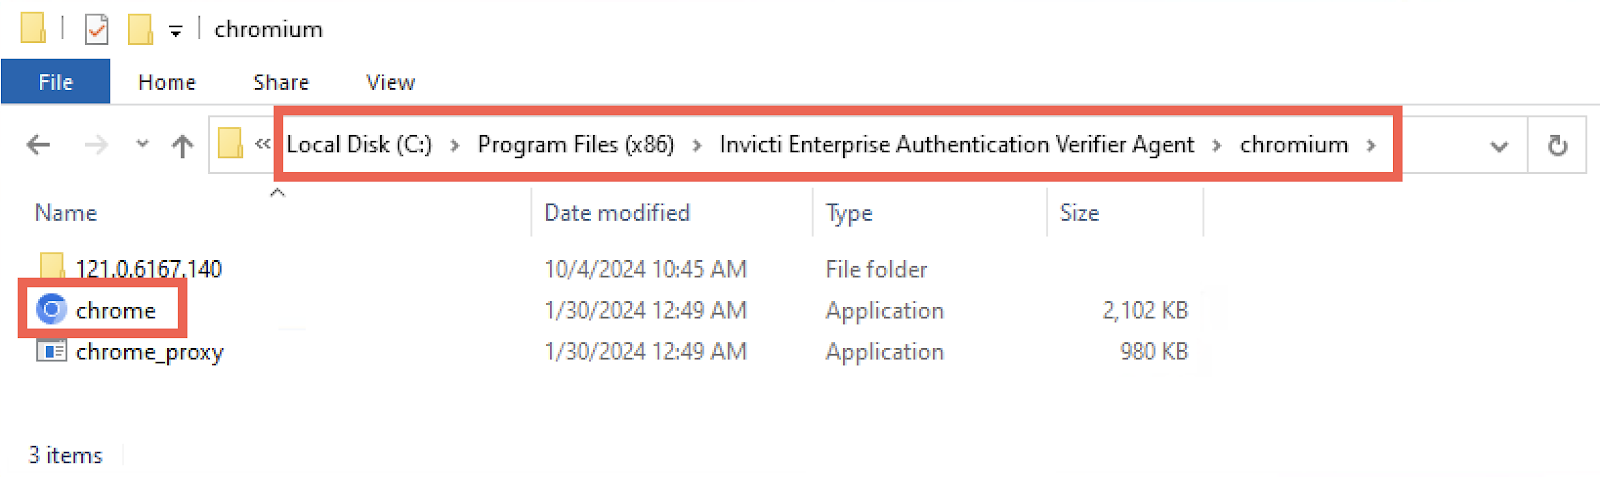
If your Authentication Verifier agent is installed on a machine that can run a browser, you can launch the agent's internal browser to confirm that outbound traffic is being blocked:
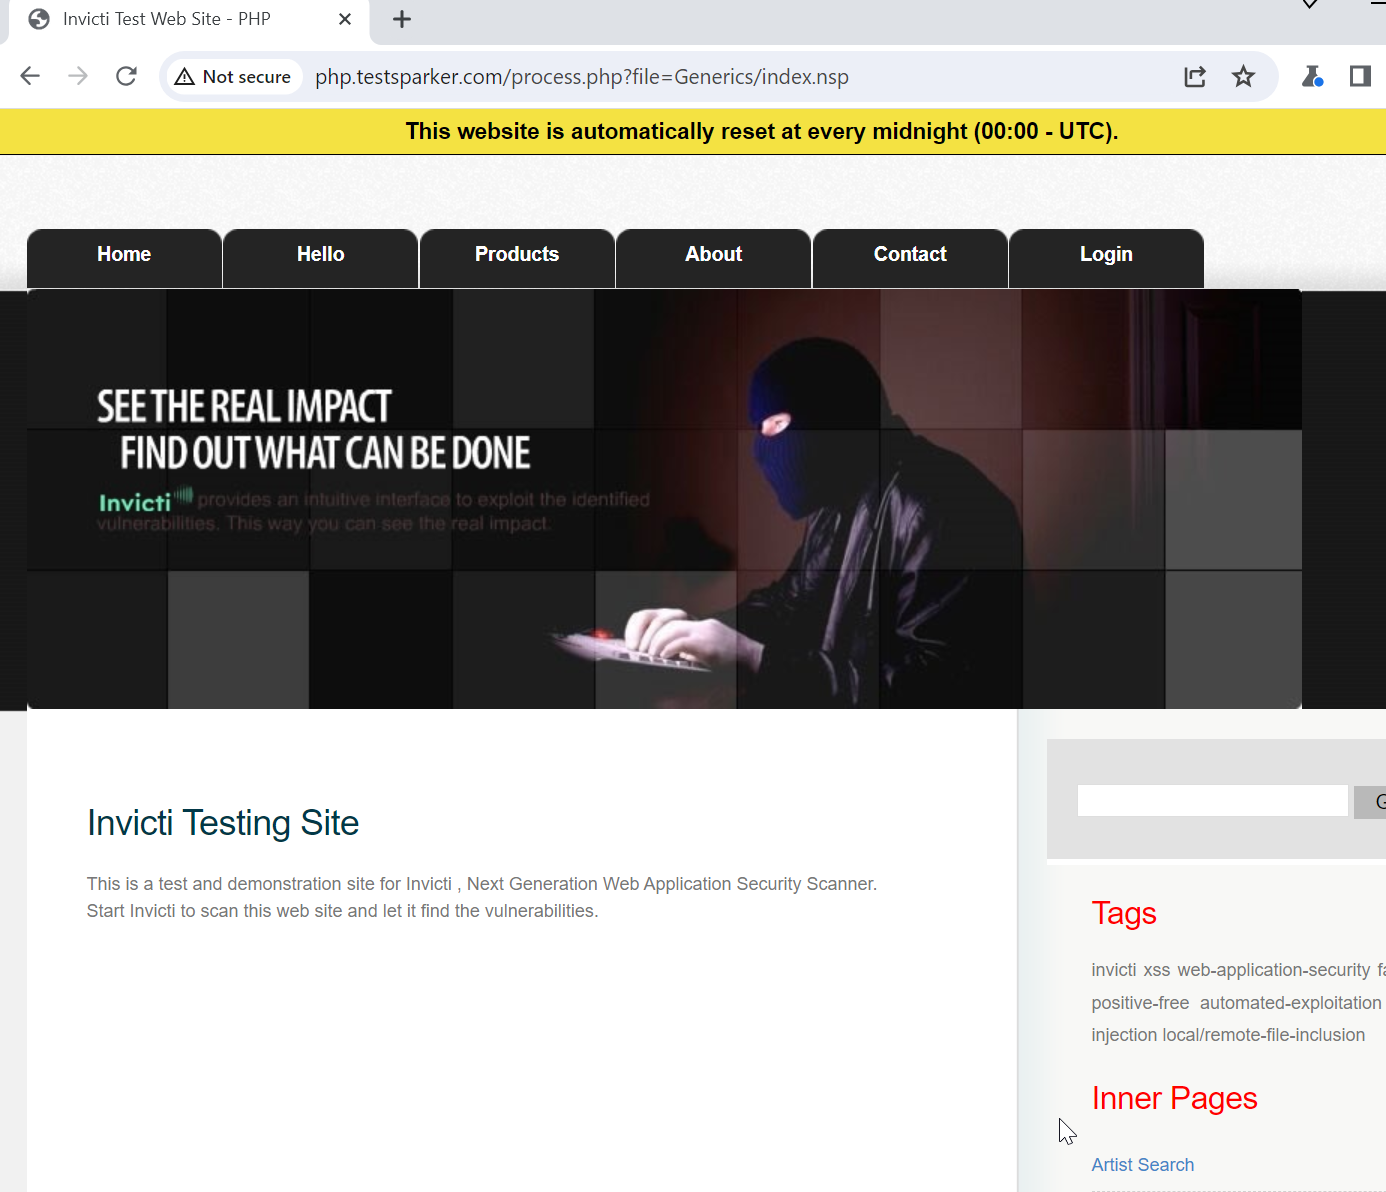
Using a test website in these examples, this is what the test website would look like with a regular Chrome browser:
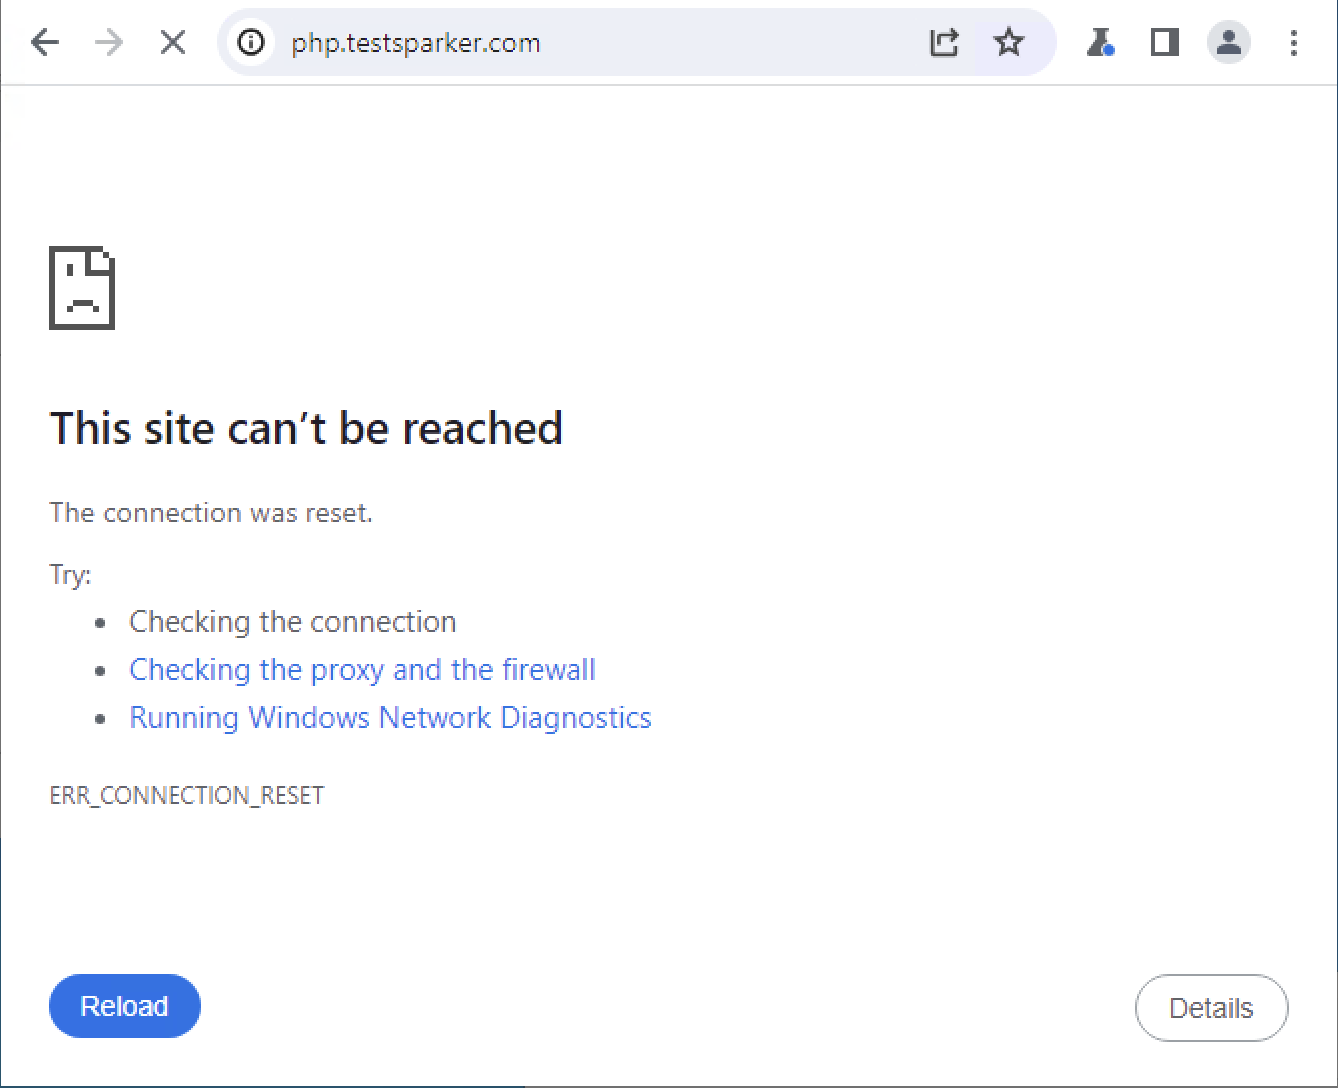
Using the Authentication Verifier agent's built-in Chrome you might get the following if the outbound traffic is just dropped:
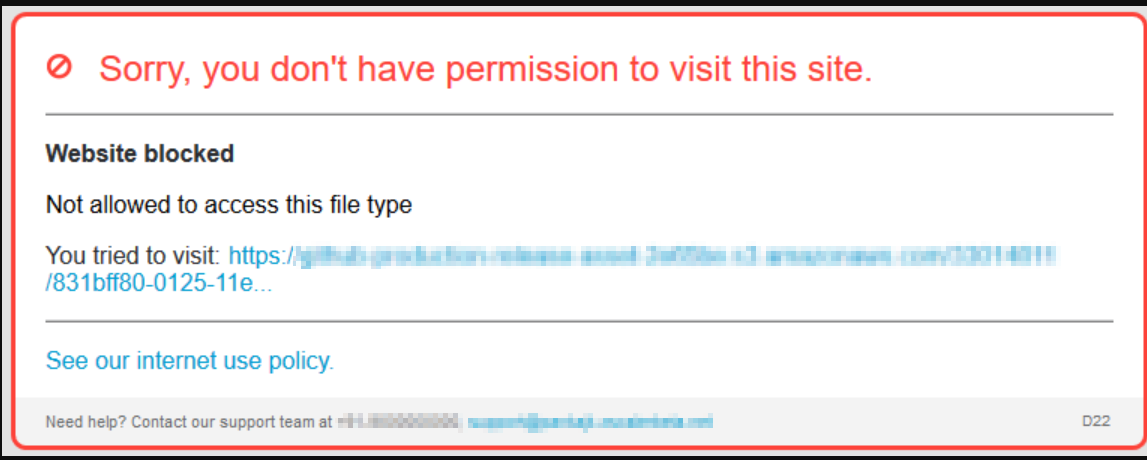
You might also get something like this if your WAF informs you of the block:
Adjusting the agent settings
To configure your agent to pass through your configured proxy or WAF:
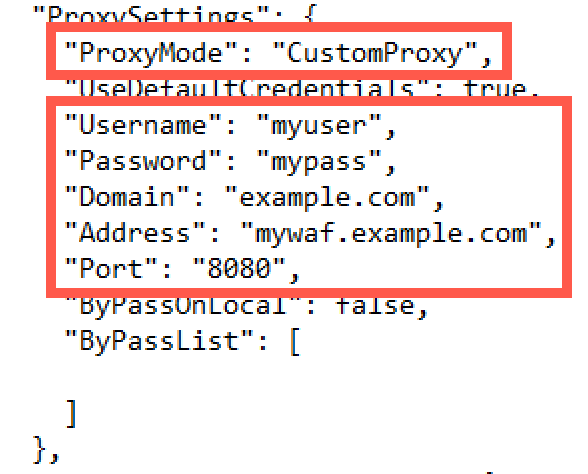
- Open your
appsettings.jsonfile and locate the ProxySettings section - Adjust the ProxyMode value to
CustomProxy - Set the values of the Username, Password, Domain, Address, and Port to your outbound proxy or WAF values
Need help?
Invicti Support team is ready to provide you with technical help. Go to Help Center