Deploy Shark (IAST) in Invicti Enterprise on-demand
You can run interactive security testing (IAST) with Invicti Shark in your web application to confirm more vulnerabilities and minimize false positives.
Invicti provides industry-leading dynamic application security testing (DAST) capabilities to help find vulnerabilities in the target web application. Using Invicti Shark enables Invicti Enterprise to provide additional information from the back-end while scanning your web application.
This document shows how to enable, download, and install the Invicti Shark (IAST) agent for Invicti Enterprise on-demand.
Deploying the Shark agent is optional. Invicti scanner is still best in class as a black-box scanner, and the Shark agent improves accuracy and vulnerability results when scanning .NET, Java, and PHP web applications.
Benefits of Invicti Shark (IAST)
With Shark's IAST capabilities, Invicti enhances security by:
- Pinpointing issue locations with debug details
- Uncovering more vulnerabilities with additional insights
- Expanding Proof-Based Scanning™ to verify more threats and streamline fixes
- Scanning entire web apps, including hidden and unlinked areas
For the Shark to operate, you need to download an agent and deploy it on your server. For security reasons, this agent is generated uniquely for each target website.
Shark has only a very minimal impact on the target machine's resources—less than 1% in lab test results.
Recommendations for Invicti Shark
Invicti Shark works best in specific environments. To get the best out of Invicti Shark, you need to use it in the right environment. The following points provide the best practice for using the Shark:
- Install Invicti Shark on your staging servers. This is the best place to perform IAST analysis.
- You may install Invicti Shark on virtual machines to perform IAST analysis as part of CI/CD pipelines. In this case, the Shark installation would need to be done as part of the CI/CD pipeline.
- Installing Invicti Shark on production servers isn't recommended. Although Invicti Shark consumes limited resources, your production environment may run slower.
For more information, refer to Changing the DAST Game with Invicti IAST.
Access Invicti Shark
Before you can use the Invicti Shark (IAST) agent, follow these steps to request access:
- Select Scans > New Scan from the left-side menu.
- In the Target URL text field, input the target URL.
- In the Scan Settings section, select Shark (IAST and SCA) and click I’m Interested in Adding Shark.
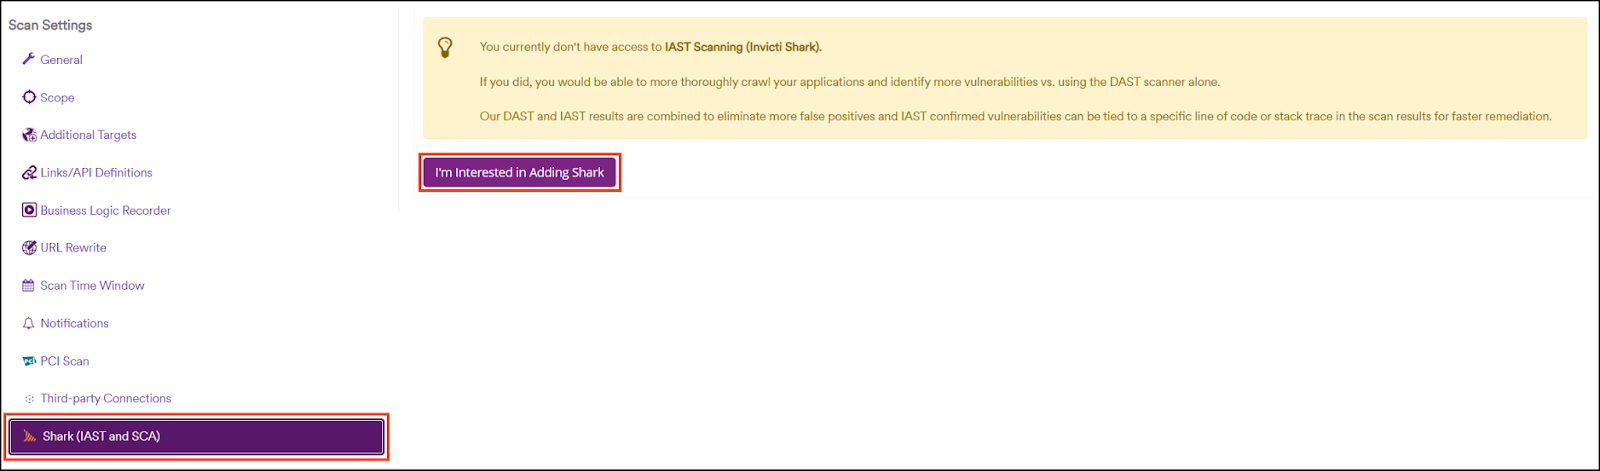
- Once approved, you are ready to download.
If you have access to Invicti Shark, the Enable Shark checkbox appears. Follow the steps from the Shark sensor download section to continue with download and installation.
Shark sensor download
Using Invicti Enterprise on-premises? Refer to the Deploying Shark (IAST) in Invicti Enterprise on-premises document.
Fields on the Shark (IAST) page
The following list explains the fields on the Shark (IAST) page:
- Installation Files: This is the section that lets you download the required file to use on your server.
- Server Platform: This lets you choose the server to download the required files for your server, such as PHP, Java.
- Advanced Settings: This lets you override settings for the default Shark token and Bridge URL/Port.
- If you want to override the default token and bridge settings, make sure to change them before downloading any files for your server.
- Shark Token:
- This token secures communication between the Invicti scanner and the IAST Shark agent. A unique token is automatically generated for each website's installation of the Shark agent.
- If you have a token already, enable the I have a token I would like to reuse checkbox and enter your token.
- This field is mandatory.
- Bridge URL and Port:
- This is the URL and port number of the IAST bridge. The bridge is used to relay information from the Shark agent to the Invicti scanning engine.
- You can set the default bridge URL and port on the General Settings page. This setting on the Shark configuration page lets you override the default bridge URL for each website.
- Make sure that the Shark agent can connect to the address/port specified.
- This field is only mandatory for Java and Node.js.
Download Shark sensors
- Select Scans > New Scan from the left-side menu.
- From the Scan Settings, enable the Shark (IAST and SCA) checkbox.
- In the Shark Settings section, enable the Enable Shark checkbox.
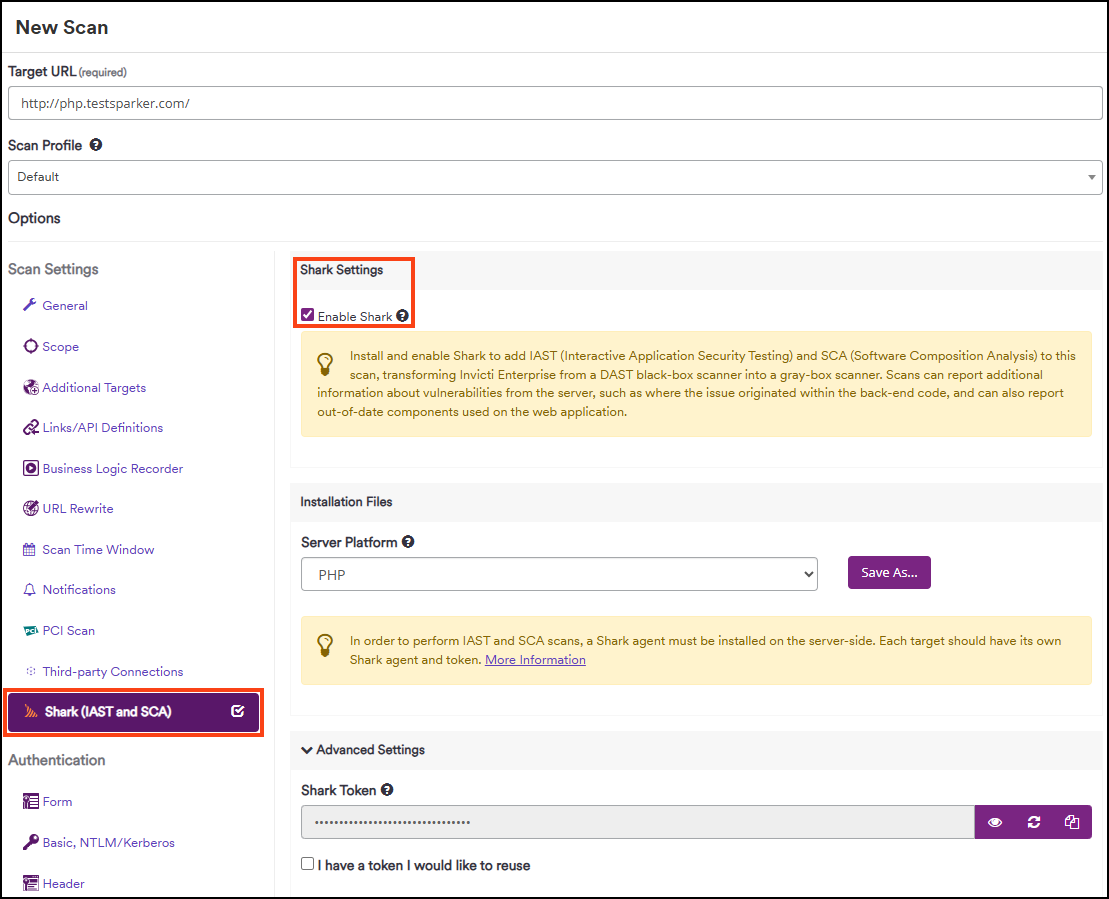
- From the Installation Files section, choose a platform from the Server Platform drop-down, then click Save As. (In the example, PHP Server Platform is used). The download starts immediately.
- If you change any of the following settings after the download, please re-download your files.
- If you change your token or Bridge URL after installing the Invicti Shark sensor, you must have a clean installation so that the changes take effect.
- Trustlist the Bridge URL (https://iast.invicti.com).
- In the Advanced Settings, if required, you can do the following:
- If you have a token already, enable the I have a token I would like to reuse checkbox and enter your token.
- Enter your Bridge URL and Port only if you want to override the default bridge URL and Port.
Deploying Invicti Shark on your server is explained in related documents:
Invicti Shark (IAST) scan results
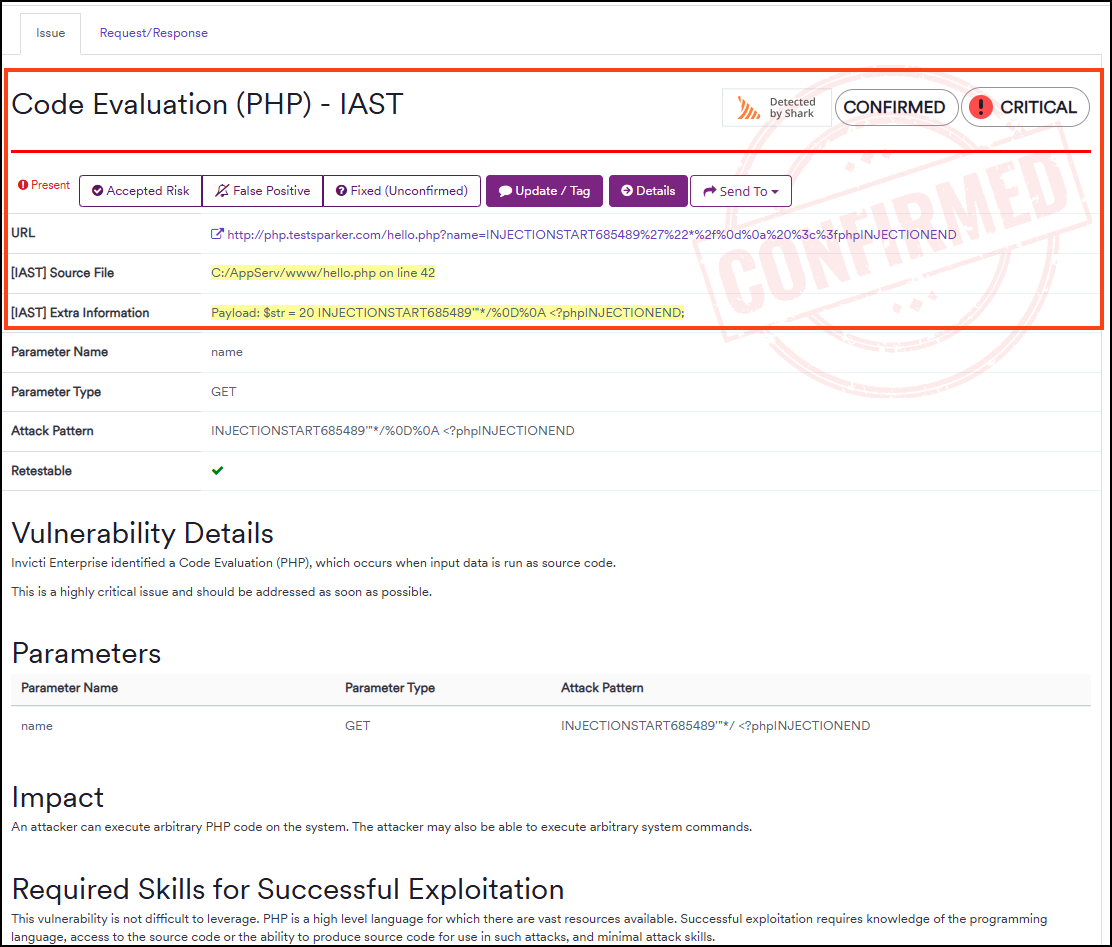
After finishing the scan with the Invicti Shark agent, in the Technical Report section, click any issue to see the results. The detailed overview of an issue looks like this:
Need help?
Invicti Support team is ready to provide you with technical help. Go to Help Center