This feature is available with Invicti API Security Standalone or Bundle.
Integrate NTA with Istio Service Mesh
This document explains how to install and configure the Invicti Network Traffic Analyzer (NTA) with Istio Service Mesh in your Kubernetes cluster to capture both HTTP and HTTPS traffic and reconstruct OpenAPI3 specification files.
Prerequisites
- A Kubernetes cluster
- Helm command-line tool installed (version 3+)
kubectlconfigured for your cluster (for example, using Get-AksHciCredential)- A Kubernetes namespace created for Invicti NTA
- Istio Service Mesh installed and running in your cluster
- API Discovery needs to communicate with the API Hub service:
https://apihub.netsparkercloud.com/api/nad
Minimum system requirements
- 1 GB RAM
- 2-core 64-bit CPU
- 2 GB available HDD
Overview
There are two ways to capture Kubernetes traffic with the Invicti NTA:
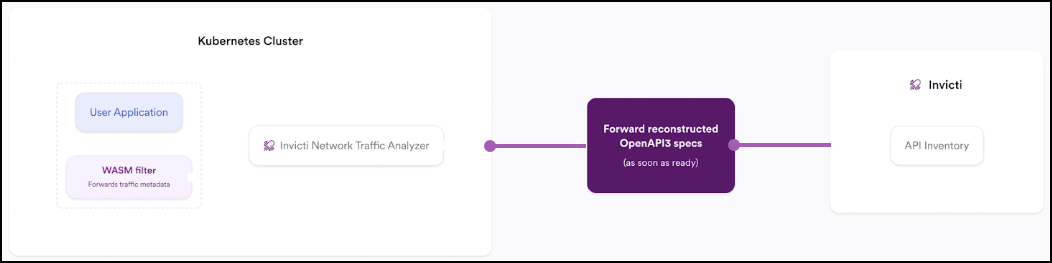
- Integrating with Istio Service Mesh (captures both HTTP & HTTPS traffic): This method is described in this document and leverages the Istio Envoy proxy with WASM filters to inspect encrypted (HTTPS) and unencrypted (HTTP) traffic. This document focuses on configuring Invicti NTA for this integration.
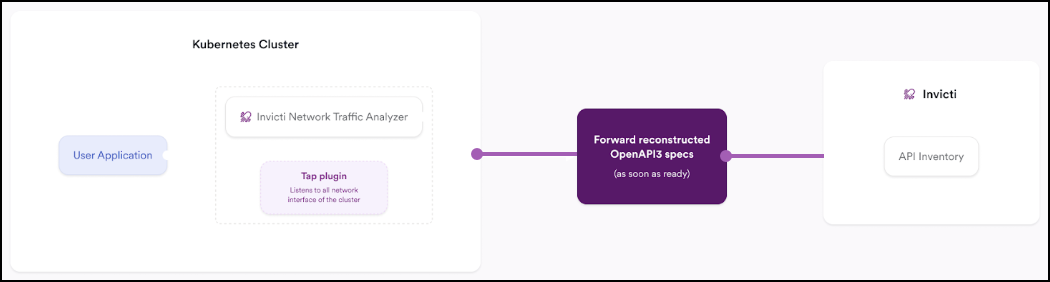
- Integrating with a Kubernetes namespace interface natively (captures HTTP traffic only): This method uses the Tap Plugin to monitor unencrypted traffic within a Kubernetes namespace. It doesn't support HTTPS traffic unless combined with Istio. Details for this setup are covered in the NTA with Tap Plugin document.
Installation steps
The Invicti NTA Helm chart includes:
- Reconstructor - Processes captured traffic and generates OpenAPI3 specification files.
- Istio Service Mesh Envoy - Captures both HTTP and HTTPS traffic by integrating with Istio's Envoy proxy. This is essential for environments using Istio to handle encrypted traffic (HTTPS) through the Envoy proxy and WebAssembly (WASM) filters.
Step 1: Retrieve registration token and password
- Log in to Invicti Enterprise.
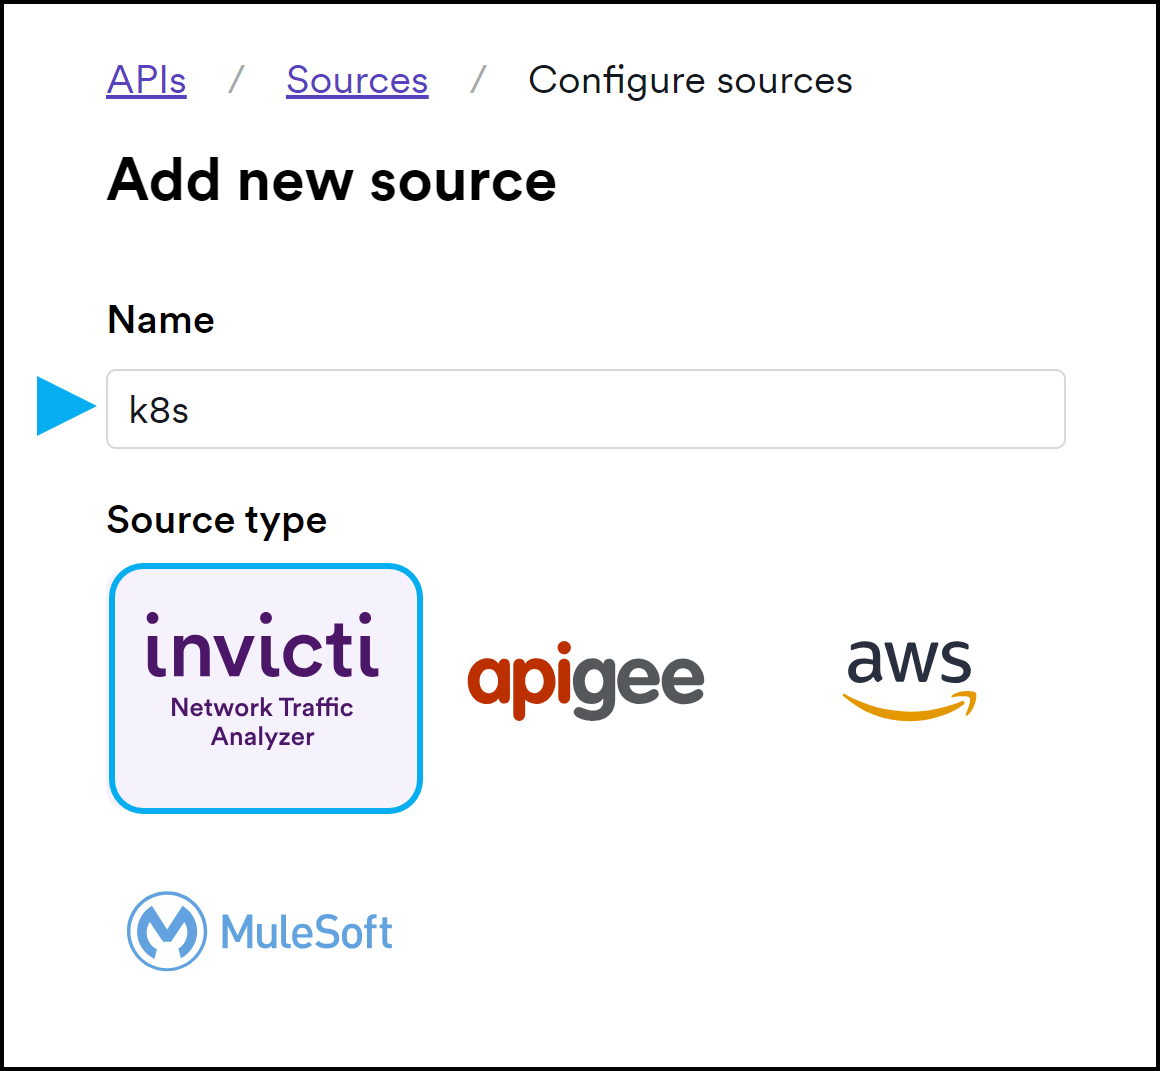
- From the left side menu, go to APIs > Sources, then click Add new source.
-
Enter a name and choose Invicti Network Traffic Analyzer.
-
Invicti on-premises only: In the NTA server URL field, enter the URL of the server where the Invicti Enterprise web app is running. The default entry is the current host URL from the browser. It must be externally accessible.
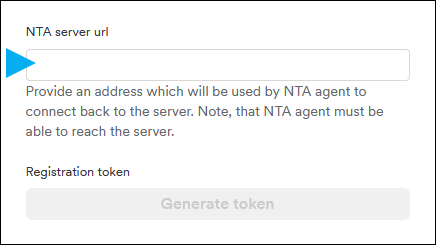
The Invicti NTA must be able to reach the URL you enter into this field. You can't use 'localhost'. The NTA Server URL you provide is embedded in the token you generate in the next step.
- Select Generate token and copy it. Paste the copied registration token in a place where you can retrieve it easily when you prepare the installation command in step 2.
- Select Save at the bottom of the page. Don't skip this step.

- Select Agents > Manage Agents from the left-side menu.
- Select + Configure New Agent.
- In the Docker CLI & Openshift section, click the copy icon next to 2- When prompted, enter the password that follows. This is the password to access Invicti's public registry.

- Paste the copied password in a place where you can retrieve it easily in step 2 when you prepare the installation command.
Step 2: Authenticate with the Invicti Registry
- Launch the Helm command-line tool that was set up during the prerequisites.
- Then run the following command:
helm registry login registry.invicti.com
- Username: Your Invicti Enterprise email
- Password: Copied from Step 1.8
Step 3: Label target namespace
Before deploying, label the namespace to enable Istio sidecar injection:
kubectl label namespace <your-namespace> istio-injection=enabled
Step 4: Prepare and deploy the Invicti Helm chart
In your Helm command-line tool or terminal, run the following command to install Invicti NTA into your Kubernetes cluster:
helm install invicti-api-discovery oci://registry.invicti.com/invicti-api-discovery --version 25.11 -n default --set imageRegistryUsername=email-address --set imageRegistryPassword=password --set reconstructor.JWT_TOKEN="registration-token" --set trafficSource.envoyWasm.enabled=true --set trafficSource.envoyWasm.namespaces="your-namespace"
default: Replace with the Kubernetes namespace where you want to install Invicti NTA. This should also be the namespace watched by Envoy.email-address: Replace with your Invicti Enterprise email address.password: Replace with the password copied in Step 1.8.registration-token: The registration token from Step 1.4. Keep it enclosed in double quotes.your-namespace: The target namespace (should be separate from your application namespace). This namespace doesn't requireistio-injection=enabled.
Run the command to install Invicti NTA in your specified namespace and enable Envoy WASM filters to monitor traffic within that namespace.
Step 5: Verify the installation (optional)
To ensure that the installation was successful and the components are running properly:
- Run the following command to view the pod status:
kubectl get pods -n <your-namespace>
- Confirm that all pods (for example, tap, reconstructor) aren't in
CrashLoopBackOfforErrorstates. - If any pods aren't running properly, investigate their logs with:
kubectl logs <pod-name> -n <your-namespace>
Copy and paste the pod-name from the kubectl get pods -n <your-namespace> output.
If everything looks good, your Invicti NTA with Istio Service Mesh is now successfully capturing and analyzing traffic in your Kubernetes cluster.
Update or reinstall Invicti NTA with Istio
- Retrieve the latest registration token and password as outlined in the standard Invicti token generation procedure.
- Log in to the Invicti registry as in step 2.
- Prepare and run the update command:
helm upgrade --install invicti-api-discovery oci://registry.invicti.com/invicti-api-discovery --version 25.11 -n default --set trafficSource.envoyWasm.enabled=true --set imageRegistryUsername=email-address --set imageRegistryPassword=password --set reconstructor.JWT_TOKEN="registration-token" --set trafficSource.envoyWasm.namespaces="your-namespace"
Need help?
Invicti Support team is ready to provide you with technical help. Go to Help Center