Deployment: Invicti Platform on-demand, Invicti Platform on-premises
Add by import from CSV
Creating a new target in Invicti Platform allows you to define a specific website that you want to scan for vulnerabilities. Targets are the websites and web applications that you would like to scan using Invicti Platform. You can add them either from the Website Discovery page or directly from the Targets page. For bulk additions, importing a .csv file is a quick and efficient method to add multiple targets at once.
This document walks you through the process of importing a .csv file, configuring each target's details, and preparing them for accurate and secure vulnerability scanning. If you prefer to create a single target manually, refer to the linked document.
Steps to import a .csv file
- Select Inventory > Targets from the left-side menu.
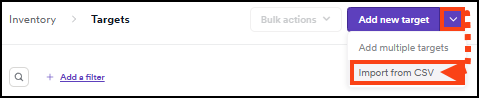
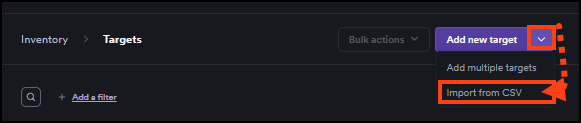
- Click the down arrow next to the Add new target button and select Import from CSV.
-
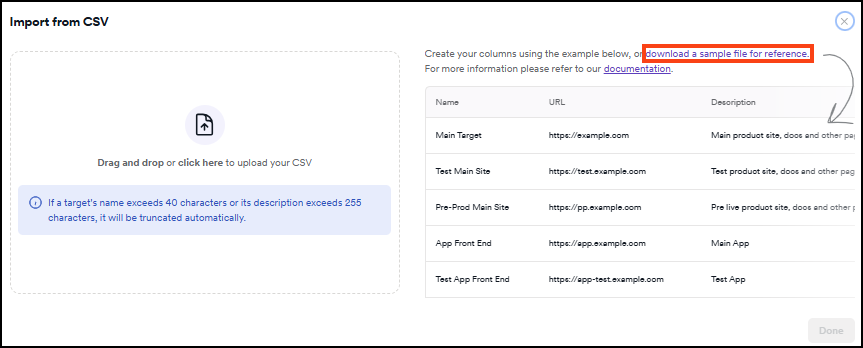
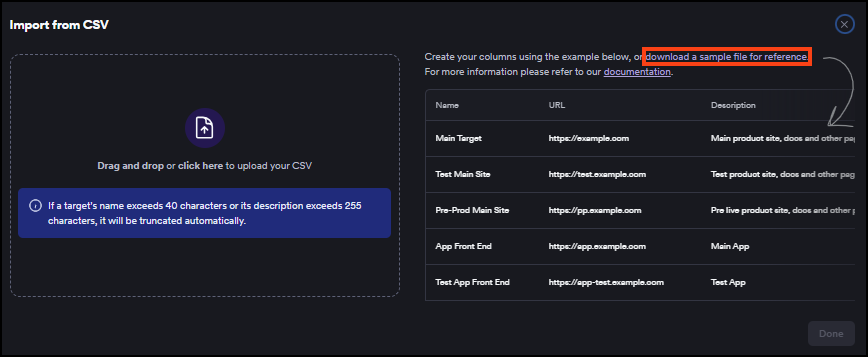
The Import from CSV dialog opens. Create your .csv file using the column structure shown in the right panel of the dialog, or download the sample file. The file must include the following columns:
- Name
- Url
- Description
- UserName (optional)
- Password (optional)
UserName and Password are simple form authentication credentials for the target.
- If a target's name exceeds 40 characters or its description exceeds 255 characters, Invicti truncates it automatically.
- The URLs mustn't contain any whitespace or spaces, as this causes a warning to appear. If you add a space before or after a URL, Invicti removes it automatically.
- The sample file looks like this:
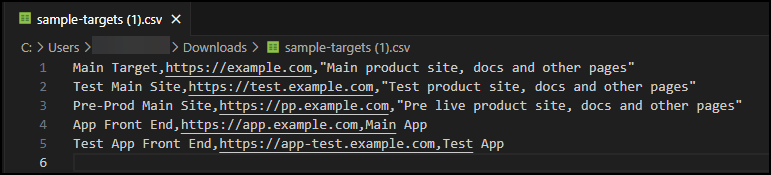
- Prepare and save the .csv file.
- Drag and drop the file or click here in the left panel to upload it.
- When the upload completes, the file shows a Complete status badge. Click Done to proceed.
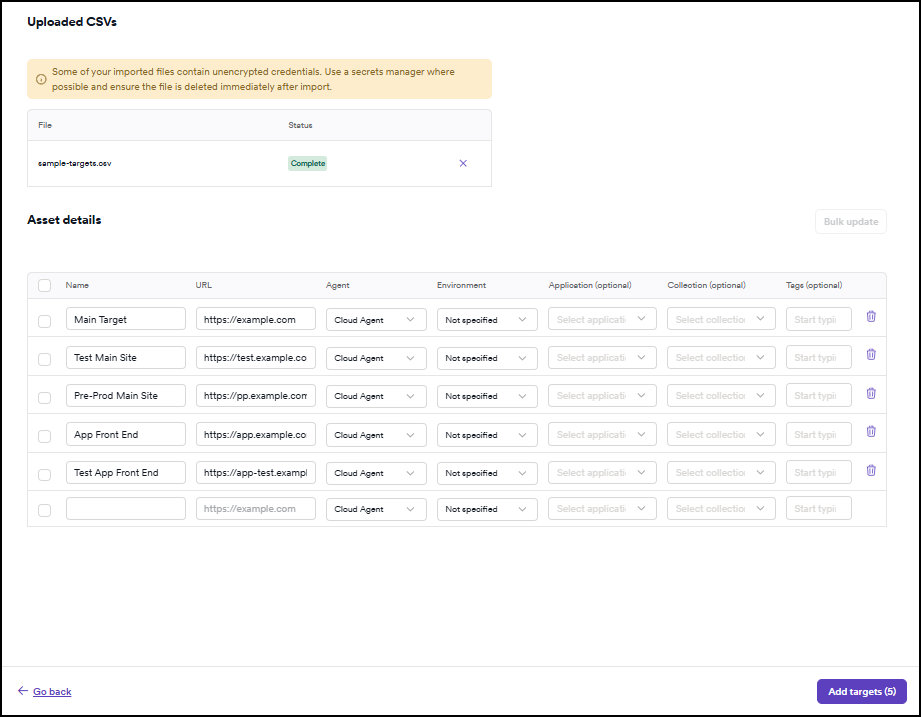
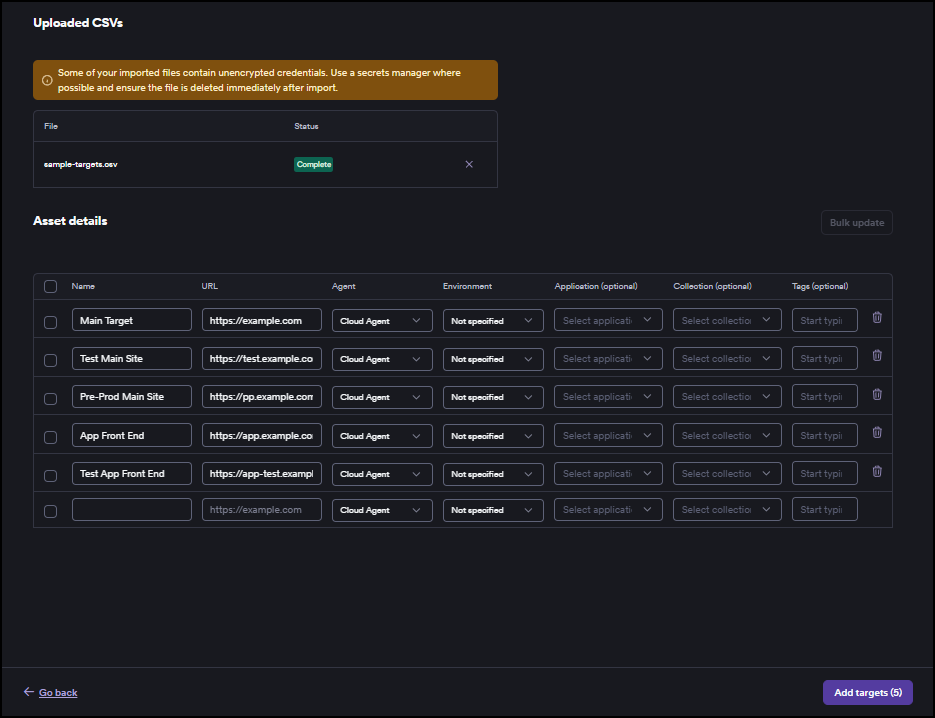
- The Add multiple targets page updates with an Uploaded CSVs section listing the imported file and its status.
If your .csv file contains credentials in the UserName and Password columns, a warning appears: "Some of your imported files contain unencrypted credentials. Use a secrets manager where possible and ensure the file is deleted immediately after import." Delete the .csv file from your machine after the import is complete.
- The Asset details section is updated with the data from your .csv file. You can also add more information to the targets before they are created, such as specifying the environment and assigning applications, collections, or tags. You can do so manually or by using the Bulk update feature.
- If you don't want to update any other information and would like to save the imported targets just with the name, URL, and Agent, select Add targets (n).
- The Targets page is updated with the imported targets information.
Manually update the imported asset details
- In the Asset details, use the dropdown menus for each target to amend or add the Agent, Environment, Application, and Collection, and enter any Tags.


- Confirm the changes and add targets by pressing Add targets (n).
- The Targets page is updated with the imported targets information.
Bulk update the imported asset details
- In the Asset details, enable the checkboxes next to the targets to select which ones you would like to update in bulk, then click Bulk update.
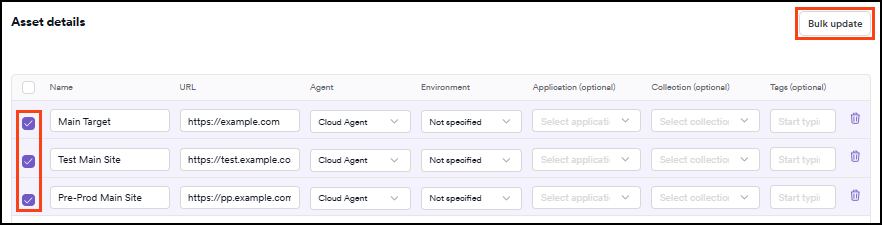
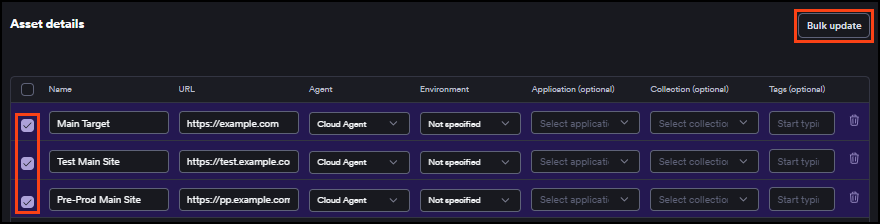
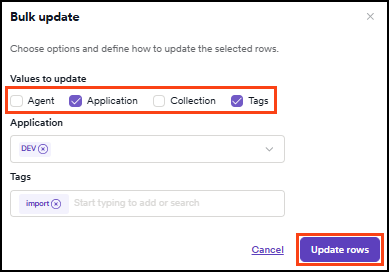
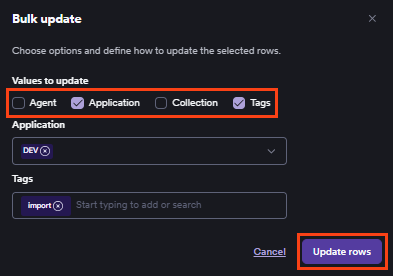
- Enable the checkboxes to select the columns you want to update, then enter the data. Once you're done, select Update rows. Remember to press Enter after each Tag addition.
- The Asset details section is updated. Once you're done, select Add targets (n) to save your targets.
- The Targets page is updated with the imported targets information.
Before running your first scan, make sure to read our authorized target scan policy. To get started safely with the Invicti Platform, you can use our testing website, which allows you to explore scanning features without using your own FQDNs or affecting live environments.
Need help?
Invicti Support team is ready to provide you with technical help. Go to Help Center