Configure a target using the API
Deployment: Invicti Platform on-demand, Invicti Platform on-premises
This is part 2 of 4 in the API scanning workflows series.
Previous: Get started | Next: Launch
This document explains how to create targets, configure authentication, and prepare scan profiles using the Invicti Platform API. These steps establish the foundation for executing scans.
Prerequisites
Before following this document, ensure you have completed:
- Get started - API key and testing tools
Step 1: Create a new web target
Register your application as a target in the Invicti inventory using the Inventory API. The target you create here is referenced by all scan operations in this series.
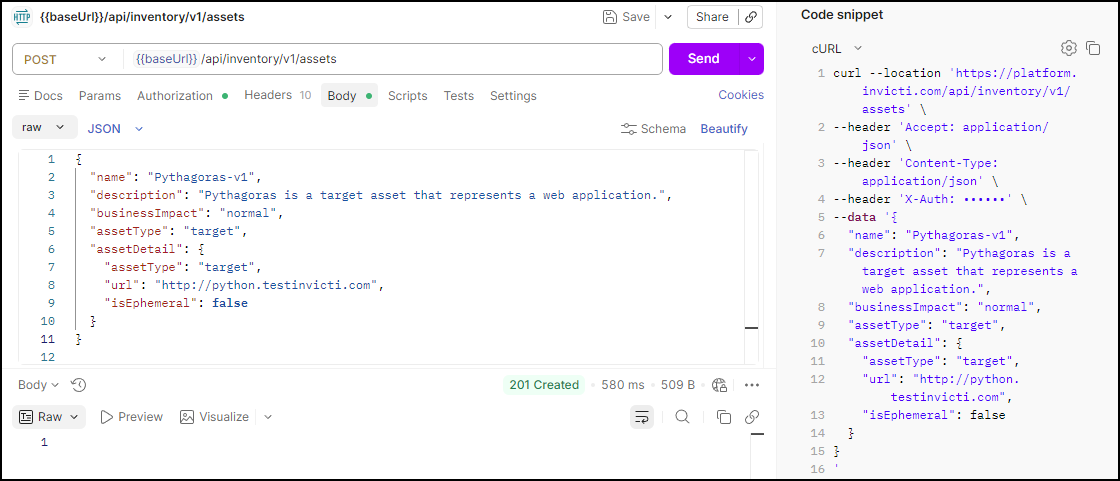
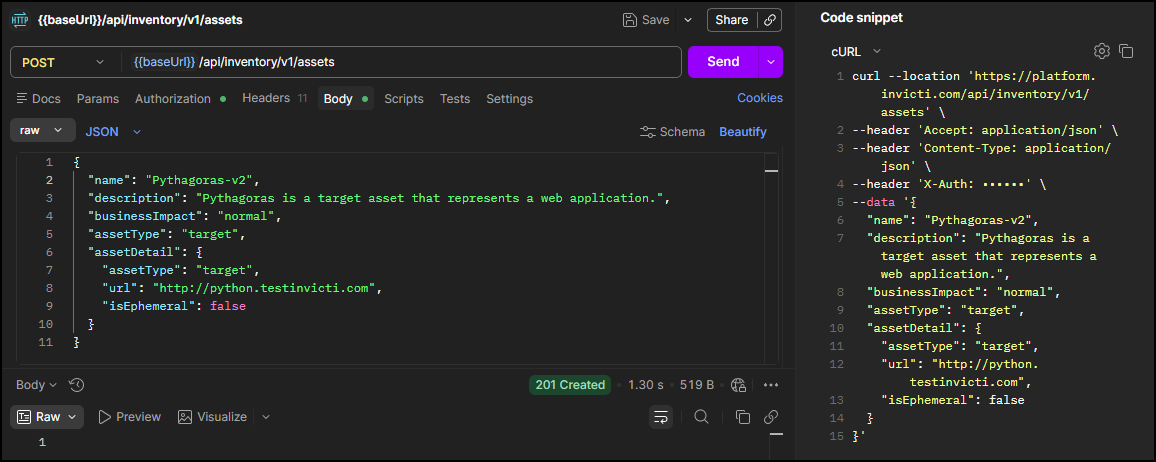
Run this request to create a new target
The first step in configuring a web target with Invicti is adding it as a target in the inventory. To do this using the API, use the Create asset endpoint from the Inventory API:
- In the Invicti Platform UI, this is referred to as an asset of the type Webapp (Target - Web). To create an asset of the type API (Target - API), you would use a different set of parameters.
- This endpoint creates a single target. To create multiple targets in one request, use a different endpoint.
POST <base-url>/api/inventory/v1/assets
Headers:
  accept: application/json
  X-Auth: <your-api-token>
Body:
{
  "name": "<target-name>",
  "description": "<target-description>",
  "businessImpact": "<business-impact>",
  "assetType": "target",
  "assetDetail": {
    "assetType": "target",
    "url": "<target-url>",
    "isEphemeral": false
  }
}
Replace the following values before sending the request:
| Placeholder | Required | Description | Example |
|---|---|---|---|
<base-url> | Yes | Your regional platform URL. Refer to Platform URLs | https://platform.invicti.com |
<your-api-token> | Yes | Your API key from User settings | a1b2c3d4-e5f6-... |
<target-name> | Yes | A display name for the target | Pythagoras-v2 |
<target-url> | Yes | The fully qualified domain name of the application to scan | http://python.testinvicti.com |
<business-impact> | No | Business impact level. Accepted values: low, normal, high, critical | high |
<target-description> | No | A short description of the target | Pythagoras is a target asset that represents a web application. |
isEphemeral | No | Set to true if the target is temporary and shouldn't persist between scans. Refer to Add a target with a dynamic URL. | false |
Expected response: 201 Created. The new target is also visible in the Invicti Platform UI under Inventory > Targets.
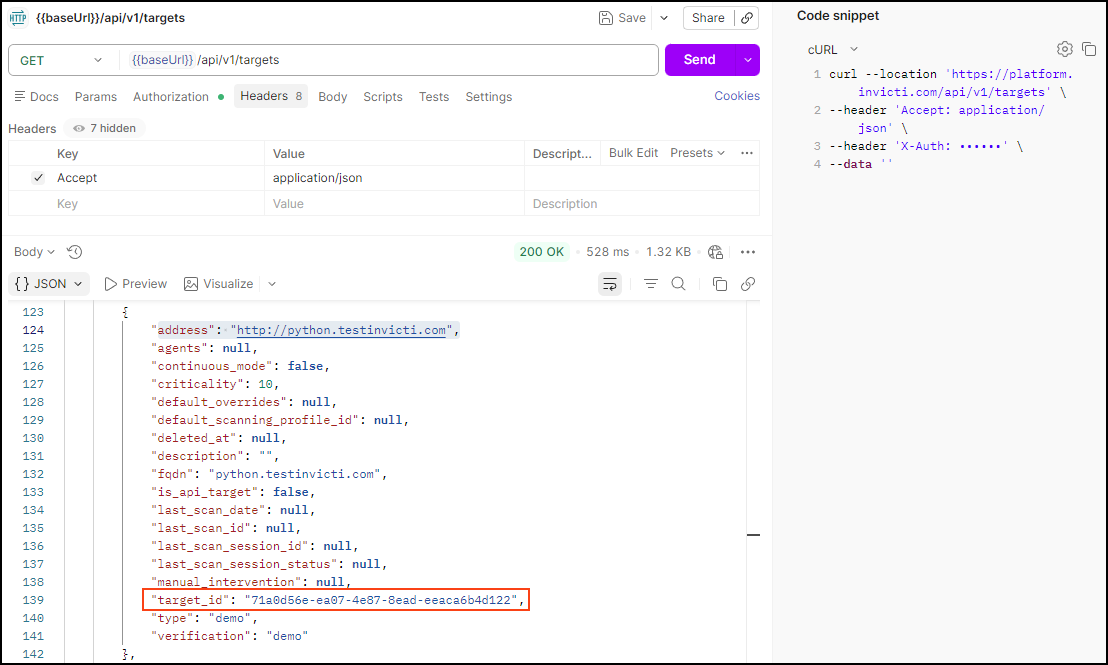
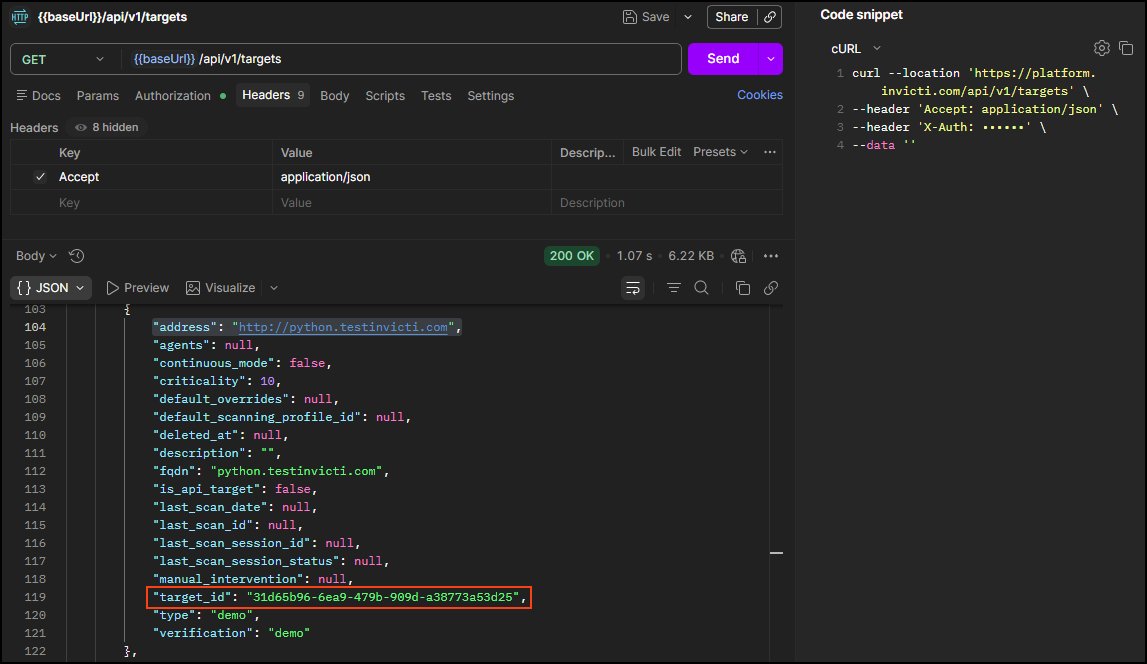
Step 2: Get the target_id
Retrieve your target's unique identifier from the DAST API. You need this target_id to launch scans in the next workflow.
Run this request to get the target ID
Using the DAST API, retrieve your list of targets and note the target_id for the target/application you want to scan:
GET <base-url>/api/v1/targets
Headers:
  accept: application/json
  X-Auth: <your-api-token>
Expected response: HTTP 200 with a list of all targets available to your user. Each target has a target_id field (UUID format). To find the correct target, use the search (🔍) to filter by URL - in this example, http://python.testinvicti.com. Note the target_id - you need it in subsequent workflows.
{
  "targets": [
    {
      "address": "http://python.testinvicti.com",
      "agents": null,
      "continuous_mode": false,
      "criticality": 10,
      "default_overrides": null,
      "default_scanning_profile_id": null,
      "deleted_at": null,
      "description": "",
      "fqdn": "python.testinvicti.com",
      "is_api_target": false,
      "last_scan_date": null,
      "last_scan_id": null,
      "last_scan_session_id": null,
      "last_scan_session_status": null,
      "manual_intervention": null,
      "target_id": "2df49409-ee21-4080-9640-eb46f4610054",
      "type": "demo",
      "verification": "demo"
    }
  ],
  "pagination": {
    "count": 1,
    "cursor_hash": "24047a5e92ad218017ced583f7897397",
    "cursors": [null],
    "sort": null
  }
}
Step 3: Add an LSR (optional)
Skip this step if your target doesn't require authentication. If it does, upload a Login Sequence Recorder (LSR) file to authenticate the scanner during the scan.
Add authentication via Login Sequence Recorder
A Login Sequence Recorder (LSR) is a type of authentication available in Invicti, used in scenarios such as multi-page login, form authentication, and multi-field login. For more information, refer to Internal agent standalone LSR overview.
Uploading an LSR is a three-step process: request an upload URL, upload the file to that URL, and then configure the target to use LSR authentication.
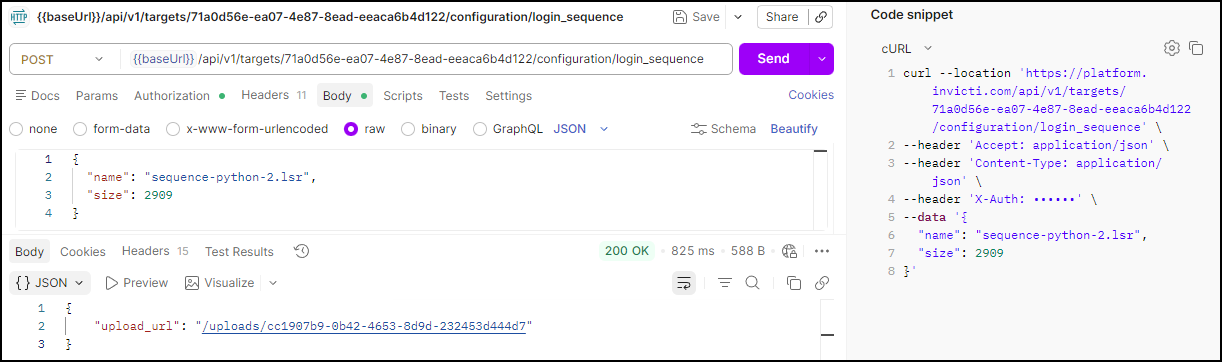
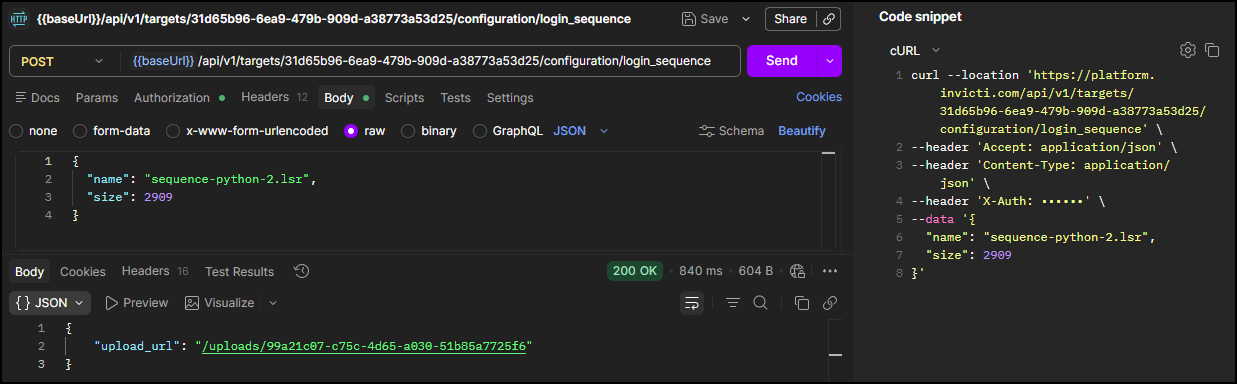
Step 3.1: Request an upload URL
POST <base-url>/api/v1/targets/<target-id>/configuration/login_sequence
Headers:
  accept: application/json
  content-type: application/json
  X-Auth: <your-api-token>
Body:
{
  "name": "<lsr-file-name>",
  "size": <file-size>
}
| Placeholder | Required | Description | Example |
|---|---|---|---|
<base-url> | Yes | Your regional platform URL. Refer to Platform URLs | https://platform.invicti.com |
<target-id> | Yes | The target ID from Step 2 | 2df49409-... |
<your-api-token> | Yes | Your API key from User settings | a1b2c3d4-e5f6-... |
<lsr-file-name> | Yes | The name of the LSR file | my-login-sequence.lsr |
<file-size> | Yes | The size of the LSR file in bytes | 2909 |
Expected response: 200 OK with a pre-signed upload URL. Note the upload_url - you need it in Step 3.2.
{
  "upload_url": "/uploads/15f4e9a2-6331-413d-9875-210gj72ffea0"
}
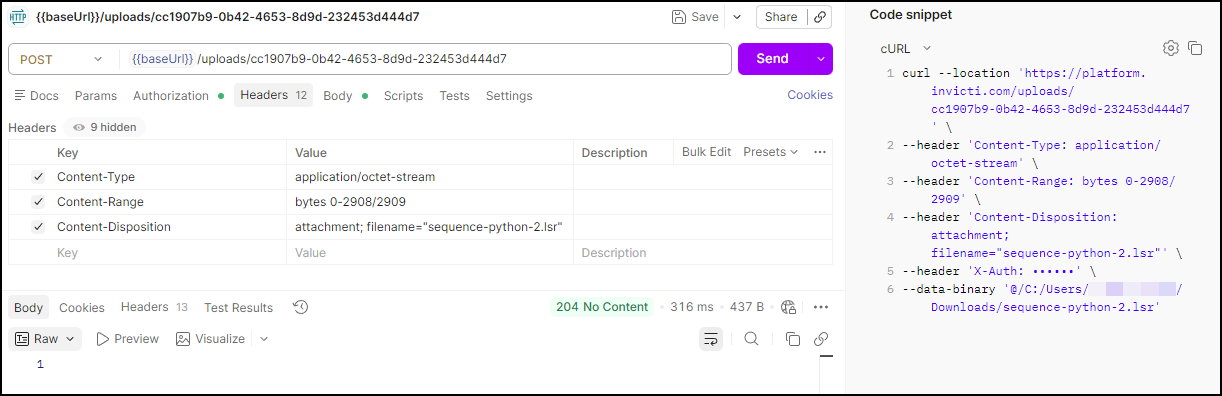
Step 3.2: Upload the LSR file
Use the upload_url from Step 3.1 to upload the LSR file to Invicti Platform:
POST <base-url><upload-url>
Headers:
  Content-Type: application/octet-stream
  Content-Range: bytes 0-<file-size-minus-1>/<file-size>
  Content-Disposition: attachment; filename="<lsr-file-name>"
Body:
  <binary content of the LSR file>
| Placeholder | Required | Description | Example |
|---|---|---|---|
<base-url> | Yes | Your regional platform URL. Refer to Platform URLs | https://platform.invicti.com |
<upload-url> | Yes | The upload_url value from Step 3.1 - append it directly to the base URL | /uploads/15f4e9a2-... |
<file-size-minus-1> | Yes | The last byte index: file size in bytes minus 1. | 2908 |
<file-size> | Yes | The total file size in bytes. | 2909 |
<lsr-file-name> | Yes | The name of the LSR file | sequence-python-2.lsr |
For the request body, select binary in your API client and choose the .lsr file from your local machine.
Expected response: HTTP 204 No Content - the upload was successful. This status means the server processed the request but has nothing to return. There is no response body.

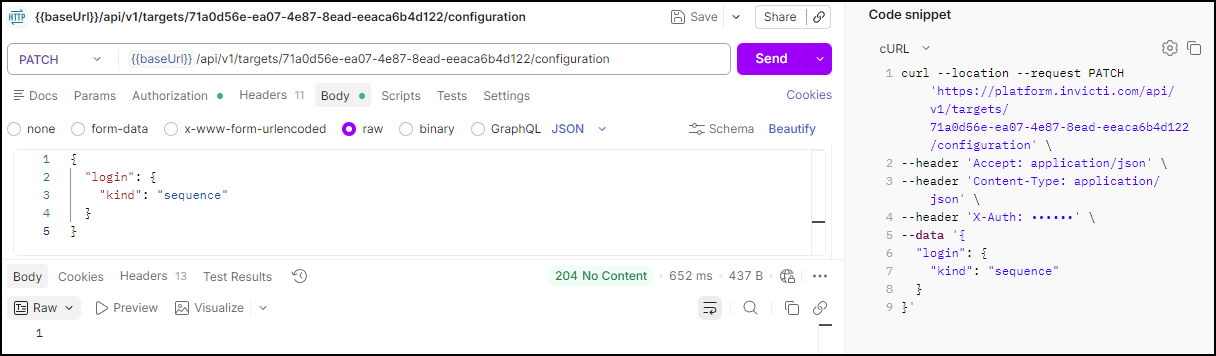
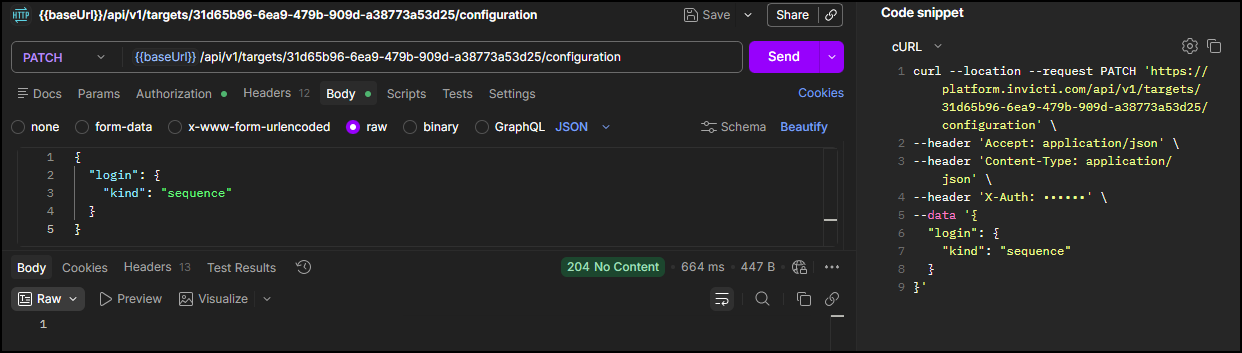
Step 3.3: Set the target authentication to LSR mode
Once you upload the LSR file, set the target's authentication mode to use it:
PATCH <base-url>/api/v1/targets/<target-id>/configuration
Headers:
  accept: application/json
  content-type: application/json
  X-Auth: <your-api-token>
Body:
{
  "login": {
    "kind": "sequence"
  }
}
| Placeholder | Required | Description | Example |
|---|---|---|---|
<base-url> | Yes | Your regional platform URL. Refer to Platform URLs | https://platform.invicti.com |
<target-id> | Yes | The target ID | 2df49409-ee21-4080-9640-eb46f4610054 |
<your-api-token> | Yes | Your API key from User settings | a1b2c3d4-e5f6-... |
Expected response: HTTP 204 No Content - the authentication mode was set successfully. This status means the server processed the request but has nothing to return. There is no response body.
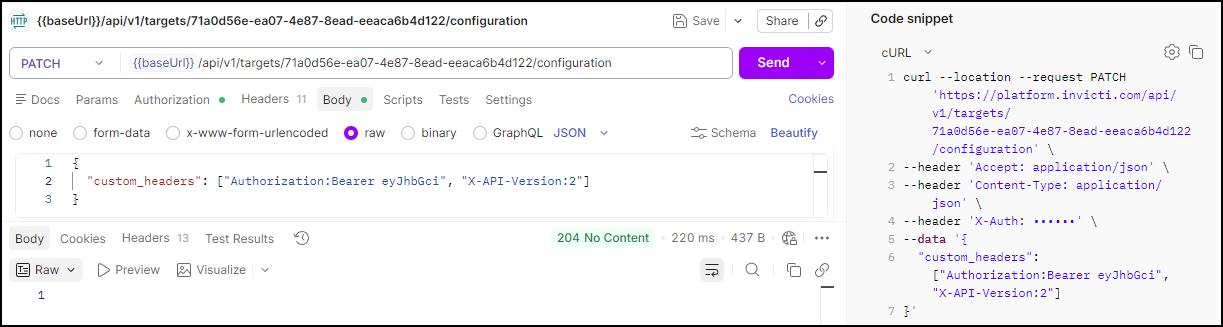
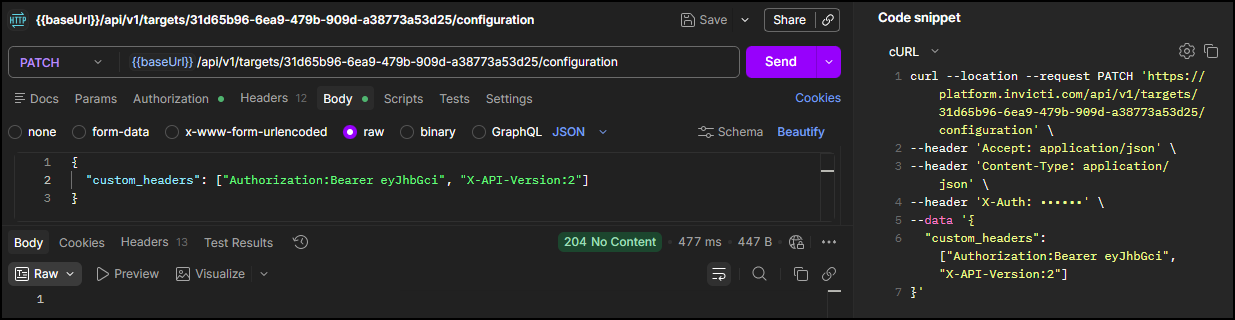
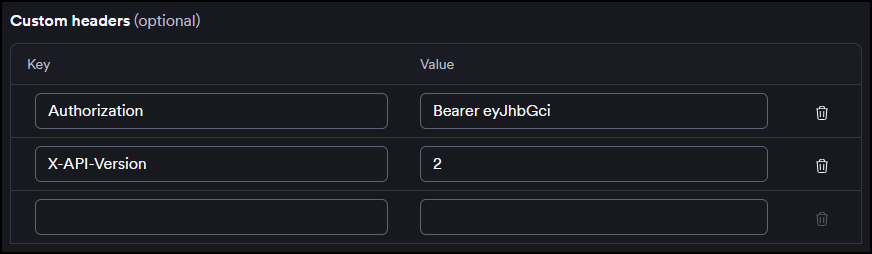
Step 4: Update custom headers (optional)
Some parameters of a target configuration can be updated via the API. Use the target_id from Step 2 to update the custom header fields. Custom headers are set at the target level, so they apply to all scans on that target. For more information, refer to Custom headers in Target's scan configuration.
Run this request to update the custom header
PATCH <base-url>/api/v1/targets/<target-id>/configuration
Headers:
  accept: application/json
  content-type: application/json
  X-Auth: <your-api-token>
Body:
{
  "custom_headers": ["<header-name>:<header-value>"]
}
| Placeholder | Required | Description | Example |
|---|---|---|---|
<base-url> | Yes | Your regional platform URL. Refer to Platform URLs | https://platform.invicti.com |
<target-id> | Yes | The target ID from Step 2 | 2df49409-... |
<your-api-token> | Yes | Your API key from User settings | a1b2c3d4-e5f6-... |
<header-name>:<header-value> | Yes | One or more custom headers in name:value format. Add multiple strings to the array as needed | header1:value1 |
Expected response: HTTP 204 No Content - the custom headers are set in the target configuration.
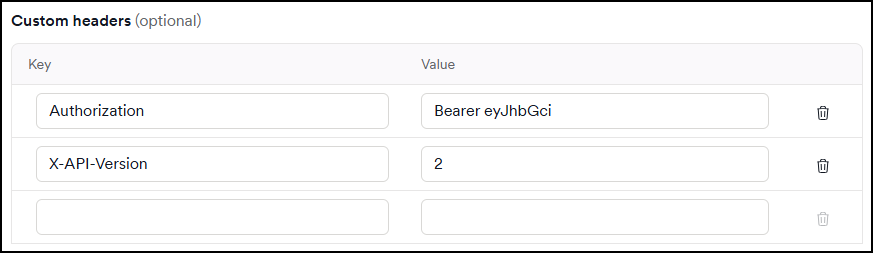
You can also validate this in the UI, as shown below.
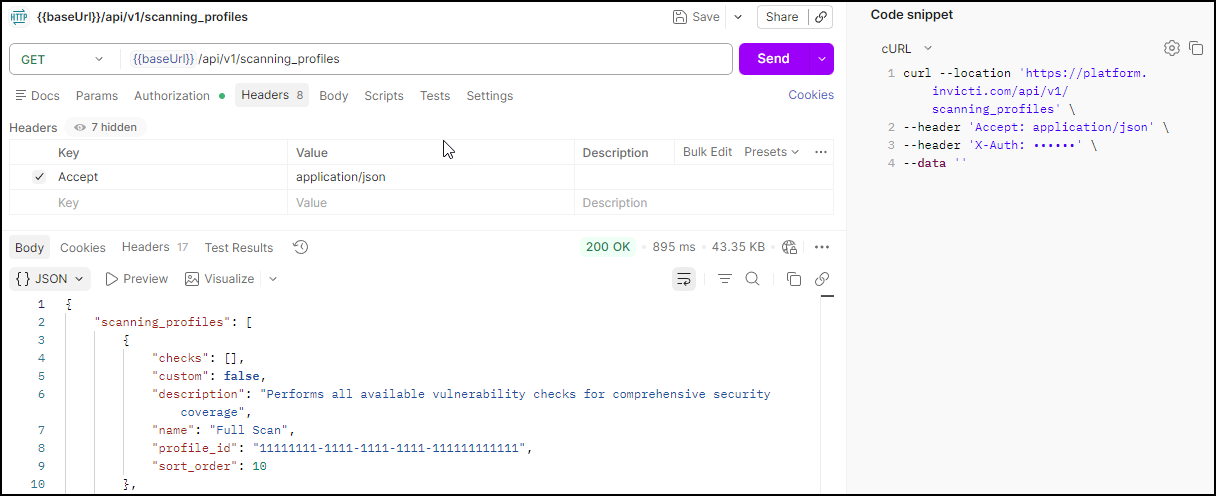
Step 5: Get the profile_id (optional)
Skip this step if you're using one of the built-in scan profiles - their IDs are listed at the end of this section. Run this request only if you want to use a custom profile you've created and need to find out the profile ID.
Run this request to get the scan profile ID
If you want to use one of the built-in scan profiles, you can skip this step. The profile IDs are listed at the end of this section. If you want to use a custom profile, run this request to retrieve your available profiles and note the profile_id (UUID):
GET <base-url>/api/v1/scanning_profiles
Headers:
  accept: application/json
  X-Auth: <your-api-token>
Expected response: HTTP 200 with a list of scanning profiles. Note the profile_id of the profile you want to use. Each profile also includes a checks array listing all the vulnerability checks it runs which can be very long for built-in profiles.
{
  "scanning_profiles": [
    {
      "checks": [],
      "custom": false,
      "description": "Performs all available vulnerability checks for comprehensive security coverage",
      "name": "Full Scan",
      "profile_id": "11111111-1111-1111-1111-111111111111",
      "sort_order": 10
    }
  ]
}
Common built-in scanning profiles
Use these profile IDs for quick access to standard scan configurations:
| Profile Name | Profile ID | Use Case |
|---|---|---|
| Full Scan | 11111111-1111-1111-1111-111111111111 | Comprehensive vulnerability assessment |
| Critical / High Risk Vulnerabilities | 11111111-1111-1111-1111-111111111112 | Focus on severe security issues |
| Cross-site Scripting Vulnerabilities | 11111111-1111-1111-1111-111111111116 | XSS-specific testing |
| SQL Injection Vulnerabilities | 11111111-1111-1111-1111-111111111113 | Database security testing |
| Weak Passwords | 11111111-1111-1111-1111-111111111115 | Authentication security |
| Crawl Only | 11111111-1111-1111-1111-111111111117 | Discovery without vulnerability testing |
Summary
You have now configured the essential components for API-driven scanning:
✅ Target created - Your application is registered in the inventory
✅ Target ID obtained - Required for scan operations
✅ Authentication configured - Optional LSR setup complete
✅ Custom header updated - Optional target configuration applied
✅ Scan profile selected - Vulnerability testing parameters defined
Next steps
With your target configured, you're ready to execute and monitor scans:
→ Continue to Launch
Complete workflow series
- Overview
- Part 1: Get started
- Part 2: Configure ← You are here
- Part 3: Launch
- Part 4: Review and report
Need help?
Invicti Support team is ready to provide you with technical help. Go to Help Center