Send vulnerabilities manually to an issue tracking system
If you have configured an integration with an issue tracking system, such as Jira, GitHub, or Slack, you can send identified vulnerabilities from Invicti Enterprise or Invicti Standard to that integration. This enables you to streamline the issue-fixing process, saves you time, and eases the developer's life. You can export issues manually and/or automatically.
This document provides instructions for manually sending issues from the Issues and Recent Scans pages in Invicti Enterprise and sending vulnerabilities from Invicti Standard.
For information about setting up an integration with an issue tracking system, refer to Integrating Invicti Enterprise with an issue tracking system or Configure auto send to actions in Invicti Standard.
For information about automatically sending vulnerabilities after scanning has been completed, refer to Configuring notifications to report vulnerabilities to an issue tracking system (Invicti Enterprise).
How to send vulnerabilities manually from Invicti Enterprise
There are two ways to manually send issues to integrated issue trackers from Invicti Enterprise: from the Issues page or the Recent Scans page. Refer to the relevant instructions below according to your preferred method.
To manually export an issue from the Issues or Recent Scans pages, its status must be Present, Revived, False Positive, or Accepted Risk. Alternatively, the state of the issue must be New, Not Fixed, or Revived. If this condition is not met, the No Action Required information pop-up will appear.
Send vulnerabilities from the Issues page
- Select Issues then All Issues from the left-side menu. Alternatively, select Issues then To Do to view only issues that have been assigned to you.
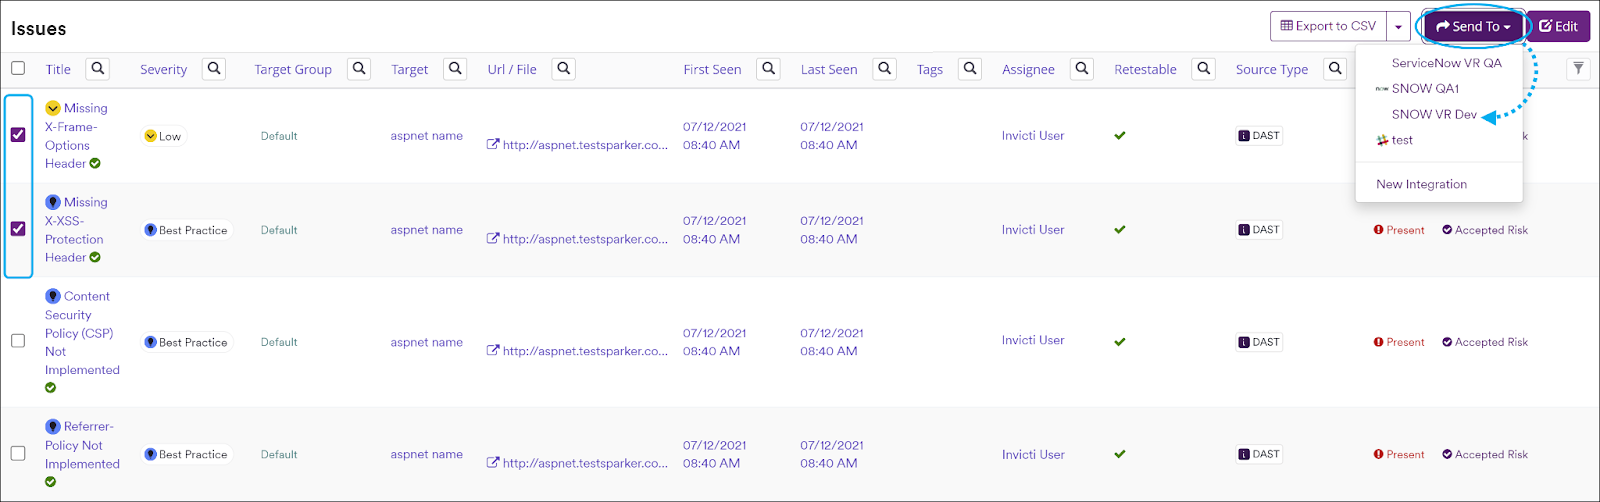
- Click the checkbox next to each vulnerability you want to send to your issue tracker.
- Click Send To, then select your issue tracker from the drop-down list of integrations.

A pop-up is displayed, with a link to the issue you have sent. If there is an error, this information will be displayed instead.
Send vulnerabilities from the Recent scans page
- Select Scans > Recent Scans from the left-side menu.
- Next to the relevant scan, select Report.
- Scroll down to the Technical Report section.
- From the list of detected vulnerabilities, select an issue and display its details.
- Click Send To, then select your issue tracker from the drop-down list of integrations.

- Once the issue has been imported into your issue tracking system, a notification is going to appear with a link for the issue number. Click OK to close the notification.
You can't export the same issue more than once.
Send multiple vulnerabilities manually to an issue tracking system
- Select Issues > To Do from the left-side menu.
- Check the checkbox next to each issue you want to send.
- Click Send To, then select the relevant issue tracker project from the drop-down.
- The issues are imported into your issue tracking system.
For more information on managing issues in Invicti Enterprise refer to Viewing issues in Invicti Enterprise.
Review scan results and imported vulnerabilities
If the vulnerability has already been automatically created in your issue tracking system (because it meets the criteria configured in Configuring Endpoint Integration), the issue number will be displayed. The grouping of each vulnerability into a family is an automatic process and does not impact your review of scan results.
Once you have configured the integration, a new Send To button is added to every reported vulnerability listed in the scan results. This enables you to send the vulnerability to any of the integrated projects.
You can view the details saved in your issue tracking system by clicking on the issue number.
Tracking and logs of issues sent to issue tracking systems
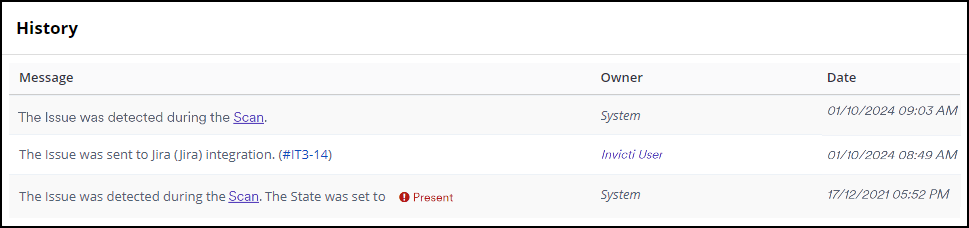
When a vulnerability is sent to your issue tracking system, Invicti Enterprise creates a record in the History section of the issue's details page. To access the History log, select the issue title from the Issues page, then scroll down to the bottom of the page.
Send vulnerabilities from Invicti Standard
- From the ribbon, select the File tab. Local Scans are displayed.
- Double-click the relevant scan to display its results.
- In the Issues panel, right-click the vulnerability you want to export and select Send to [Integration]. Alternatively, from the ribbon, select the Vulnerability tab, then Send To [Integration].
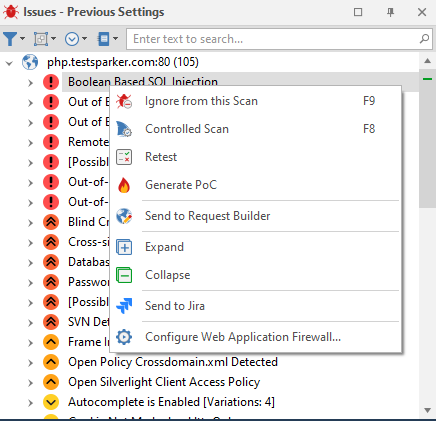
A confirmation message and link are displayed at the bottom of the screen.
Need help?
Invicti Support team is ready to provide you with technical help. Go to Help Center