Deployment: Invicti Platform on-demand, Invicti Platform on-premises
Google Single Sign-On integration with SAML
This document explains how to configure Google and Invicti Platform for Single Sign-On, so your users sign in to Invicti with their existing Google accounts.
Google offers a Single Sign-On service as part of its Cloud Identity product, providing single-click access to applications. For additional information, refer to the Google support documentation.
Why this matters
Centralize user identity in Google so admins manage one source of truth instead of two. Users authenticate with their existing Google accounts and never set or rotate a separate Invicti password. With auto-provisioning, new users get an Invicti account automatically on first sign-in - no manual onboarding step required.
Configure Google with SAML
There are three steps in this process:
- Step 1: Configure Google Single Sign-On with SAML
- Step 2: Assign users in Google
- Step 3: Configure auto-provisioning (optional)
Step 1: Configure Google Single Sign-On with SAML
- In the Google Admin console, select Apps > Web and mobile apps.
- From the Web and mobile apps page, select Add app > Add custom SAML app.
- On the Add custom SAML app page, enter a name for your app. This example uses Invicti.
- Click Continue. The Google Identity Provider details page appears with the SSO URL, Entity ID, and Certificate. You can copy these values now, or download them as a metadata XML file after finishing the wizard (covered in step 14).
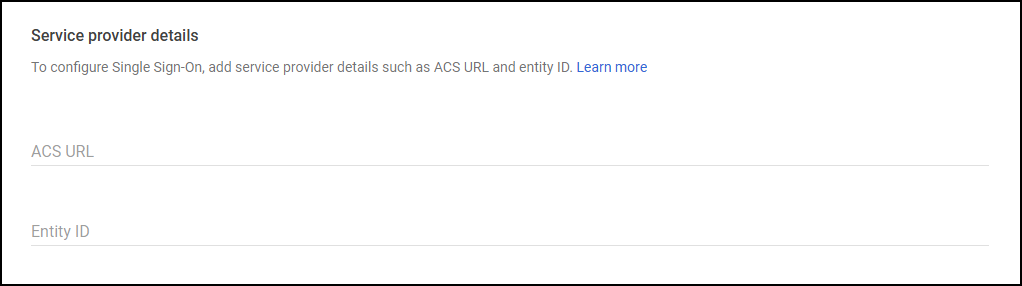
- Click Continue. The Service provider details section appears.
- In a new browser tab, log in to Invicti Platform and select Settings > SSO & Provisioning.
- Turn on the Enable SSO toggle.
- Select Google from the SSO provider drop-down list.
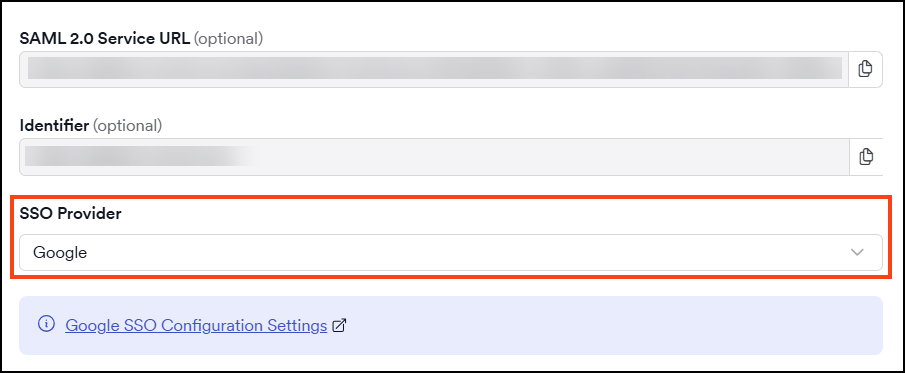
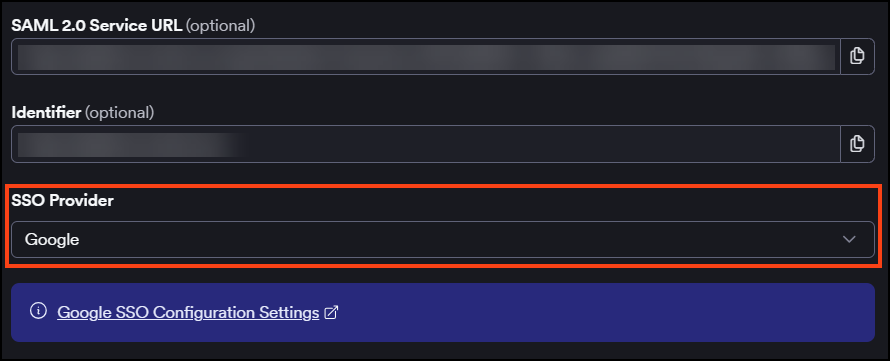
- Copy the SAML 2.0 Service URL from Invicti and paste it into the ACS URL field in the Service provider details section in Google.
- Copy the Identifier from Invicti and paste it into the Entity ID field in the Service provider details section in Google.
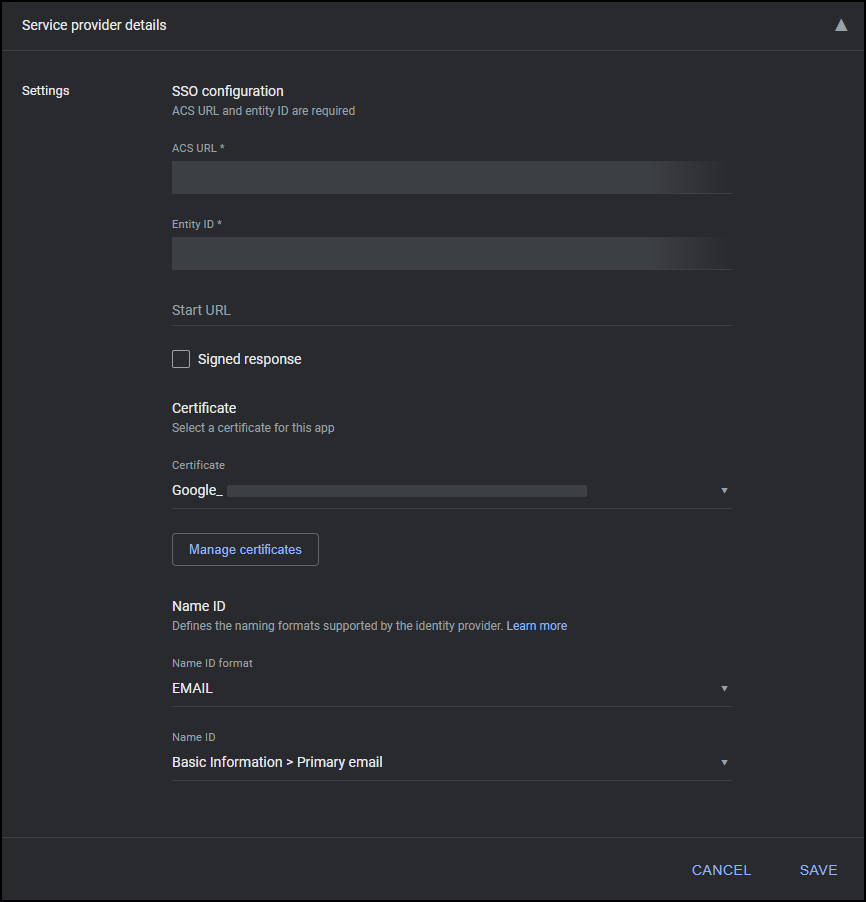
The Name ID format and Name ID value fields on the same page default to using the user's primary email, which is what Invicti expects. Don't change them unless you have a specific requirement.
- Click Continue in the Google Admin console. The Attribute mapping page appears, which also includes a Group membership (optional) section.
You can leave the Group membership section empty - Invicti doesn't currently use SAML group claims for role assignment. New users get the default role configured under Default access for new users and teams.
- Click Continue to skip attribute mapping for now. You'll configure attribute mappings in Step 3: Configure auto-provisioning if you want to provision users automatically.
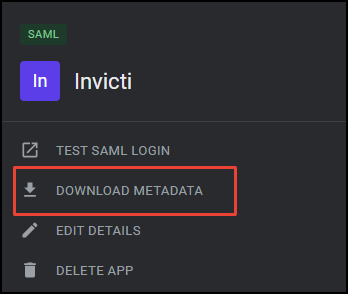
- Click Finish in your Google Admin console. The Invicti app's details page appears.
- On the app's details page, click Download metadata to download the Google IdP metadata XML file.

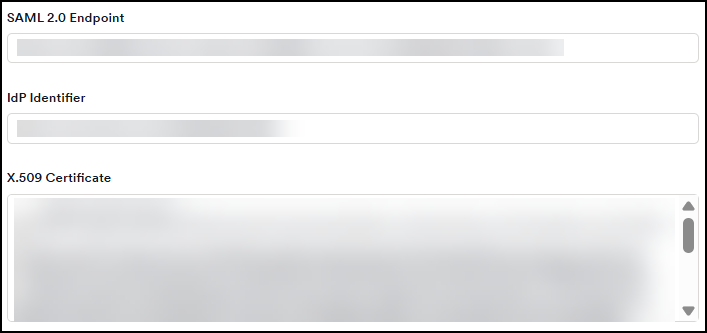
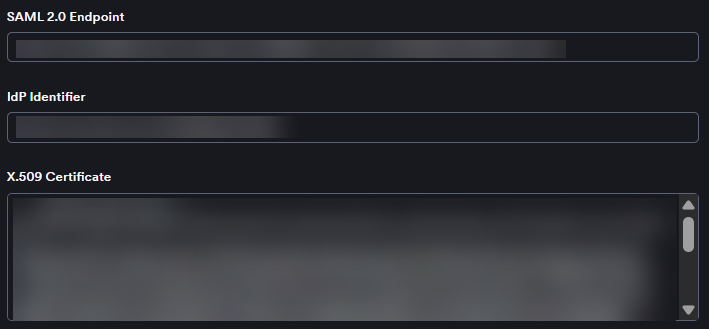
- Open the downloaded metadata XML. Copy the value of the
entityIDattribute on the root<EntityDescriptor>element, switch to the Invicti browser tab, and paste it into the IdP Identifier field. - From the same XML, copy the
Locationattribute on the<SingleSignOnService>element and paste it into the SAML 2.0 Endpoint field in Invicti. - From the same XML, copy the content of the
<X509Certificate>element and paste it into the X.509 Certificate field in Invicti.
- In Invicti, select the checkboxes for signed assertions, encrypted assertions, or sign requests as needed.
- If you enable any assertions or requests, a new section appears where you can Generate a new certificate or upload an existing one.
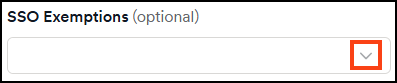
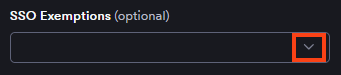
- Use the SSO exemptions drop-down to select users who can log in to Invicti via password.
- Click Save.
Step 2: Assign users in Google
- In the Google Admin console, open the Invicti app's settings page.
- In the User access section, set the access to On for everyone, or scope it to a specific organizational unit or group.


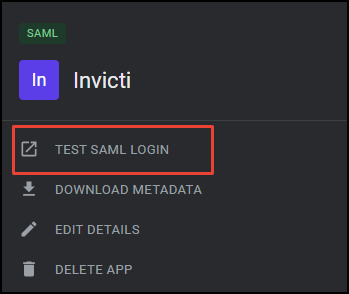
Google can take up to 24 hours to propagate user access changes. The Test SAML login button works immediately for the signed-in admin, but end-user logins may fail until propagation completes.
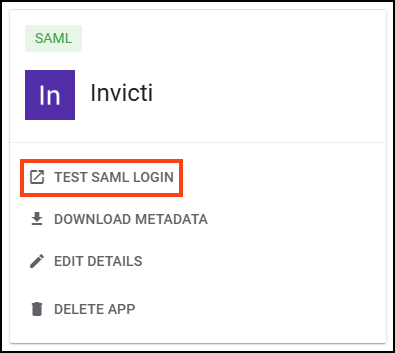
- To verify the connection, click Test SAML login on the Invicti app's page.
Users who exist in both Google and Invicti Platform can now log in to Invicti via Google - either by clicking the Invicti tile from Google's apps menu (IdP-initiated) or by using the SSO option on the Invicti login page (SP-initiated). If a user doesn't yet have an Invicti account, see Step 3: Configure auto-provisioning.
Step 3: Configure auto-provisioning
Auto-provisioning automatically creates user accounts in Invicti when users log in via Google for the first time. To enable it, you must first add attribute mappings in Google so that Invicti receives the user's first and last name, then enable provisioning in Invicti.
You don't need to map the email address as an attribute. Invicti reads the email from the SAML Name ID, which defaults to the user's primary Google email (see the tip in Step 1).
Add attribute mappings in Google
- In the Google Admin console, open the Invicti SAML app.
- Expand the Attribute mapping section and click Add mapping.
- Add the following attribute mappings:
| Google directory attribute | App attribute |
|---|---|
Basic Information > First name | firstName |
Basic Information > Last name | lastName |
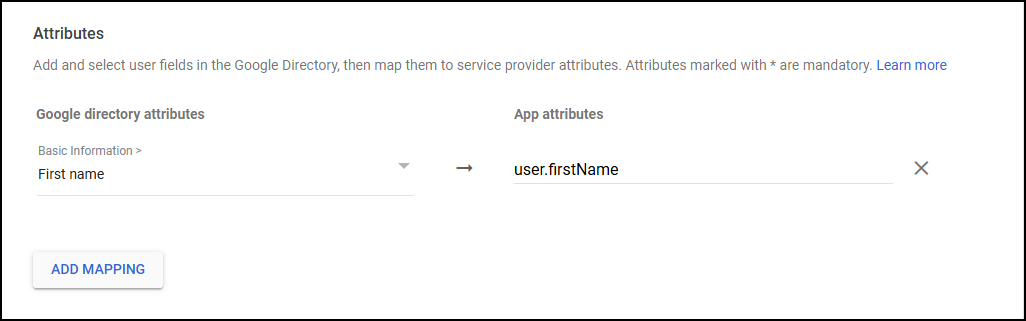

- Click Save.
The values in the App attribute column must be exactly firstName and lastName: lowercase first letter, case-sensitive. If the values don't match exactly, Invicti rejects the login with the error We encountered some issue with SSO login, please contact your administrator (and check whether e.g. configuration / certificate is still valid) and doesn't create a user. For more information, refer to the Single Sign-On configuration document.
Enable auto-provisioning in Invicti
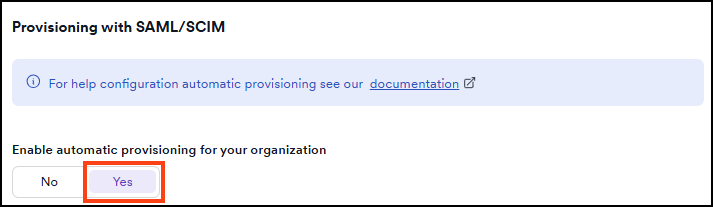
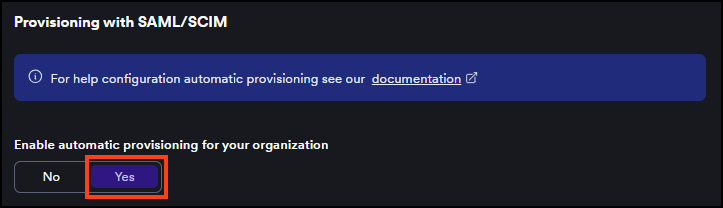
- In Invicti Platform, go to Settings > SSO & Provisioning.
- In the Automatic provisioning section, set the Enable automatic provisioning for your organization toggle to Yes.
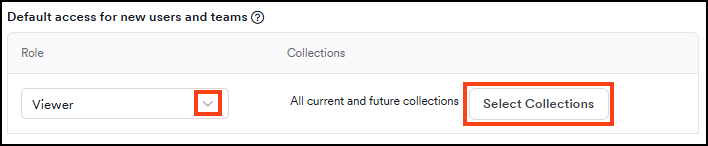
- In the Default access for new users and teams section, select a role from the Role drop-down to assign to newly provisioned users.
- Optionally, click Select collections to choose which collections new users can access. If you don't select any, new users get access to all current and future collections by default.

- Click Save.
For more information about SSO fields and auto-provisioning behavior, refer to the Single Sign-On configuration document.
Troubleshooting
Test SAML login redirects to Invicti, then Invicti shows an SSO error
The assertion reached Invicti but was rejected. Check the following Google-specific causes, then refer to the general SSO troubleshooting for the remaining checks.
- IdP Identifier doesn't match Google's Entity ID. In Invicti, the IdP Identifier field must contain Google's Entity ID - the
entityIDattribute on the root<EntityDescriptor>in the metadata XML - not the SSO URL. The two values differ by a/idppath segment and are easy to confuse. - Required attributes missing in the assertion. If auto-provisioning is enabled in Invicti, the assertion must include
firstNameandlastName(case-sensitive, lowercase first letter, no prefix). Invicti reads email from the SAML Name ID, so you don't need to map it as an attribute. Verify the mappings in Step 3: Configure auto-provisioning and confirm the test user's Google profile has both First name and Last name populated.
Test SAML login fails before reaching Invicti (Google error page)
Google returns its own error codes when it can't issue the assertion. For the full reference, refer to Google's SAML app error messages. The two most common:
app_not_enabled_for_user- User access isn't enabled for the user, or the change hasn't propagated. Confirm User access is set to On for everyone (or includes the test user's organizational unit), then wait up to 24 hours for the change to propagate.app_not_configured_for_user- The Entity ID on Invicti's side (Identifier field) doesn't match the value Google receives in the SAML request. The comparison is case-sensitive. Re-copy the Invicti Identifier value into Google's Entity ID field exactly.
Test SAML login button does nothing or opens a blank page
The test opens a new tab and submits an HTTP-POST form. Disable popup blockers for the Google Admin console domain and retry. If the new tab opens but stays blank, check the browser's Network tab to see whether the POST to Invicti's ACS URL completed.
Need help?
Invicti Support team is ready to provide you with technical help. Go to Help Center