Package: Invicti AppSec Core (on-demand)
Jira
To integrate Invicti AppSec with Jira:
- Navigate to your Invicti AppSec instance.
- Select Integrations from the left menu panel.
- Select Issue Managers on the Integrations page.
- Click the Activate button on Jira.
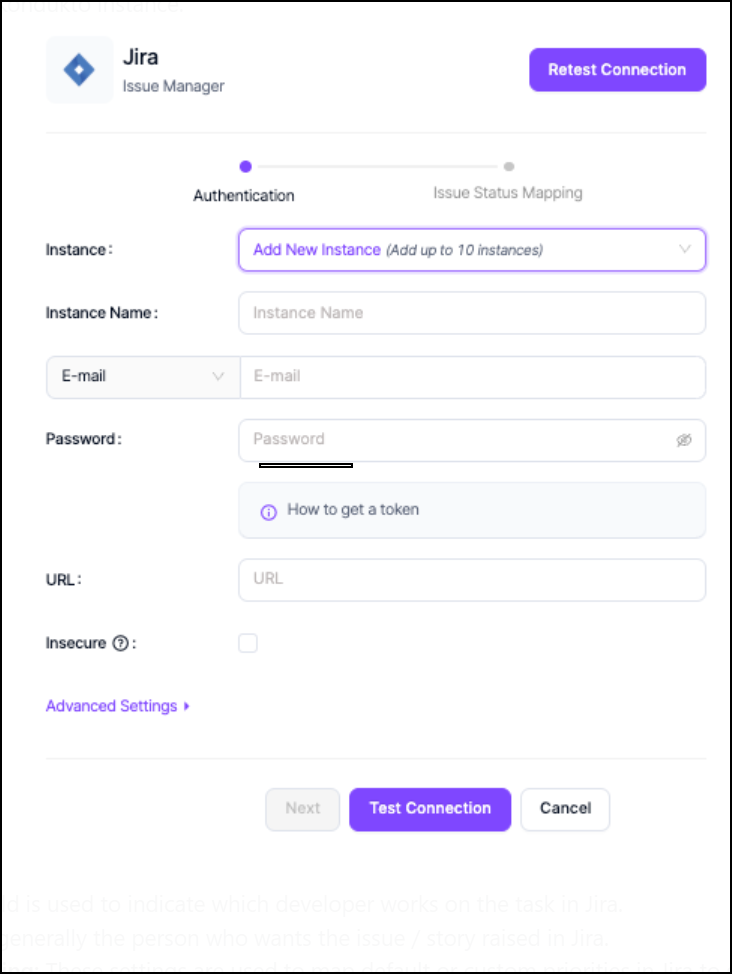
Jira credentials can be used directly for login, or a token can be created through Jira. Integration can be done using an email/password or username/token combination. If a password is not to be entered in Invicti AppSec and a token is used instead, a guide on how to create token is available below.
How to get a token
- Log on to your Jira account in your web browser.
- Click your profile in the upper right corner.
- Click Manage Account.
- Navigate to the Security tab on the left.
- Click Create and manage API tokens under API token or click the link below Jira API Token Page - Atlassian Account
- Click the Create API token button.
- Enter a label for your token, and make sure to copy the token. Once created, the API key can't be viewed or edited again.
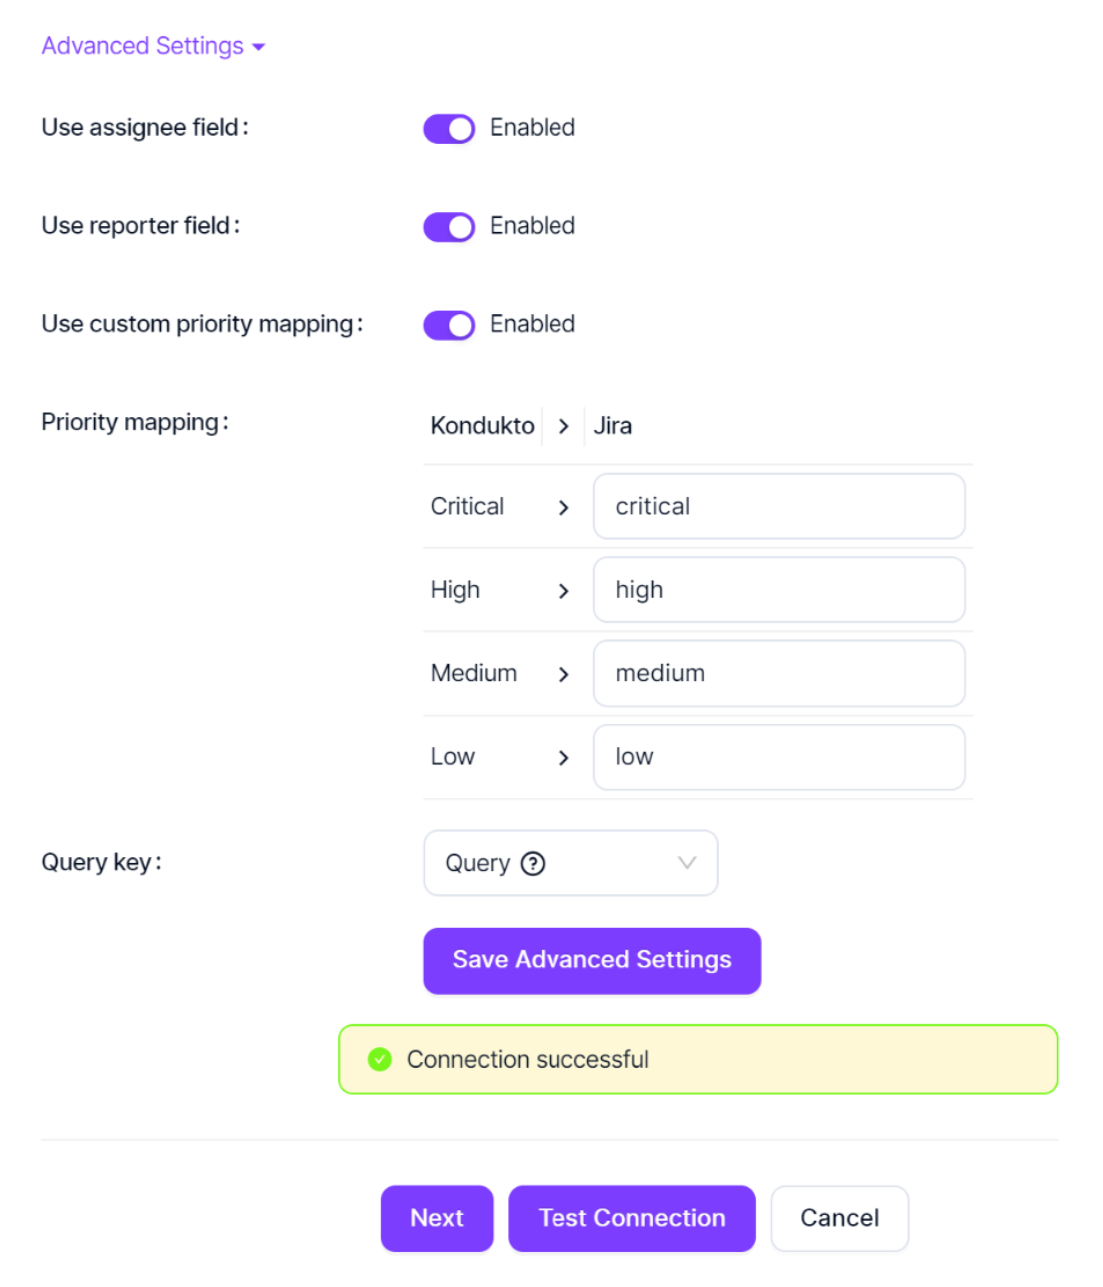
Advanced settings
You should enable these settings only if you're using these fields in your own Jira, as this causes the integration to break otherwise.
- Assignee field: this field is used to indicate which developer works on the task in Jira
- Reporter field: this is generally the person who wants the issue or story raised in Jira
- Custom priority mapping: these settings are used to map default or custom priorities in Jira to set prioritisation
Make sure the states chosen for opening, in progress and closing are linked to each other on Jira so that Invicti AppSec can create tickets and change or track their status on Jira successfully. This global setting can be changed under project settings if a different configuration is needed on a project level. To ensure the correct configuration, the organization's workflow can be reviewed and directly integrated into this section.

Jira instance
- You can see the list of statuses in Jira by clicking the gear icon in the upper right.
- Navigate to Issues from the menu.
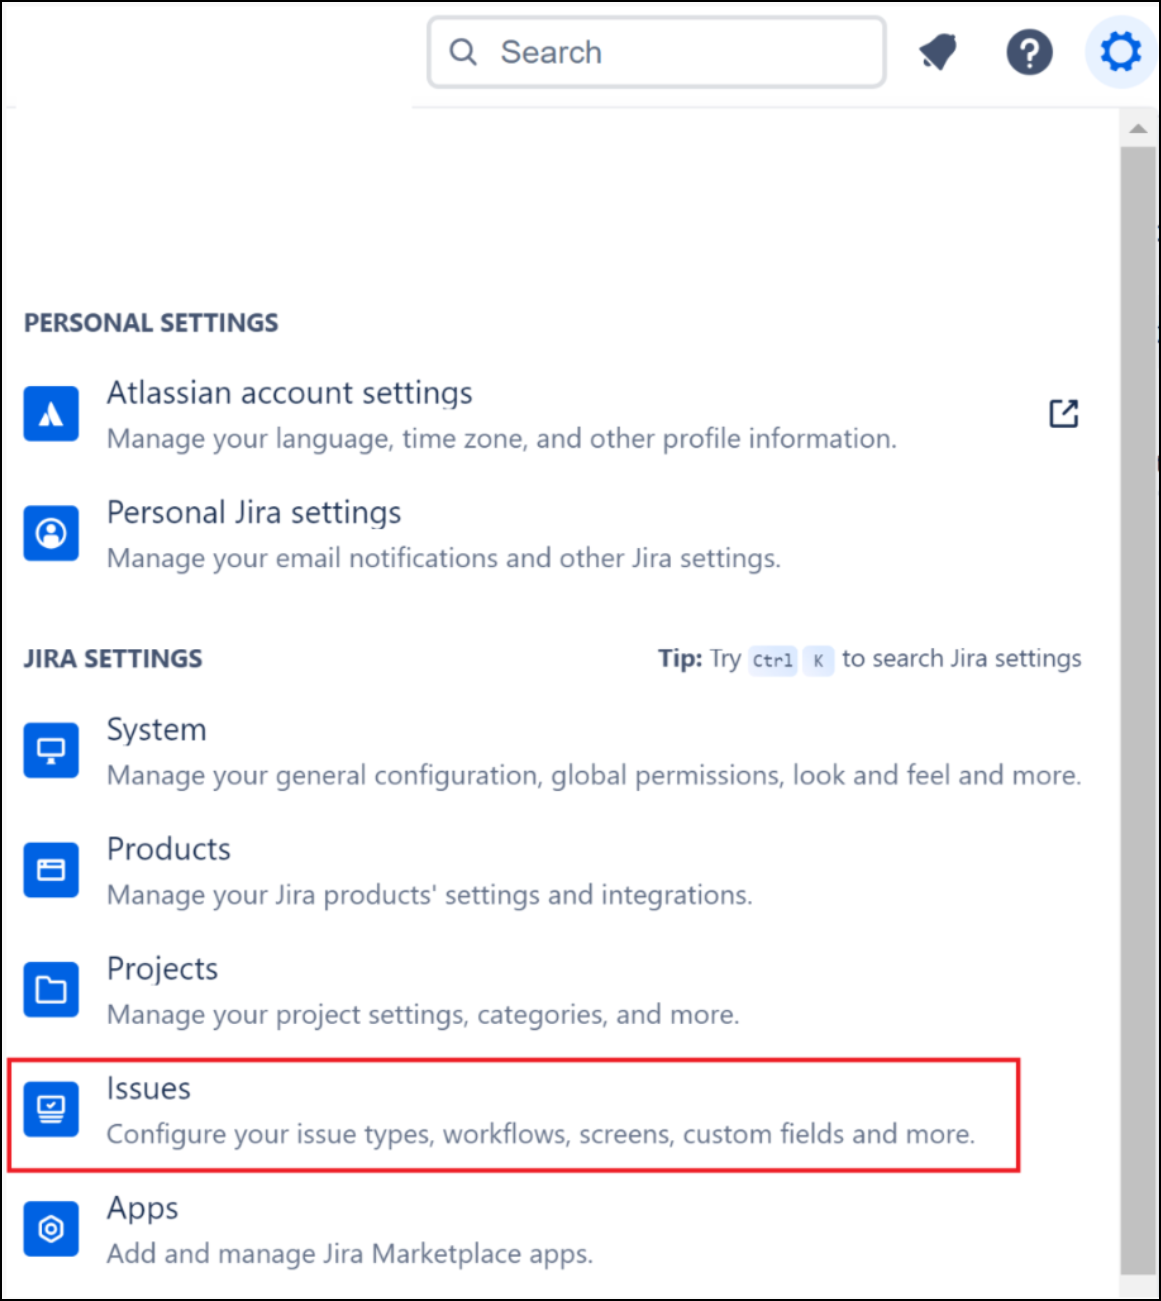
- At the bottom of the left panel, under the Issue Attributes, there's a Statuses view (screenshot is from a new project, everything is default here).
Finally, you should create a Jira project and copy the dashboard link. You can get help from the guides in Jira for the right type of project creation.
Assign issue manager to a project in Invicti AppSec
Once you've activated Jira as your issue manager, you can assign Jira as your issue manager to a given project.
- Navigate to your Invicti AppSec instance.
- Select Projects & Products from the left menu panel and choose Projects.
- Select a project from the list.
- Select the Settings tab in the tabs above the project.
- Select Issue Assignment.
- Choose Jira for the Issue Manager.
Custom fields
In Jira, you can select the issue type you wish to display on Invicti AppSec for issues that need resolution. Additionally, you can define specific custom fields to be used within Invicti AppSec. These custom fields can either be user-provided—where users manually input the required information—or they can be auto-filled using data already available within Invicti AppSec.
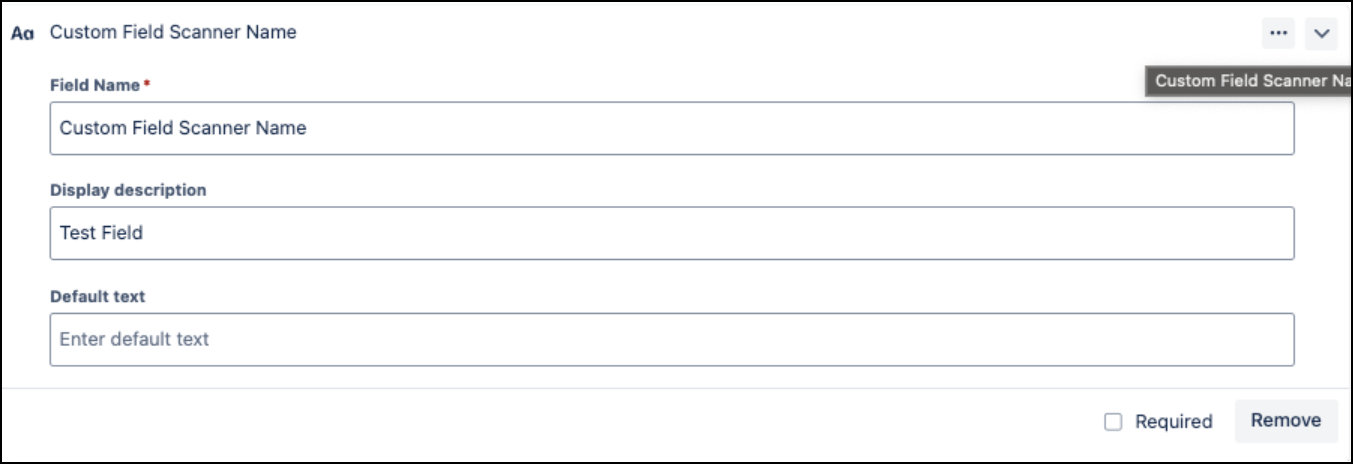
For example, you might add a Scanner custom field, or a Resolution Deadline field where users manually enter a due date. This flexibility allows for a more structured and automated issue-tracking process, ensuring that security findings are properly managed within Jira.
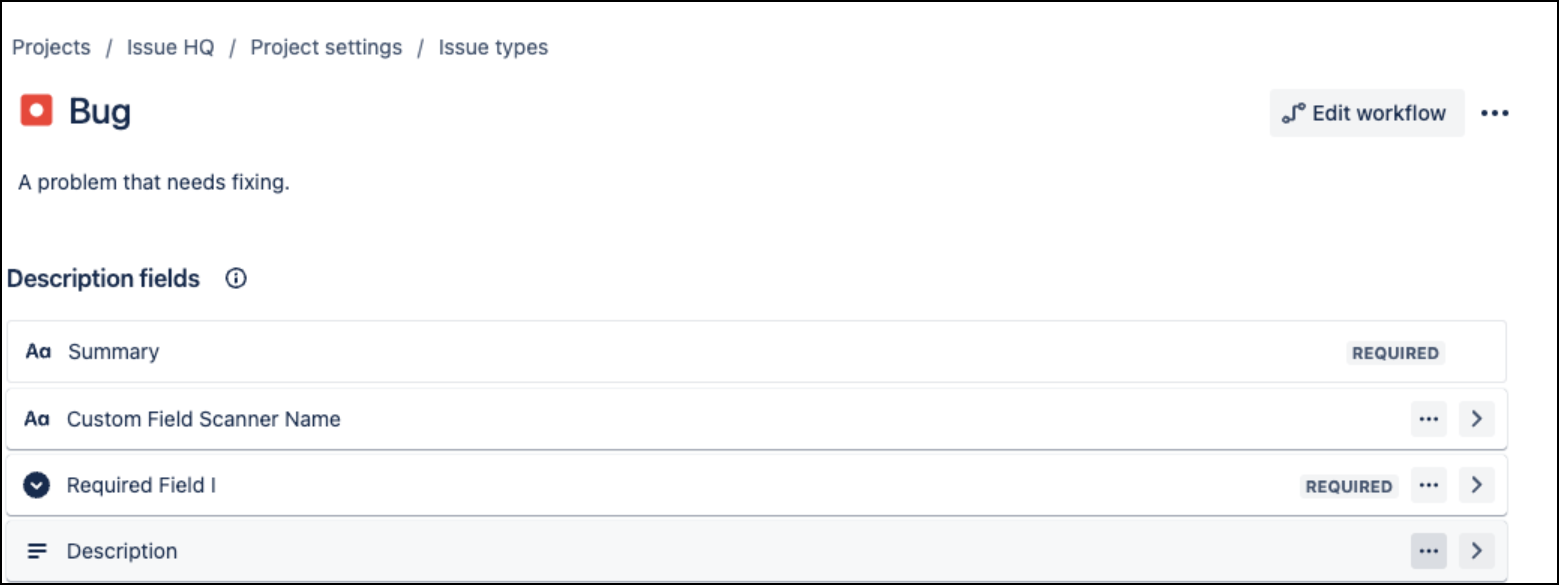
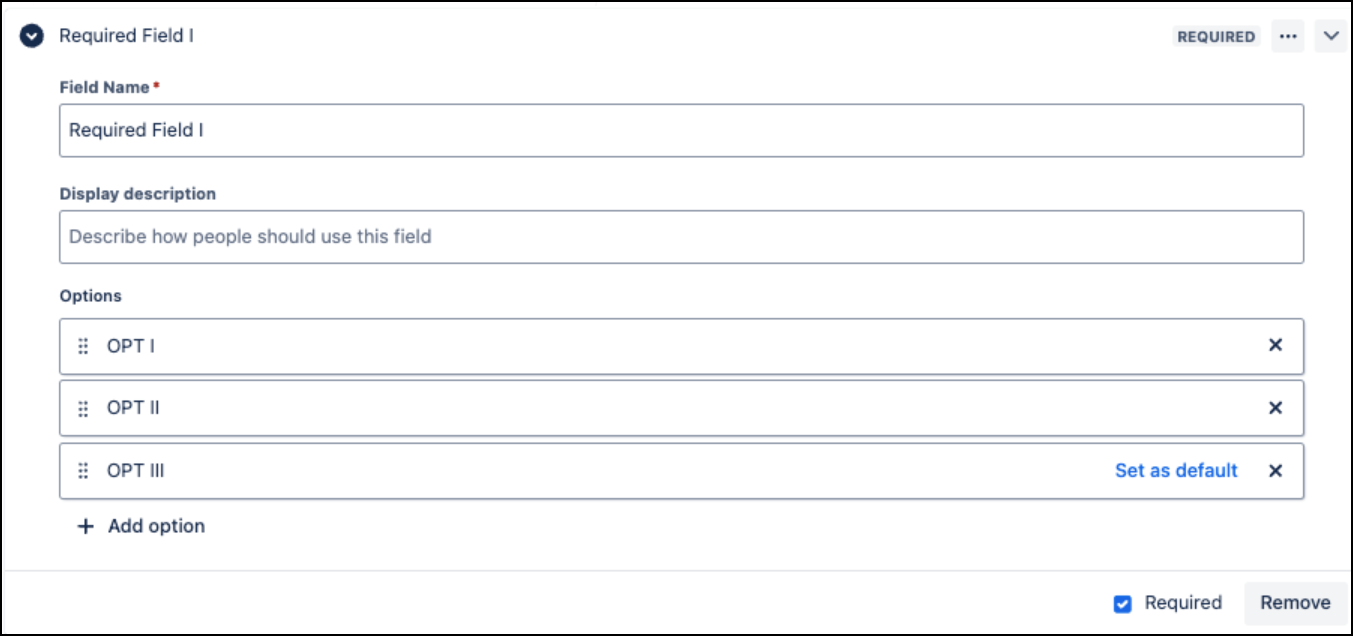
When adding fields, selecting the Required Field option ensures that the field is marked as mandatory. This means users must provide a value before proceeding. On the other hand, if a field isn't marked as required, it remains optional, allowing users to leave it empty if necessary.
This distinction helps enforce critical data entry while maintaining flexibility for less essential information.
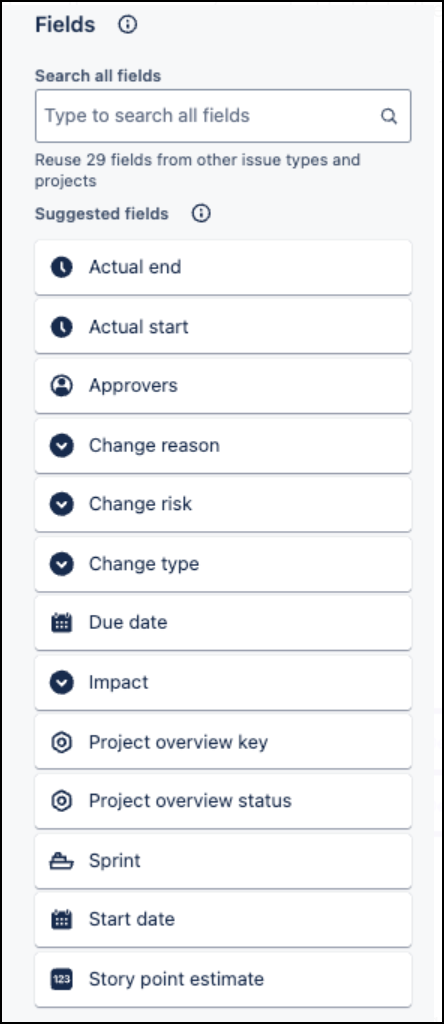
To customize, you can simply drag and drop other necessary or suggested fields to the section from the right-hand side.
In Invicti AppSec's issue management, you can select Jira as the issue manager and see the setting names that were configured in Jira.
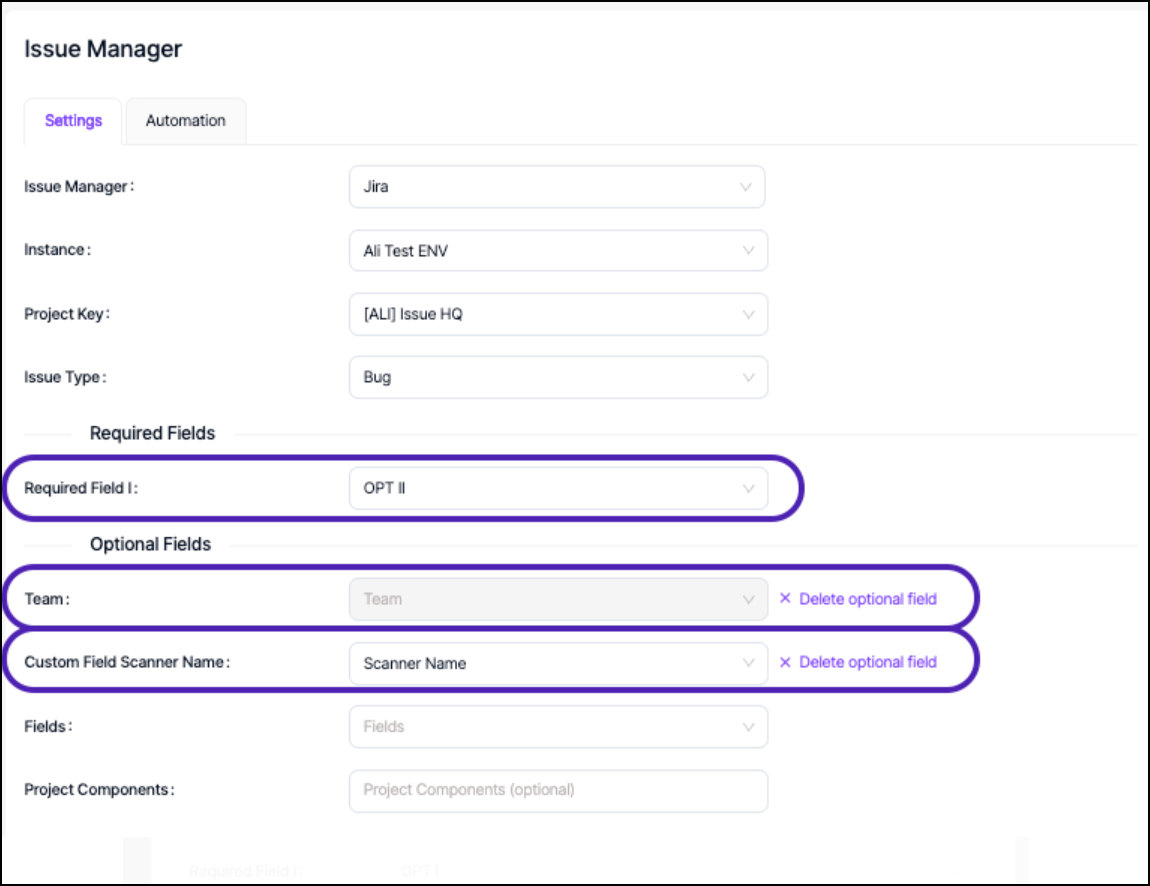
You also have the option to remove an optional field and add another. Simply navigate to Fields and select the ones you wish to display. In this section, if the Custom Field Scanner Name is set to the Scanner value in Invicti AppSec, the scanner information is automatically populated when creating an issue in Jira.
This allows Invicti AppSec to dynamically insert the relevant scanner details into the designated field without requiring manual input, ensuring consistency and reducing the risk of missing information.
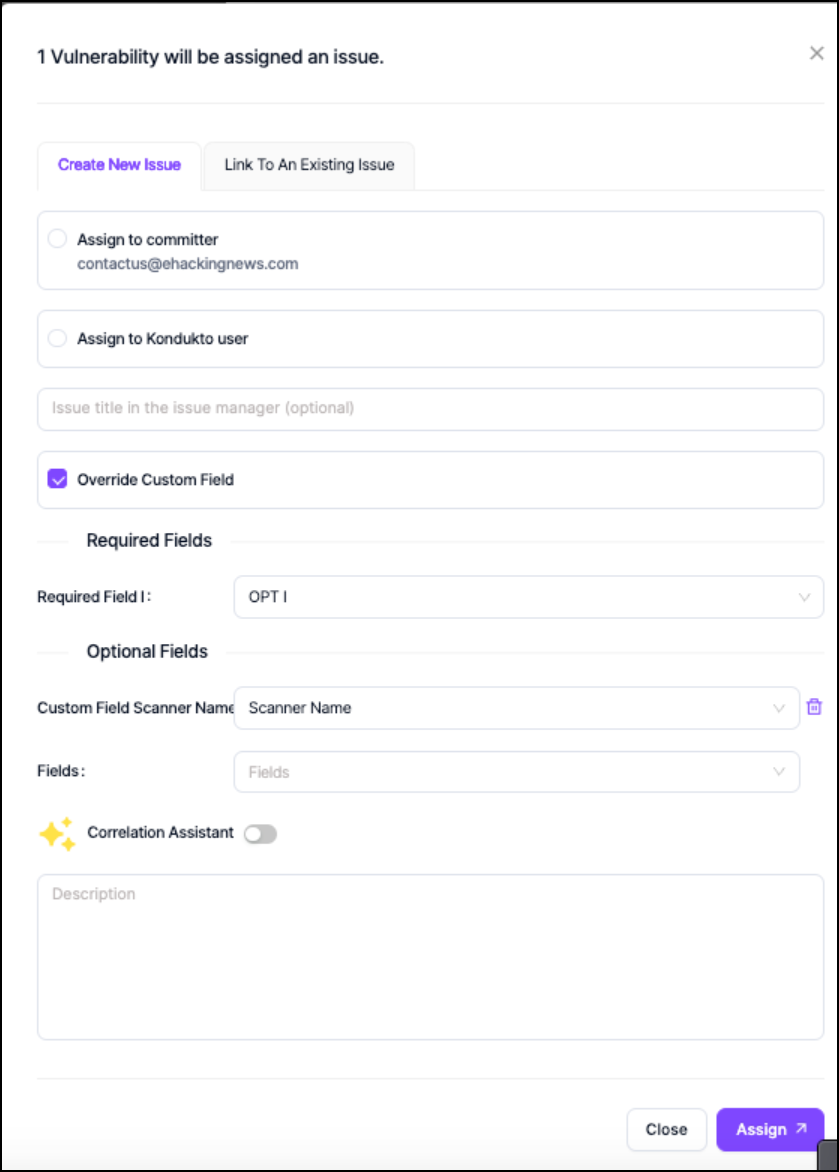
Once these settings are configured, Invicti AppSec uses them automatically when creating issues in Jira. However, when creating an issue manually, these settings can be overridden.
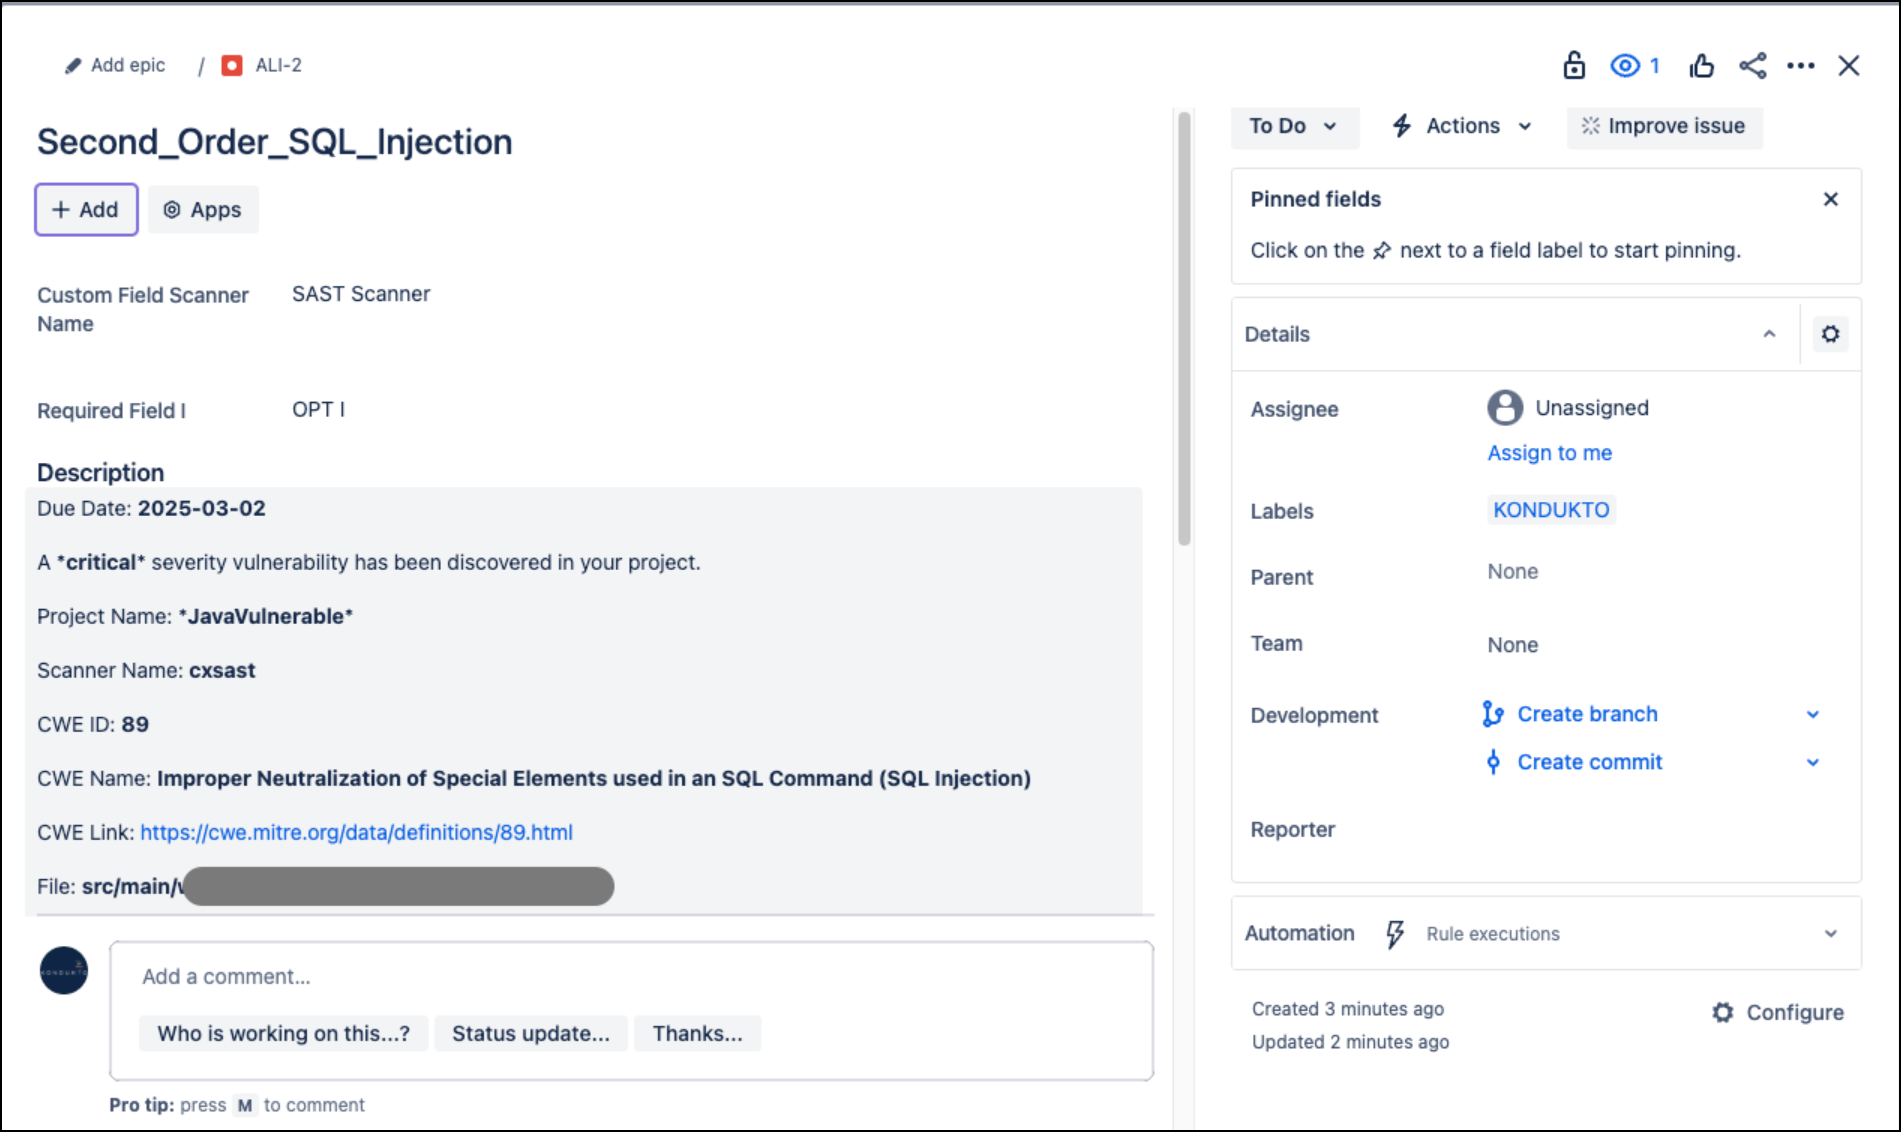
Once Issue Manager is selected and configured, you're now able to select from vulnerabilities scanned inside the project and create or assign an issue in the Invicti AppSec application, reflecting the issue inside Jira issues.
Need help?
Invicti Support team is ready to provide you with technical help. Go to Help Center