Package: Invicti AppSec Enterprise (on-premise, on-demand)
Fortify On Demand SAST
Invicti AppSec supports Fortify On Demand (FoD) as a SAST (Static Application Security Testing) scanner. This guide explains how to activate and configure the Fortify On Demand integration.
Fortify On Demand is a cloud-based application security testing service by OpenText (formerly Micro Focus) that provides SAST, DAST, and mobile security testing as a service.
Prerequisites
Before starting the integration, ensure you have the following information from your Fortify On Demand account:
| Field | Description | Required |
|---|---|---|
| Client ID | Your Fortify On Demand API Client ID | Yes |
| Secret Key | Your Fortify On Demand API Secret Key | Yes |
| URL | Your Fortify On Demand API URL (e.g., https://api.ams.fortify.com) | Yes |
| Insecure | Skip SSL certificate verification (not recommended for production) | No |
Get API Credentials (on Fortify On Demand Side)
- Log in to the Fortify On Demand portal.
- Navigate to Administration > Settings > API.
- Create or locate your API Client credentials (Client ID and Secret Key).
- Note your API URL based on your data center region:
- Americas:
https://api.ams.fortify.com - EMEA:
https://api.emea.fortify.com - APAC:
https://api.apac.fortify.com
- Americas:
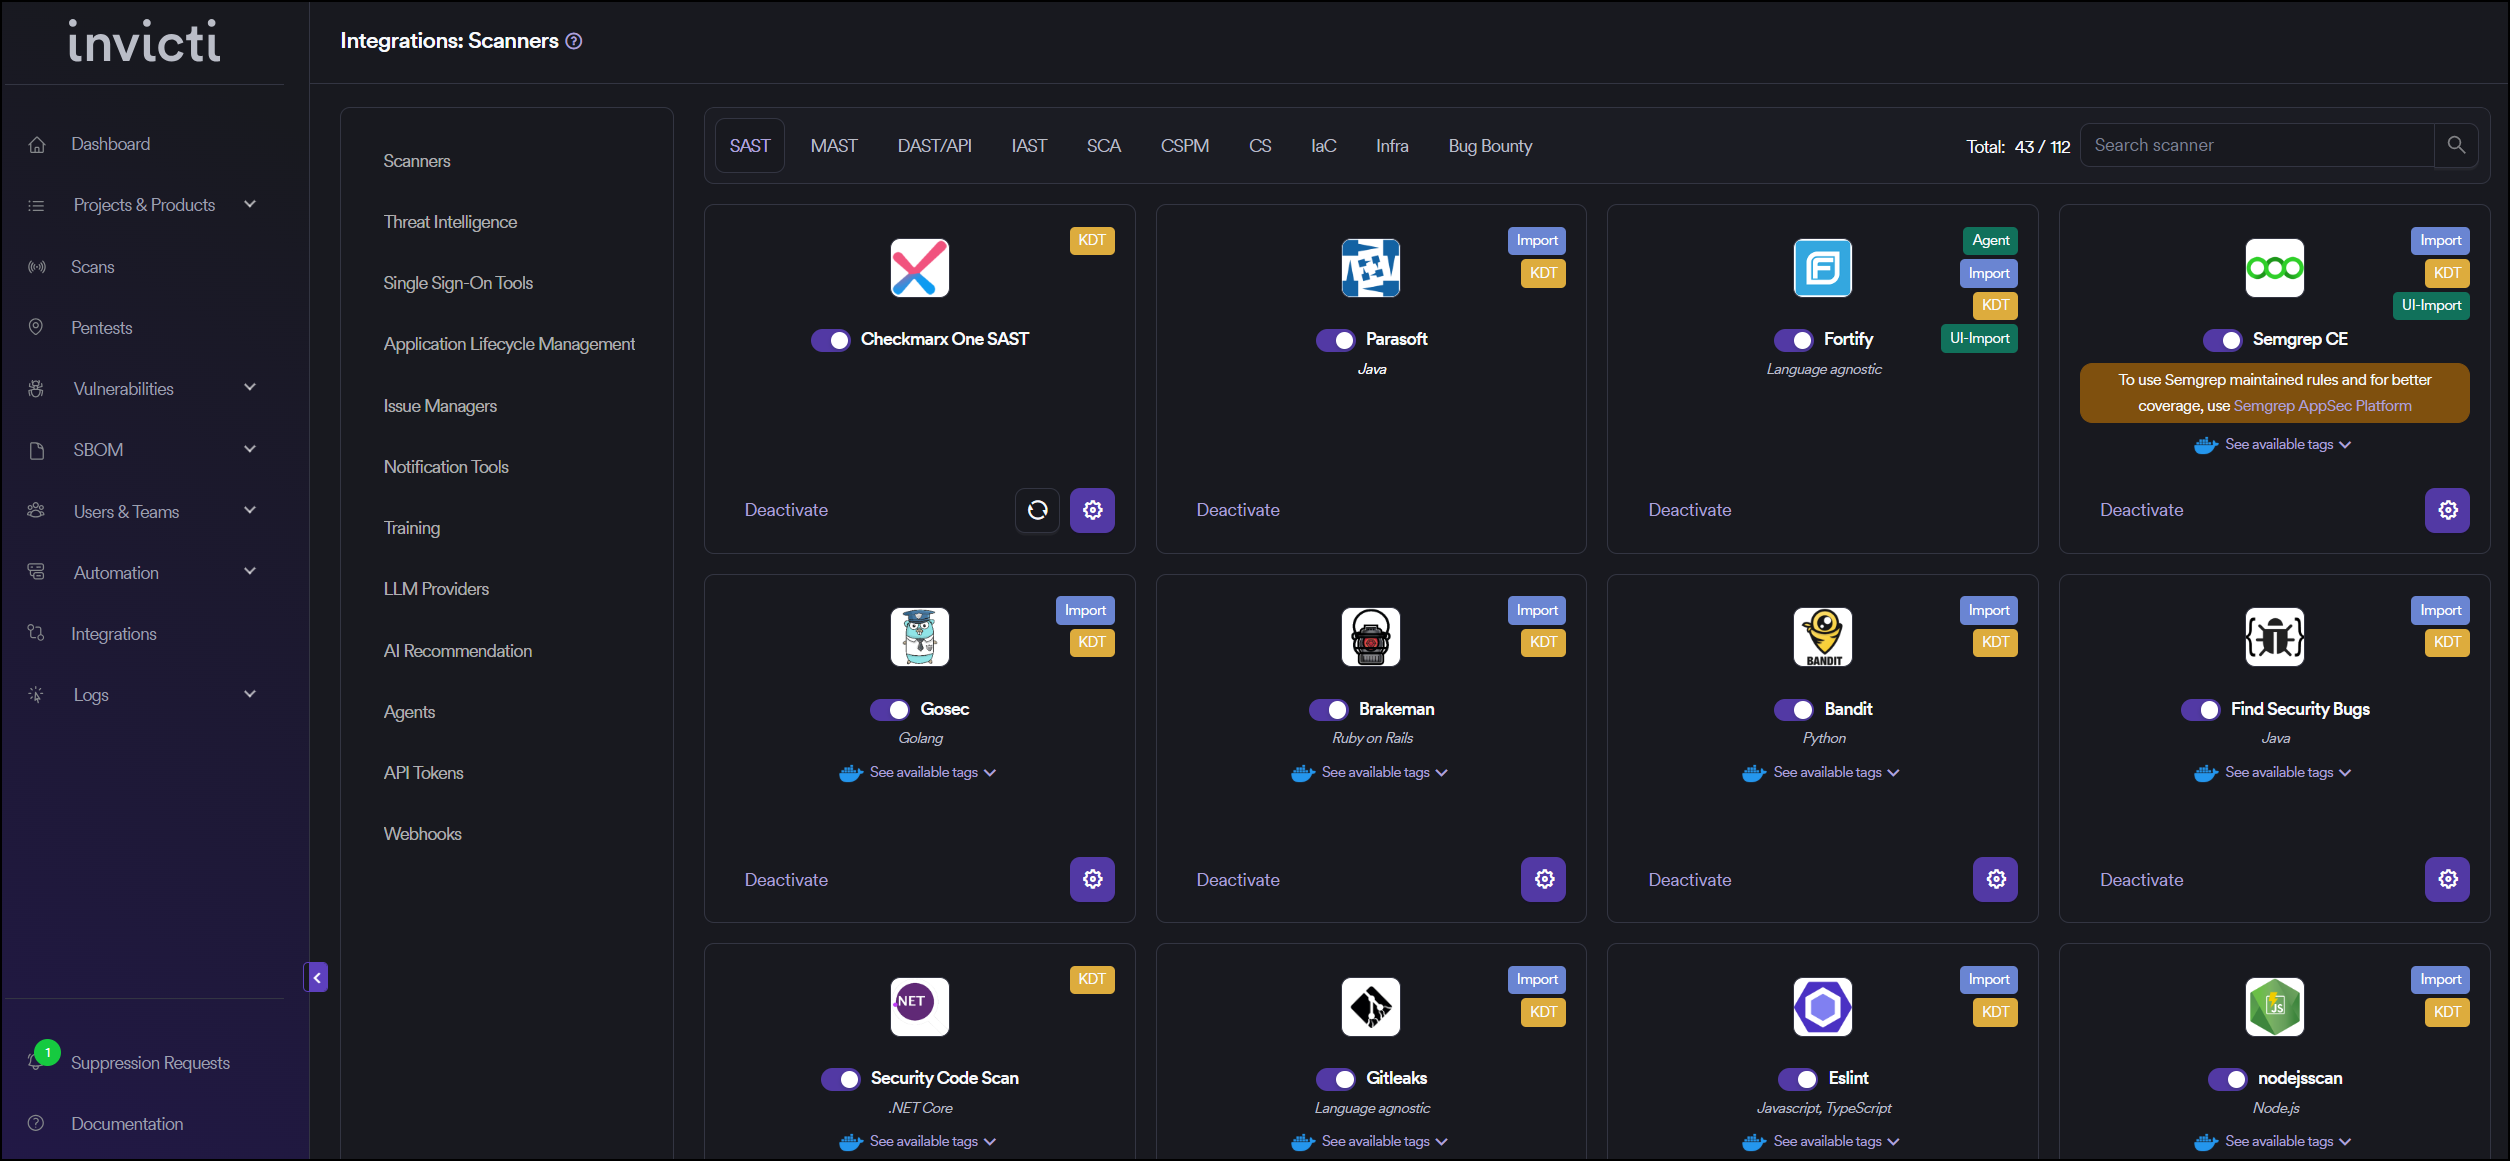
Step 1: Navigate to Integrations
From the left sidebar menu, click Integrations.
Step 2: Select the SAST Tab
On the Integrations page, you will see the Scanners section with multiple tabs. Click on the SAST tab (it is selected by default).
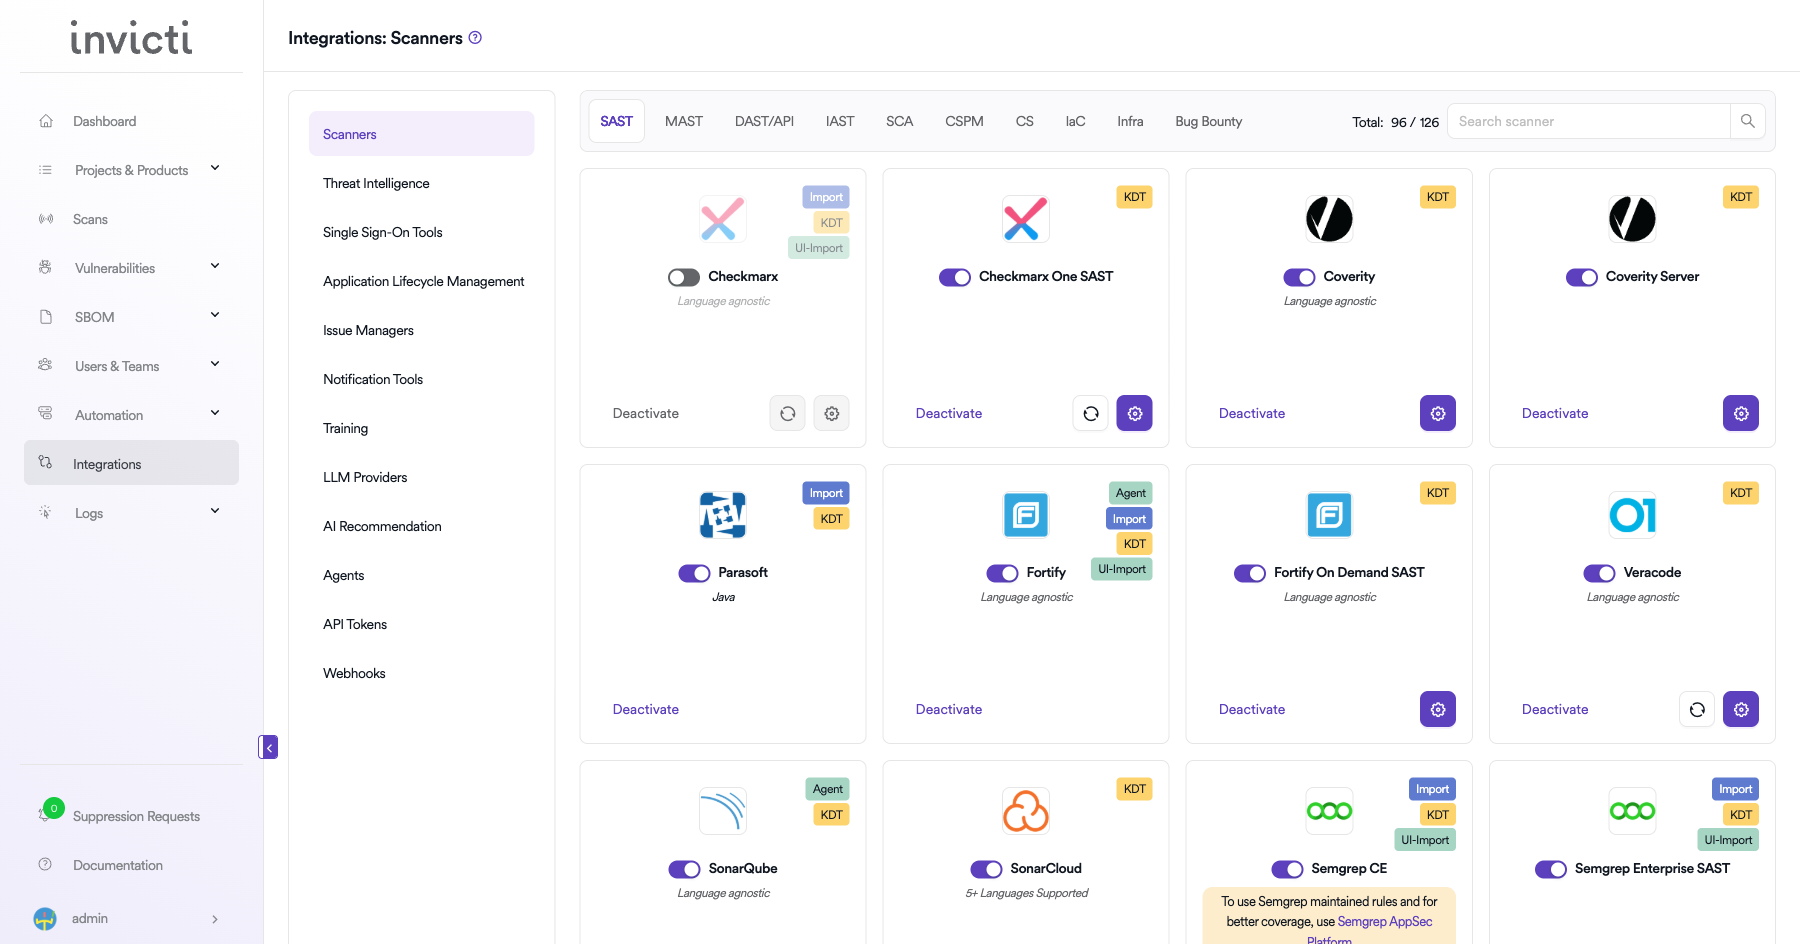
Step 3: Find and Activate Fortify On Demand SAST
Scroll through the list of SAST scanners to find Fortify On Demand SAST.
- If Fortify On Demand is not activated, you will see an "Activate" button. Click it to enable the integration.
- If Fortify On Demand is already activated, you will see a toggle switch in the ON position and a "Deactivate" button, along with a gear icon for configuration.
The scan method badge on the Fortify On Demand card shows KDT, which means scans are triggered through the Kondukto CLI tool (KDT).
Step 4: Configure Connection Settings
Click the gear icon on the Fortify On Demand card to open the configuration panel. Fill in the required fields:
- Client ID: Enter your Fortify On Demand API Client ID.
- Secret Key: Enter your Fortify On Demand API Secret Key.
- URL: Enter your Fortify On Demand API URL (e.g.,
https://api.ams.fortify.com). - Insecure: Enable this checkbox only if your Fortify On Demand instance uses a self-signed SSL certificate.
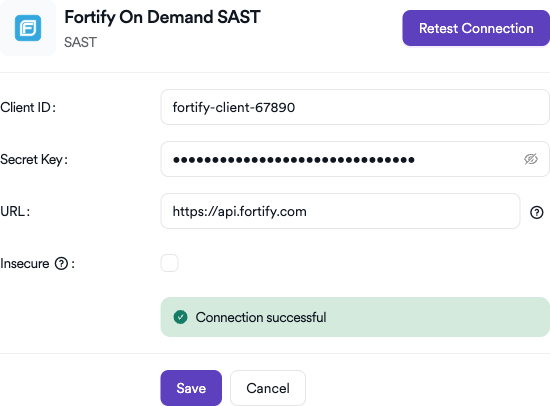
Step 5: Test the Connection
Click the Test Connection button at the bottom of the configuration panel to verify that the provided credentials and URL are correct.
- If the connection is successful, the integration is ready to use.
- If the connection fails, verify your Client ID, Secret Key, and URL values.
- For existing integrations, you can use the Retest Connection button at the top of the panel.
Step 6: Advanced Settings (Optional)
Click on Advanced Settings to expand additional options:
| Setting | Description | Default |
|---|---|---|
| Allow team leads to scan this instance | Permits team leads to trigger scans using this Fortify On Demand instance | Off |
| Allow team leads to create new instances | Permits team leads to create additional Fortify On Demand instances | Off |
After modifying advanced settings, click Save Advanced Settings to apply changes.
Summary
| Step | Action |
|---|---|
| 1 | Navigate to Integrations from the sidebar |
| 2 | Select the SAST tab under Scanners |
| 3 | Find Fortify On Demand SAST and click Activate (if not already active) |
| 4 | Click the gear icon and fill in Client ID, Secret Key, and URL |
| 5 | Click Test Connection to verify |
| 6 | (Optional) Configure Advanced Settings for team lead permissions |
Create a Scan
After activating and configuring Fortify On Demand, you can create scans from your project's scanner settings.
Navigate to Project Scanners
- Go to your Project page.
- Click the Settings tab.
- Select Scanners from the left sidebar.
Add Fortify On Demand Scanner
- In the scanner type dropdown, select SAST.
- In the scanner dropdown, search for and select Fortify On Demand.
- Click the Add button to open the scan configuration drawer.
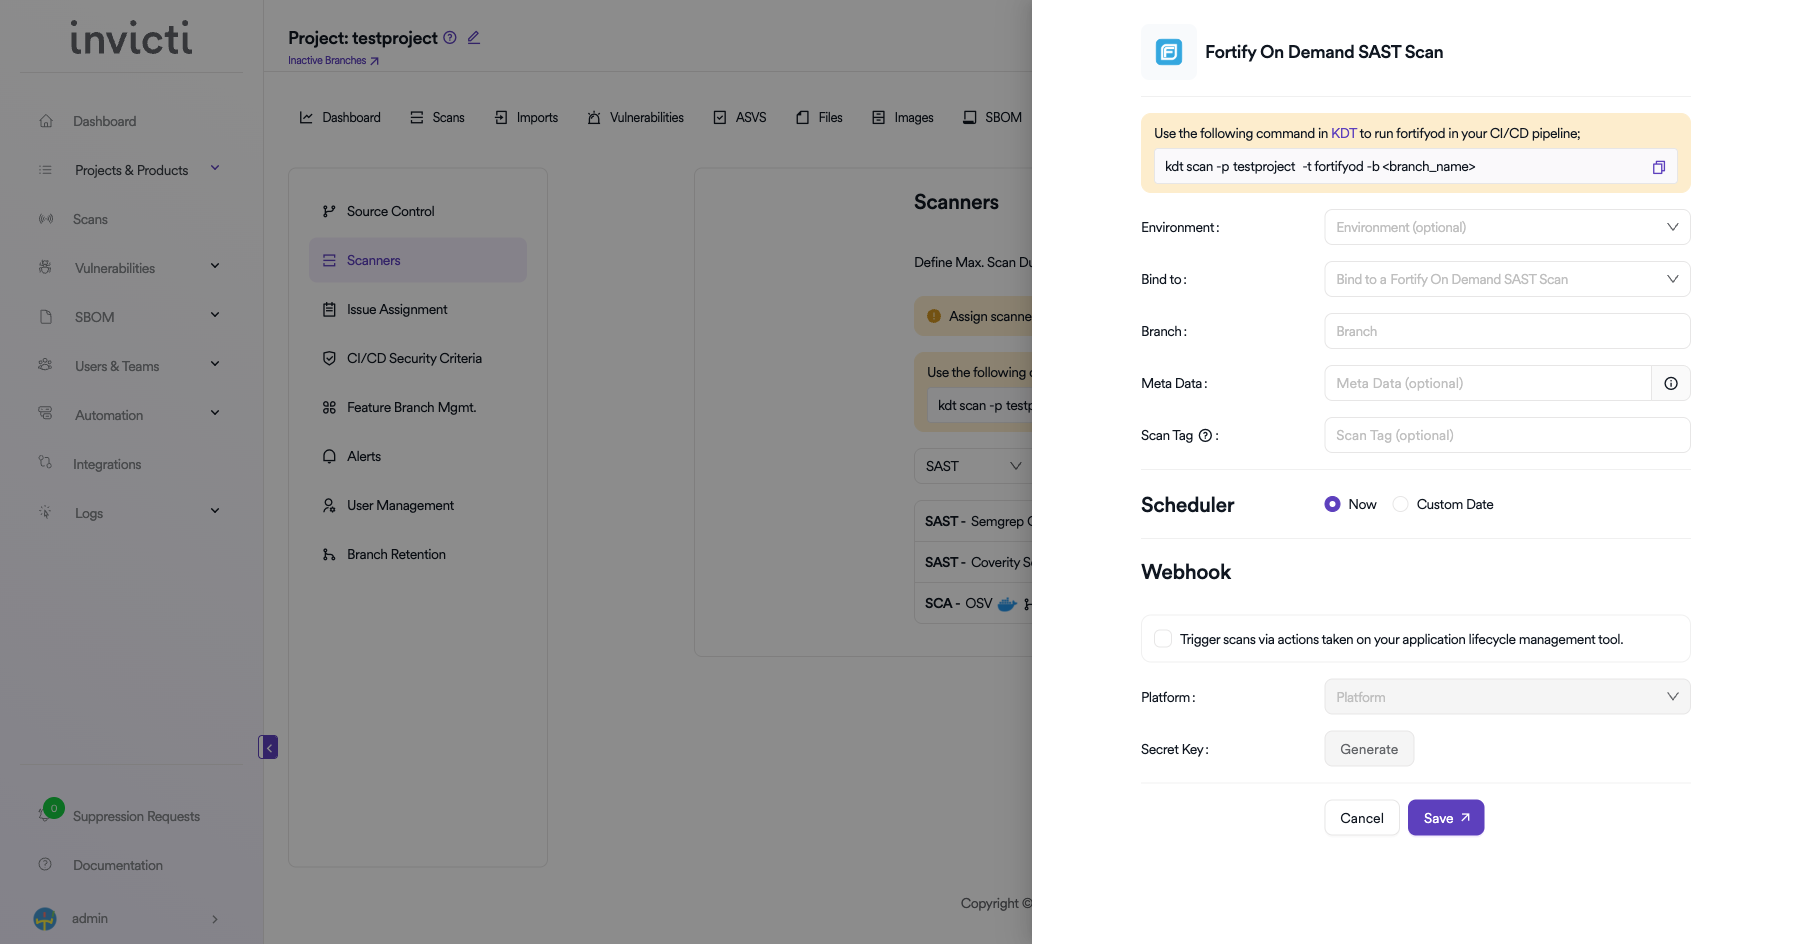
Scan Configuration Fields
| Field | Description | Required |
|---|---|---|
| Environment | Select the environment for the scan (optional) | No |
| Bind to | Select the Fortify On Demand application/release to bind to | Yes |
| Branch | Specify the branch to scan | No |
| Meta Data | Additional metadata for the scan (optional) | No |
| Scan Tag | Tag to identify the scan (optional) | No |
Scheduler
- Now: Run the scan immediately after saving.
- Custom Date: Schedule the scan for a specific date and time.
Webhook (Optional)
Enable webhook to trigger scans via actions taken on your application lifecycle management tool:
- Check the Trigger scans via actions checkbox.
- Select the Platform (e.g., GitHub, GitLab, Bitbucket).
- Click Generate to create a Secret Key for webhook authentication.
KDT Command
You can also trigger Fortify On Demand scans from your CI/CD pipeline using KDT:
kdt scan -p <project_name> -t fortifyod -b <branch_name>
Click Save to create the scan configuration.
Troubleshooting
Connection Fails
- Invalid Credentials: Verify both the Client ID and Secret Key are correct and have not been regenerated.
- Wrong URL: Ensure the API URL matches your Fortify On Demand region (e.g.,
https://api.ams.fortify.comfor EMEA,https://api.fortify.comfor US). - Expired Credentials: Fortify On Demand API credentials may expire. Regenerate them from the Fortify On Demand portal.
- SSL Issues: If using the Insecure option, note that this is not recommended for production use.
Scan Issues
- No Releases Found: Verify the API credentials have access to the specified application and release in Fortify On Demand.
- Scan Queued: Fortify On Demand scans may be queued depending on subscription tier. Check the Fortify On Demand portal for scan status.
- Assessment Type: Ensure the correct assessment type is selected for the application.
Best Practices
- Use Dedicated API Credentials: Create separate API credentials for the Invicti AppSec integration.
- Rotate Credentials Regularly: Regenerate Client ID and Secret Key periodically.
- Select Correct Region: Double-check the API URL matches your Fortify On Demand deployment region.
- Monitor Scan Quotas: Fortify On Demand has scan entitlements based on your subscription. Monitor usage to avoid exceeding quotas.
Limitations
- Subscription-Based: Available features depend on your Fortify On Demand subscription tier.
- Scan Queue: Scans may be queued during high-demand periods, which can affect scan completion times.
- Region Lock: API credentials are region-specific; US credentials do not work with EMEA endpoints and vice versa.
Need help?
Invicti Support team is ready to provide you with technical help. Go to Help Center