Package: Invicti AppSec Enterprise (on-premise, on-demand)
SonarQube SAST
Invicti AppSec supports SonarQube as a SAST (Static Application Security Testing) scanner. This guide explains how to activate and configure the SonarQube integration.
SonarQube is a self-managed code quality and security analysis platform that supports 30+ programming languages.
Prerequisites
Before starting the integration, ensure you have the following information from your SonarQube instance:
| Field | Description | Required |
|---|---|---|
| Token | User token or global analysis token generated from your SonarQube instance | Yes |
| URL | Your SonarQube instance URL (e.g., https://sonarqube.your-company.com) | Yes |
| Insecure | Skip SSL certificate verification (not recommended for production) | No |
SonarQube also supports Username + Password authentication as an alternative to token-based authentication. However, token-based authentication is recommended.
Get a Token (on SonarQube Side)
- Log in to your SonarQube instance.
- Click on your avatar (upper right-hand corner) and select My Account.
- Navigate to the Security tab.
- Under Generate Tokens, enter a token name.
- Select the token type: User Token (recommended).
- Click Generate and copy the token immediately (it won't be shown again).
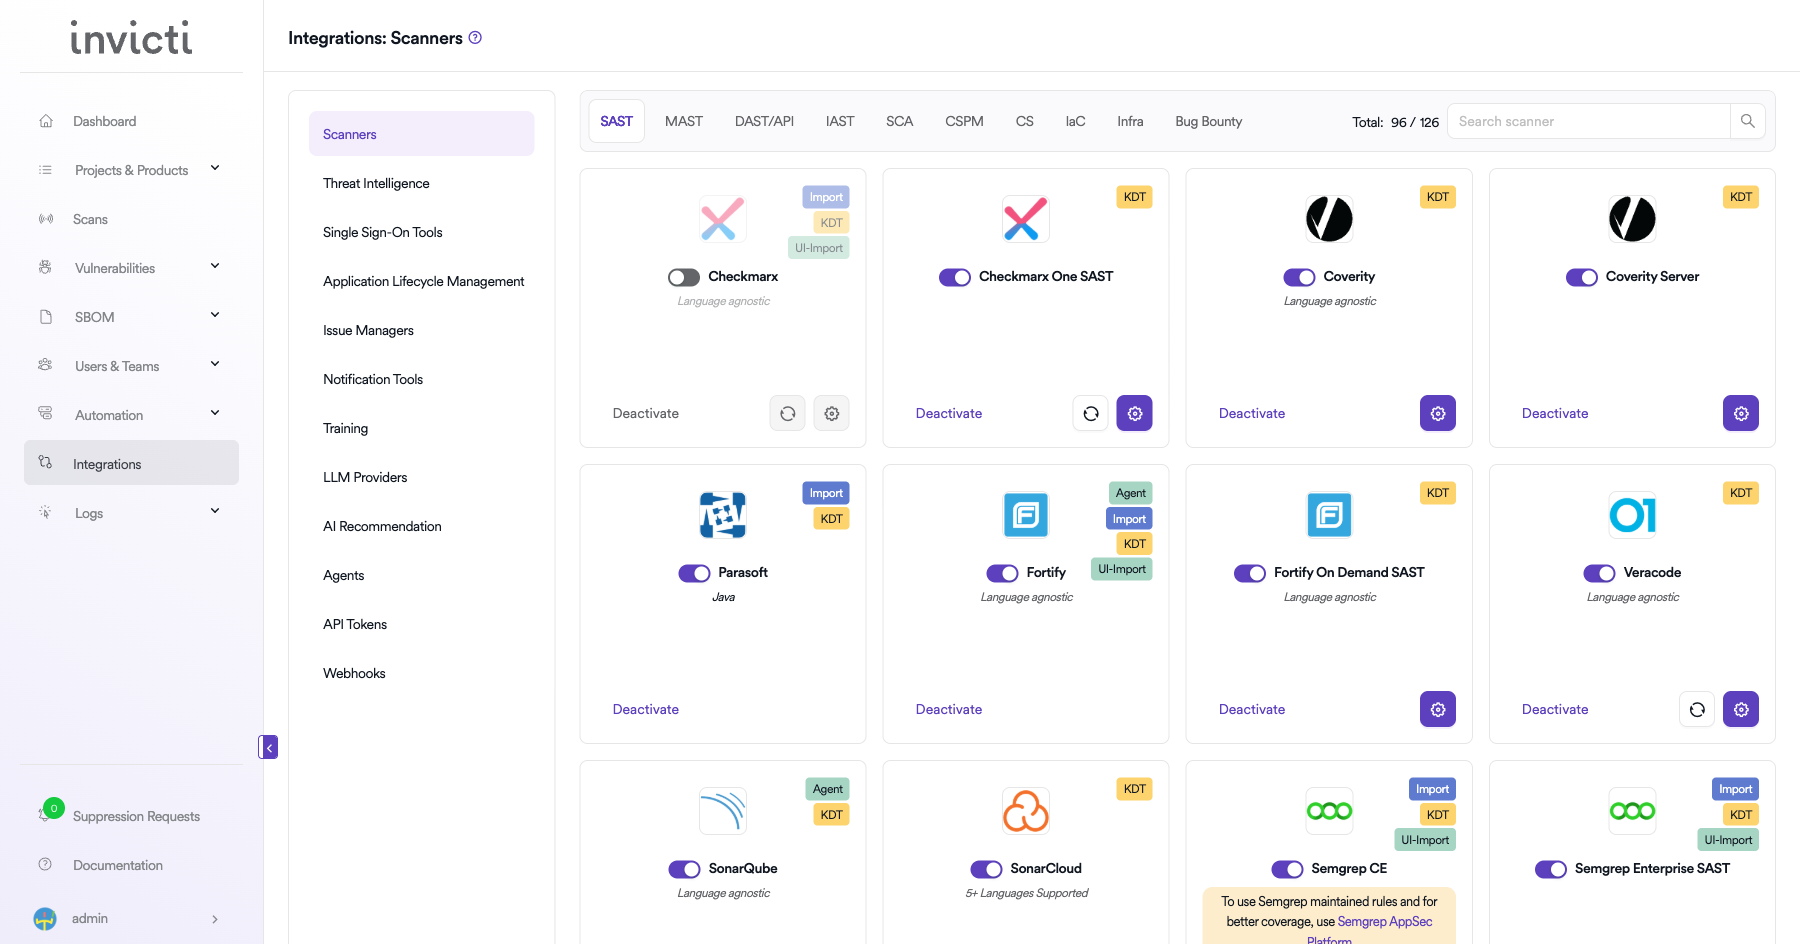
Step 1: Navigate to Integrations
From the left sidebar menu, click on Integrations.
Step 2: Select the SAST Tab
On the Integrations page, you will see the Scanners section with multiple tabs. Click on the SAST tab (it is selected by default).
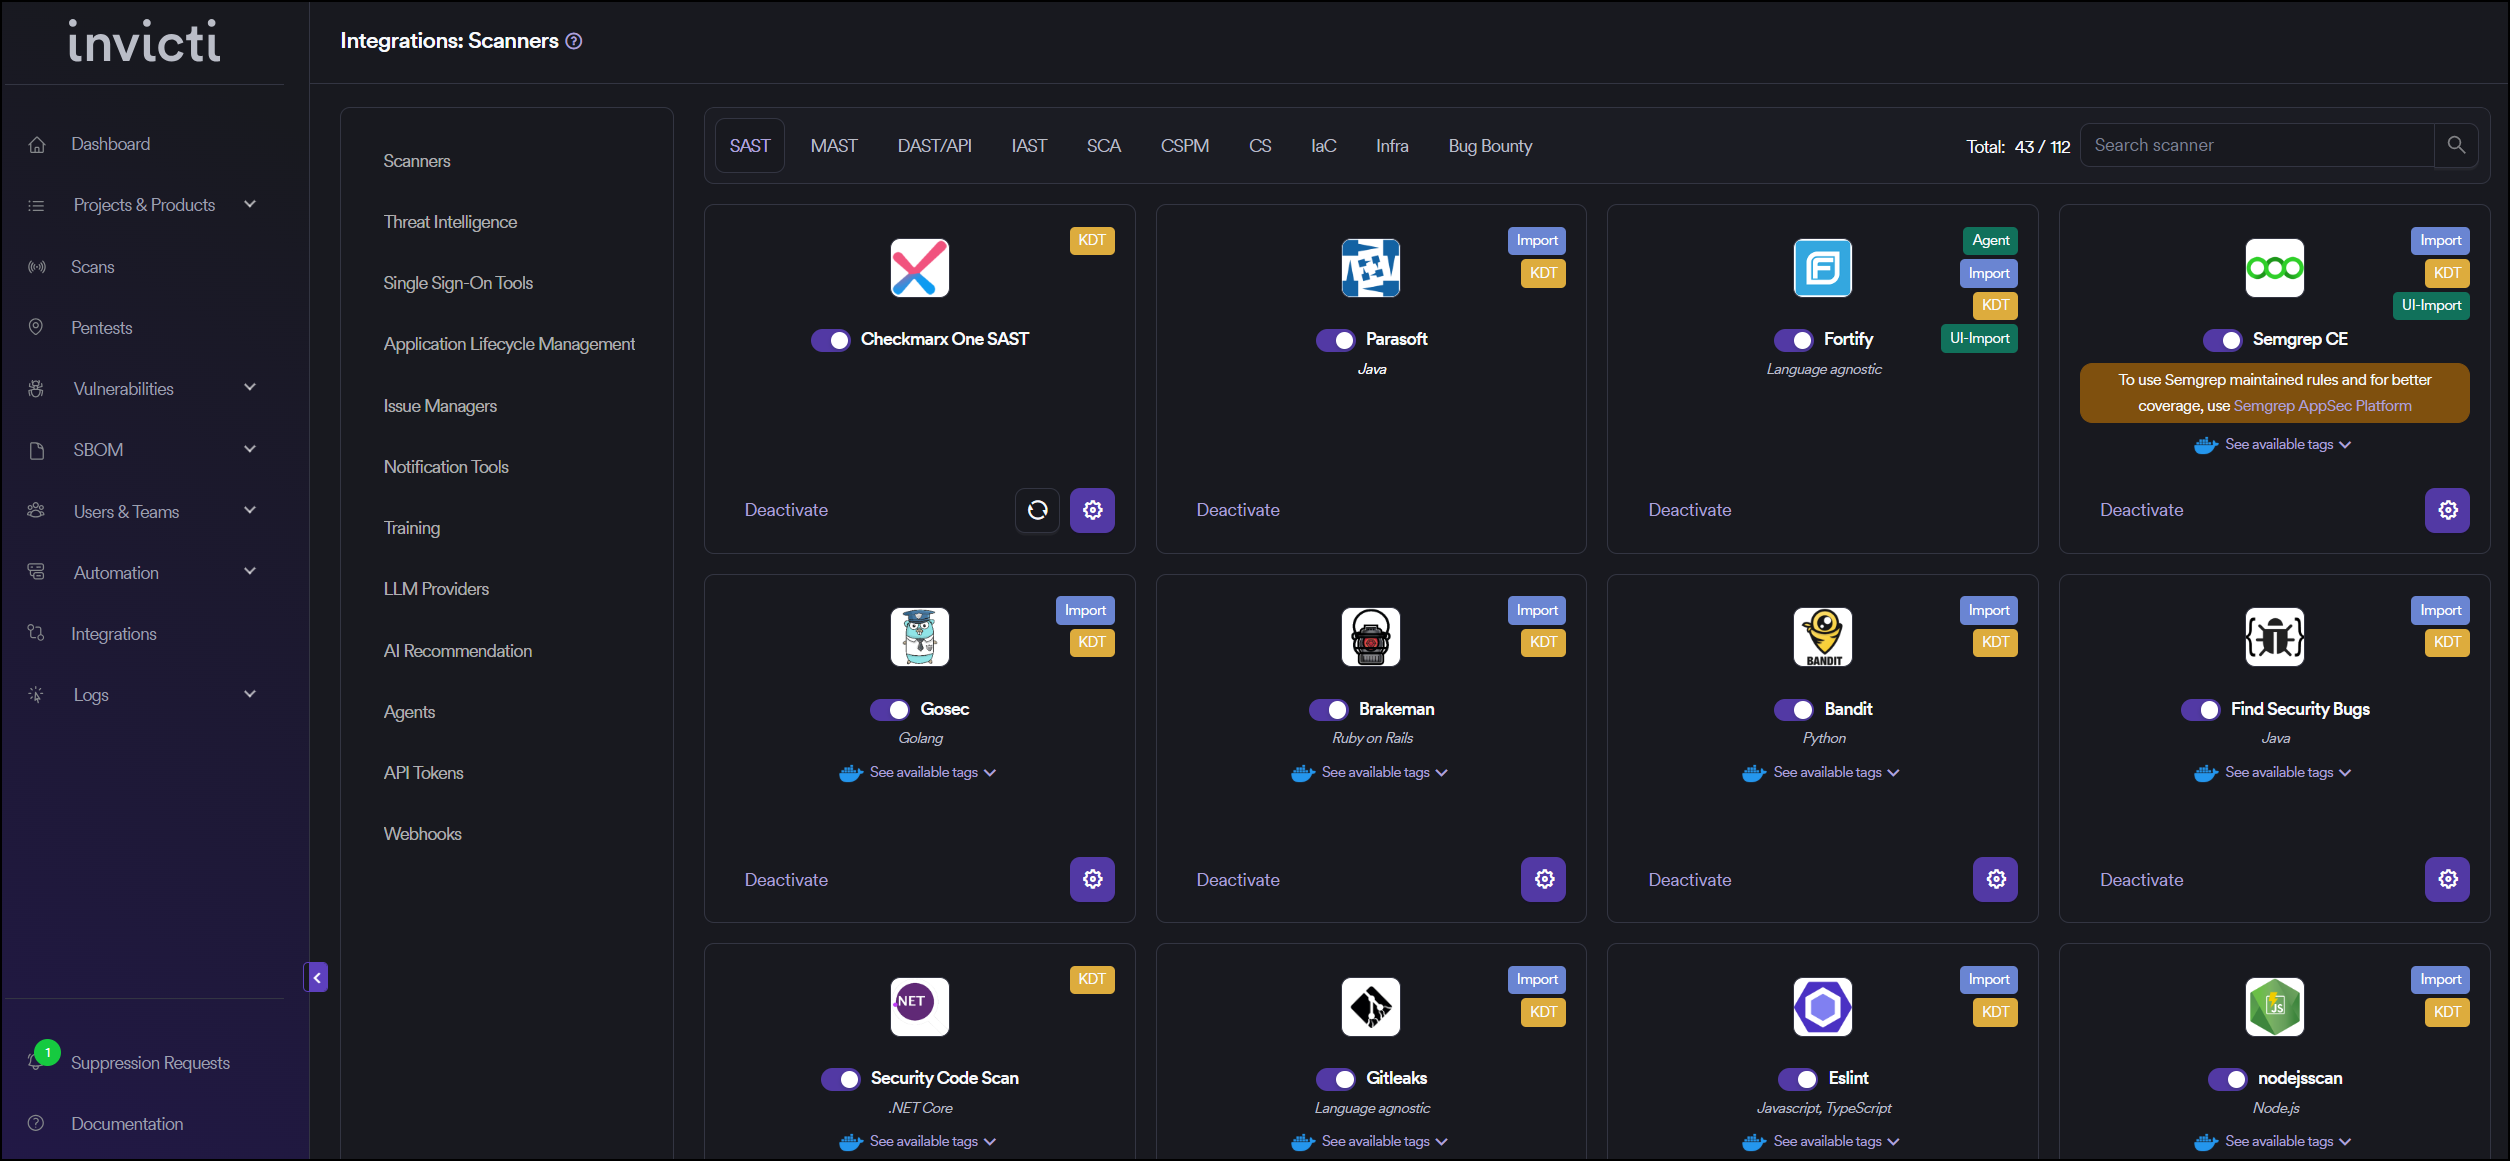
Step 3: Find and Activate SonarQube
Scroll through the list of SAST scanners to find SonarQube.
- If SonarQube is not activated, you will see an "Activate" button. Click it to enable the integration.
- If SonarQube is already activated, you will see a toggle switch in the ON position and a "Deactivate" button, along with a gear icon for configuration.
The scan method badges on the SonarQube card show Agent and KDT, which means scans can be triggered through the Kondukto agent or the Kondukto CLI tool (KDT).
Step 4: Configure Connection Settings
Click on the gear icon on the SonarQube card to open the configuration panel. Fill in the required fields:
- System Edition: Select your SonarQube edition from the dropdown (e.g., Enterprise, Community, Developer).
- Authentication Type: Select the authentication method — Token (recommended) or Username & Password.
- Token: Paste the user token you generated from SonarQube (if Token authentication is selected).
- URL: Enter your SonarQube instance URL (e.g.,
https://sonarqube.your-company.com). - Insecure: Enable this checkbox only if your SonarQube instance uses a self-signed SSL certificate.
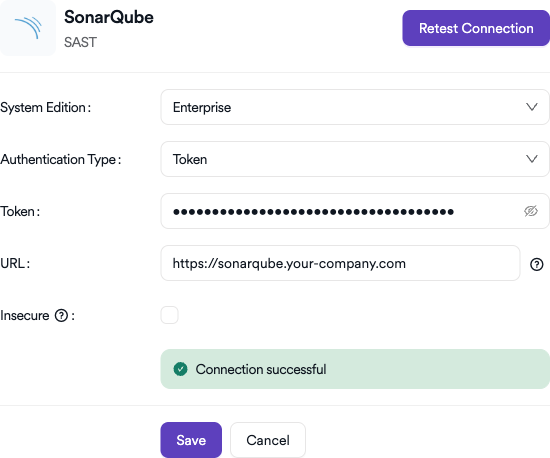
Step 5: Test the Connection
Click the "Test Connection" button at the bottom of the configuration panel to verify that the provided credentials and URL are correct.
- If the connection is successful, the integration is ready to use.
- If the connection fails, verify your Token and URL values.
- For existing integrations, you can use the "Retest Connection" button at the top of the panel.
Step 6: Advanced Settings (Optional)
Click on "Advanced Settings" to expand additional options:
| Setting | Description | Default |
|---|---|---|
| Allow team leads to scan this instance | Permits team leads to trigger scans using this SonarQube instance | Off |
| Allow team leads to create new instances | Permits team leads to create additional SonarQube instances | Off |
After modifying advanced settings, click "Save Advanced Settings" to apply changes.
Summary
| Step | Action |
|---|---|
| 1 | Navigate to Integrations from the sidebar |
| 2 | Select the SAST tab under Scanners |
| 3 | Find SonarQube and click Activate (if not already active) |
| 4 | Click the gear icon and fill in Token, URL, and optionally Instance |
| 5 | Click Test Connection to verify |
| 6 | (Optional) Configure Advanced Settings for team lead permissions |
Create a Scan
After activating and configuring SonarQube, you can create scans from your project's scanner settings.
Navigate to Project Scanners
- Go to your Project page.
- Click on the Settings tab.
- Select Scanners from the left sidebar.
Add SonarQube Scanner
- In the scanner type dropdown, select SAST.
- In the scanner dropdown, search for and select SonarQube.
- Click the Add button to open the scan configuration drawer.
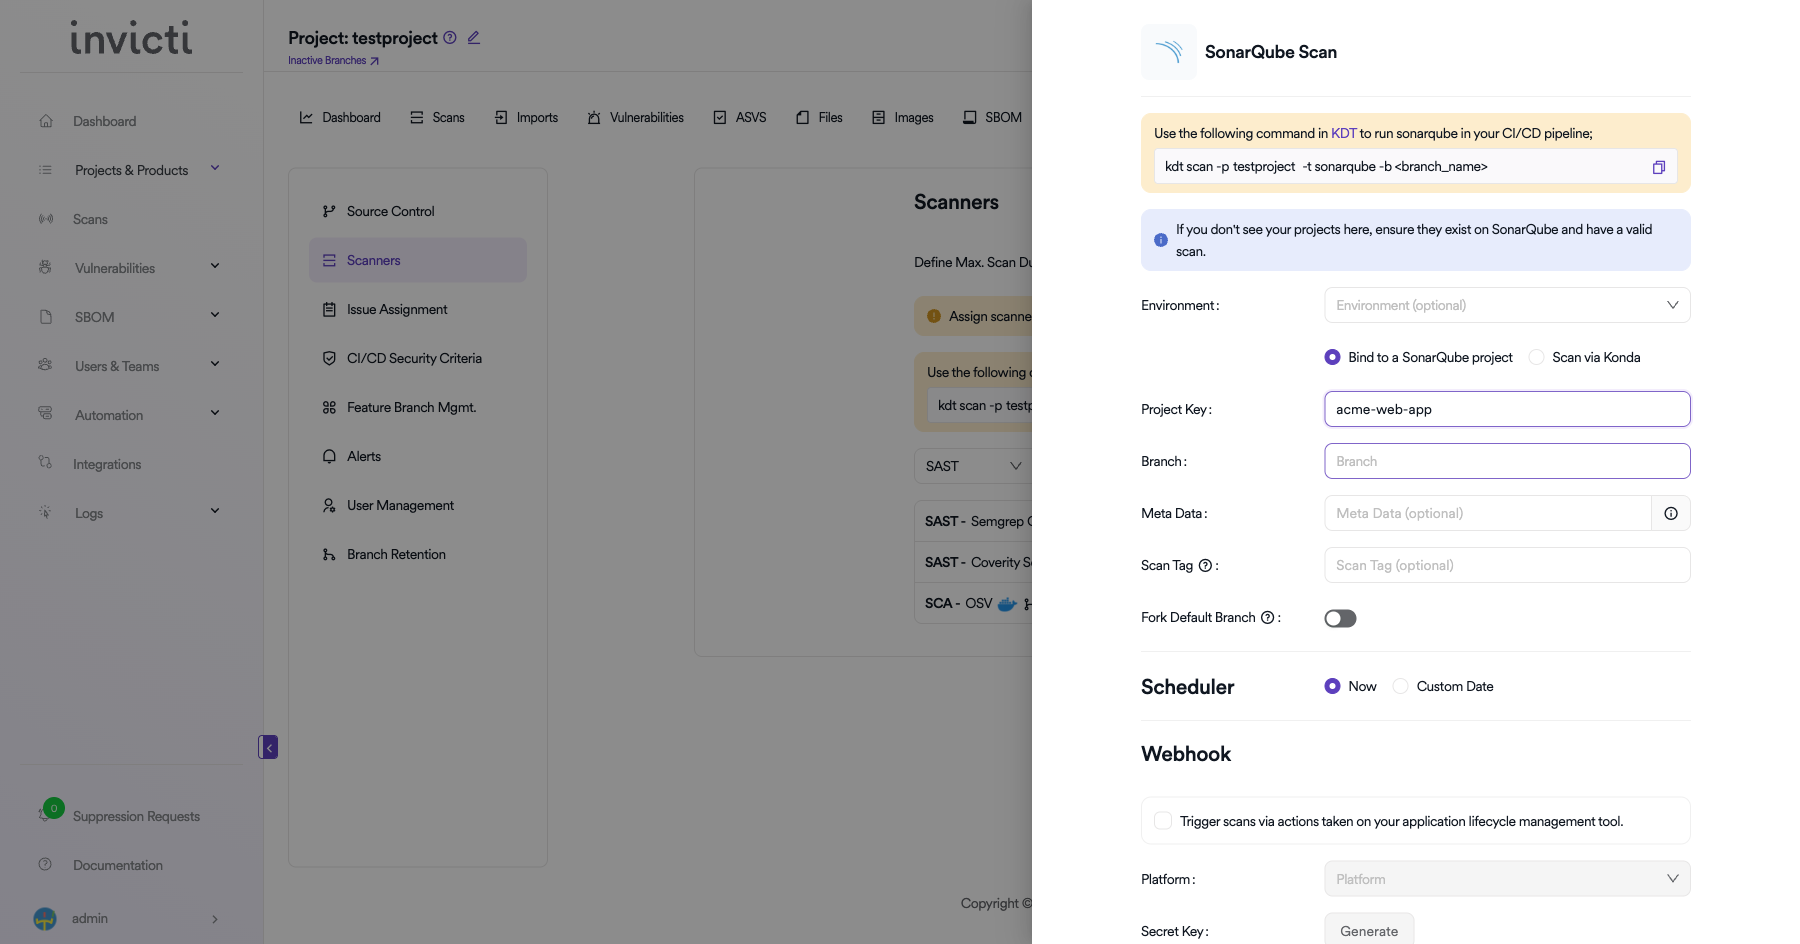
Scan Configuration Fields
| Field | Description | Required |
|---|---|---|
| Environment | Select the environment for the scan (optional) | No |
| Scan Mode | Choose between Bind to a SonarQube project (use existing SonarQube project) or Scan via Konda (run scan through Kondukto agent) | Yes |
| Project Key | Select the SonarQube project to bind to (shown when "Bind to a SonarQube project" is selected) | Yes (if binding) |
| Branch | Specify the branch to scan | No |
| Meta Data | Additional metadata for the scan (optional) | No |
| Scan Tag | Tag to identify the scan (optional) | No |
| Fork Default Branch | Enable to fork the default branch before scanning | No |
Scheduler
- Now: Run the scan immediately after saving.
- Custom Date: Schedule the scan for a specific date and time.
Webhook (Optional)
Enable webhook to trigger scans via actions taken on your application lifecycle management tool:
- Check the Trigger scans via actions checkbox.
- Select the Platform (e.g., GitHub, GitLab, Bitbucket).
- Click Generate to create a Secret Key for webhook authentication.
KDT Command
You can also trigger SonarQube scans from your CI/CD pipeline using KDT:
kdt scan -p <project_name> -t sonarqube -b <branch_name>
Click Save to create the scan configuration.
Troubleshooting
Connection Fails
- Invalid Token: Ensure the token has not expired or been revoked. Generate a new token from My Account > Security in SonarQube.
- Incorrect URL: Verify the URL includes the correct protocol (
https://) and port number if applicable. - SSL Certificate Issues: If using a self-signed certificate, enable the Insecure checkbox in the connection settings.
- Network/Firewall: Ensure the Invicti AppSec instance can reach your SonarQube server. Check firewall rules and proxy settings.
Scan Issues
- No Projects Found: Verify the token has sufficient permissions to list projects in SonarQube.
- Branch Not Found: Ensure the specified branch exists in the SonarQube project and that branch analysis is enabled in your SonarQube edition.
- Empty Results: Confirm that the SonarQube project has completed at least one analysis before importing.
Best Practices
- Use Token Authentication: Token-based authentication is more secure than username/password and allows granular permission control.
- Rotate Tokens Regularly: Set a token expiration policy and rotate tokens periodically.
- Use Dedicated Service Accounts: Create a dedicated SonarQube user for Invicti AppSec integration instead of using personal accounts.
- Match Branch Names: Keep branch names consistent between your repository and SonarQube for accurate tracking.
- Use HTTPS: Always use HTTPS for the SonarQube URL in production environments.
Limitations
- Branch Analysis: Branch analysis requires SonarQube Developer Edition or higher. Community Edition only supports the main branch.
- System Edition: The System Edition dropdown in the connection settings must match your actual SonarQube edition for proper functionality.
- Rate Limits: Large SonarQube instances with many projects may experience slower project listing due to API pagination.
Need help?
Invicti Support team is ready to provide you with technical help. Go to Help Center