Package: Invicti AppSec Enterprise (on-premise, on-demand)
Black Duck SCA integration
Invicti AppSec supports Black Duck as an SCA (Software Composition Analysis) scanner. This guide explains how to activate and configure the Black Duck integration.
Black Duck (by Synopsys) is an enterprise software composition analysis solution that helps organizations manage the security, quality, and license compliance risks of open-source and third-party code. It provides comprehensive visibility into open-source usage across the entire software supply chain.
Prerequisites
Before starting the integration, ensure you have the following information from your Black Duck instance:
| Field | Description | Required |
|---|---|---|
| Instance | The Black Duck deployment instance type (selected from dropdown) | Yes |
| Token | API bearer token generated from your Black Duck instance | Yes |
| URL | Your Black Duck instance URL (e.g., https://blackduck.yourcompany.com) | Yes |
| Insecure | Skip SSL certificate verification (not recommended for production) | No |
| Advanced Settings | Additional configuration options for team lead permissions | No |
Get Credentials (on Black Duck Side)
- Log in to your Black Duck instance.
- Click on your user profile in the top-right corner.
- Navigate to API Tokens (or My Access Tokens).
- Click Create New Token.
- Provide a name and set the appropriate permissions (read access is sufficient for scanning).
- Copy the generated token and save it securely.
Get credentials
- Log in to your Black Duck instance.
- Go to your profile > API Tokens.
- Click Create New Token and set appropriate permissions.
- Copy and save the token securely.
Step 1: Navigate to Integrations
From the left sidebar menu, click on Integrations.
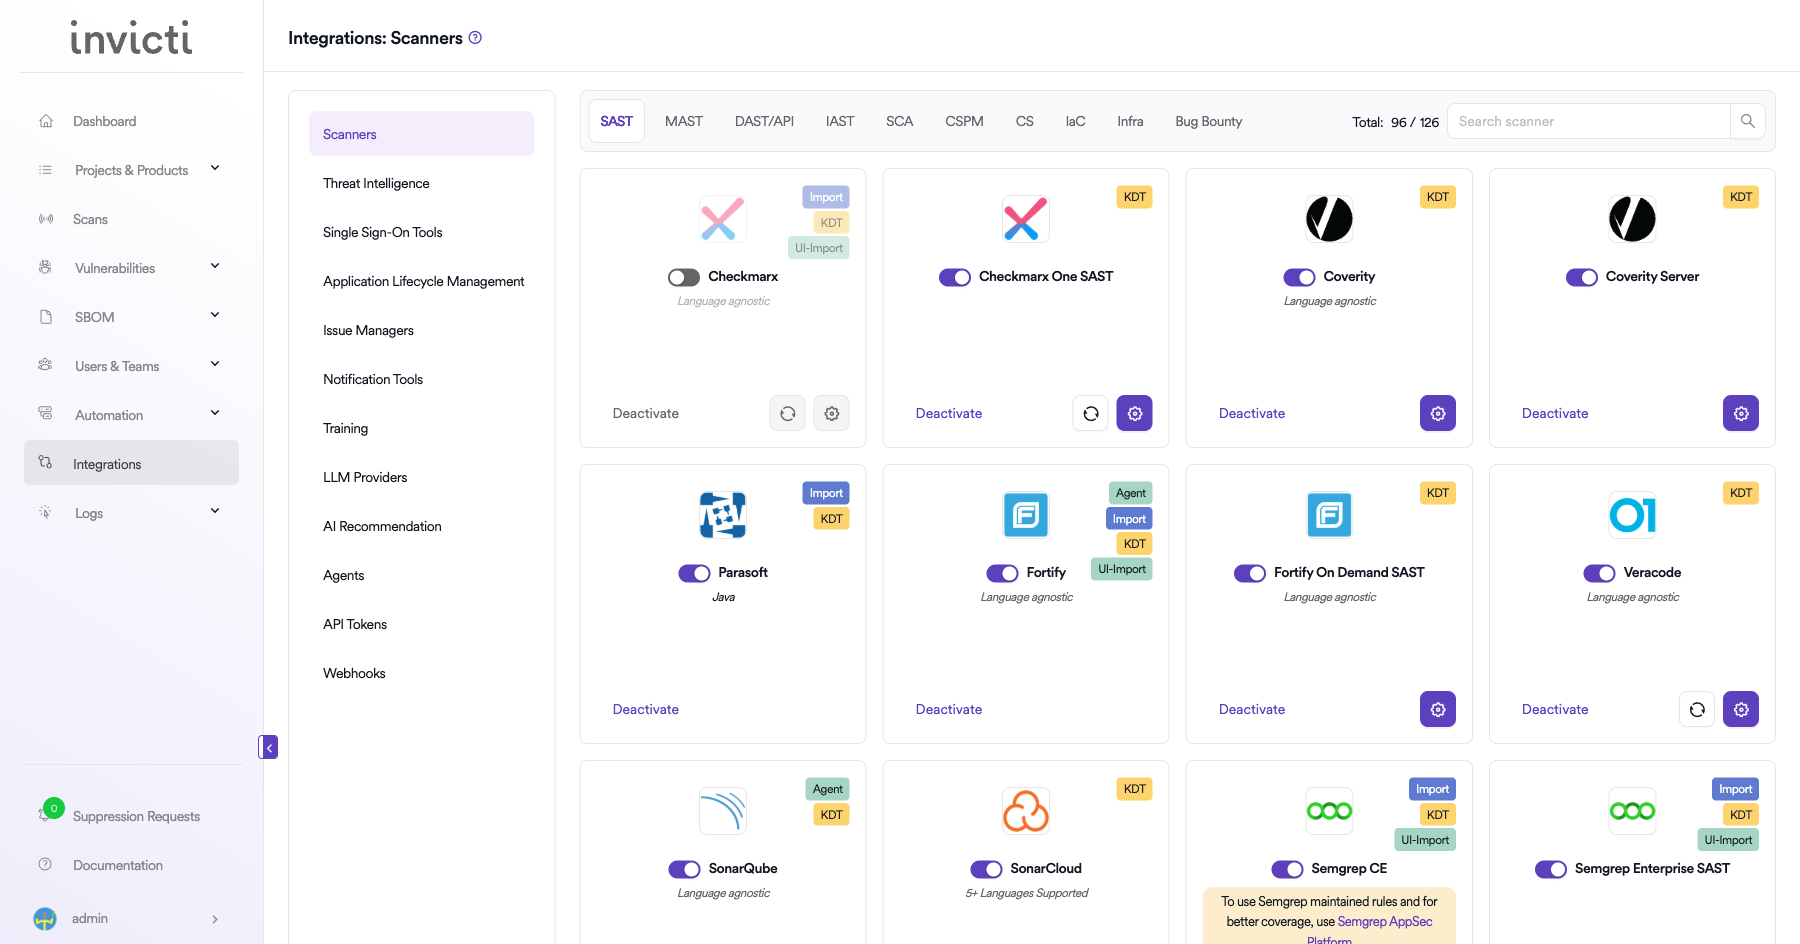
Step 2: Select the SCA Tab
On the Integrations page, you will see the Scanners section with multiple tabs. Click on the SCA tab.
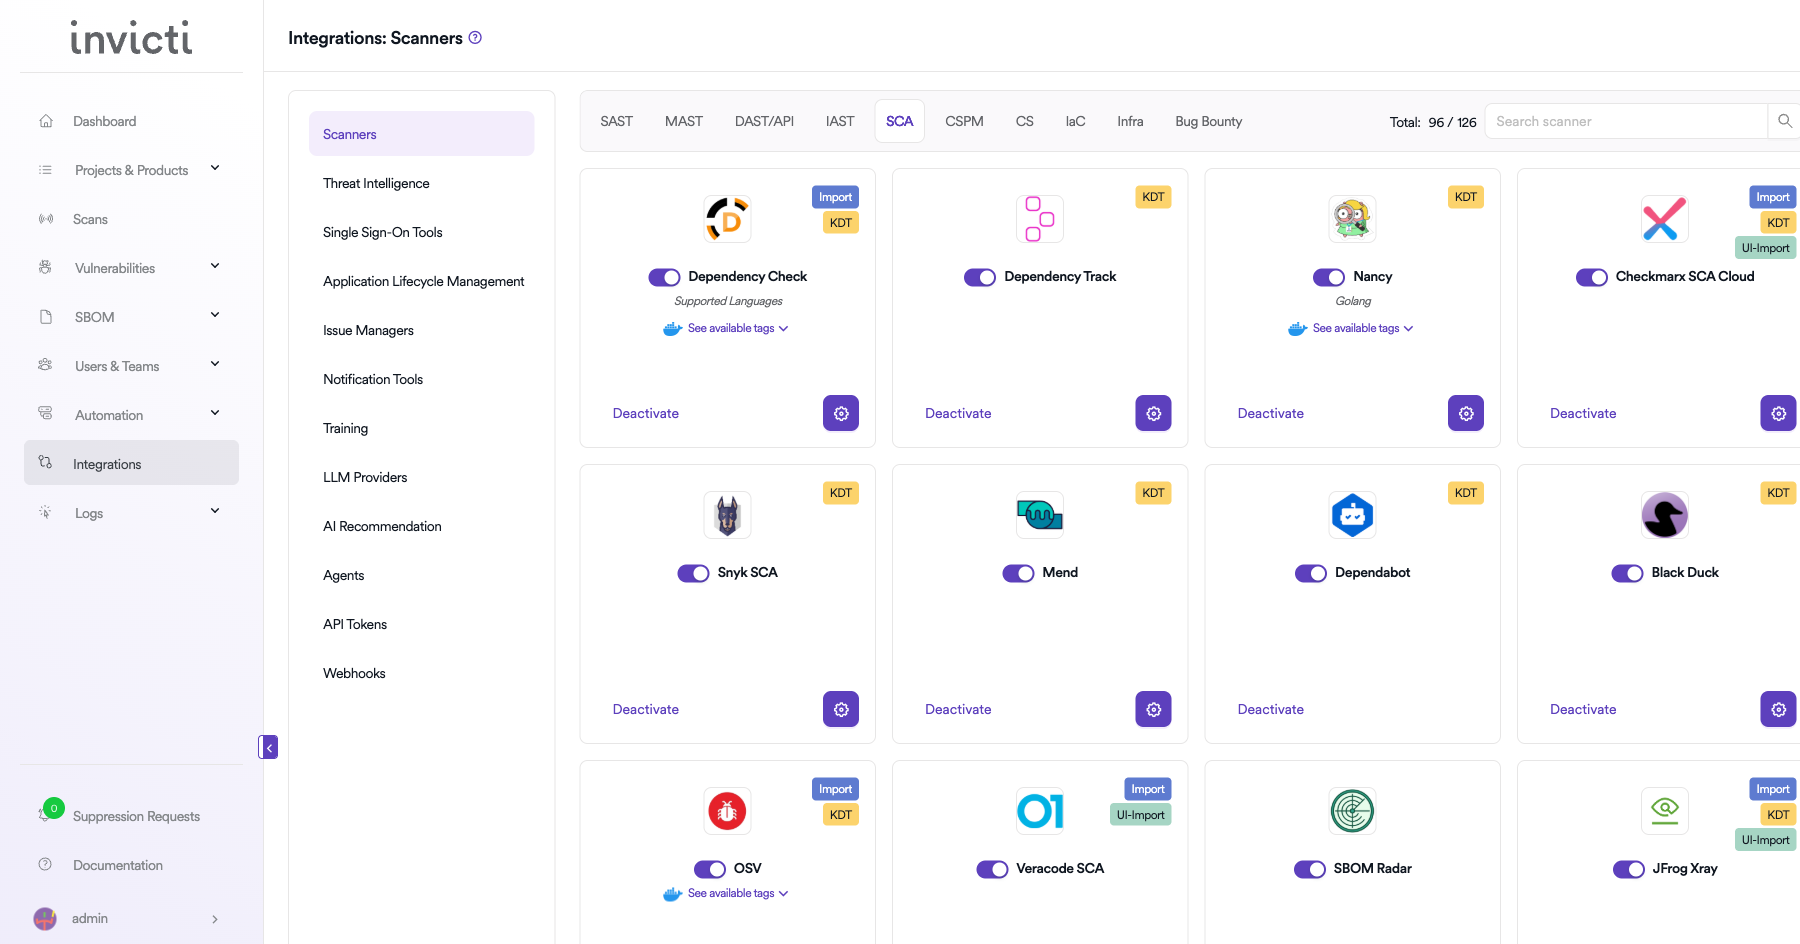
Step 3: Find and Activate Black Duck
Scroll through the list of SCA scanners to find Black Duck.
- If Black Duck is not activated, you will see an "Activate" button. Click it to enable the integration.
- If Black Duck is already activated, you will see a toggle switch in the ON position and a "Deactivate" button, along with a gear icon for configuration.
The scan method badge on the Black Duck card shows KDT, which means scans are triggered through the Kondukto CLI tool (KDT).
Step 4: Configure Connection Settings
Click on the gear icon on the Black Duck card to open the configuration panel. Fill in the required fields:
- Instance: Select your Black Duck deployment instance type from the dropdown menu.
- Token: Paste the API bearer token you generated from Black Duck.
- URL: Enter your Black Duck instance URL (e.g.,
https://blackduck.yourcompany.com). - Insecure: Enable this checkbox only if your Black Duck instance uses a self-signed SSL certificate.
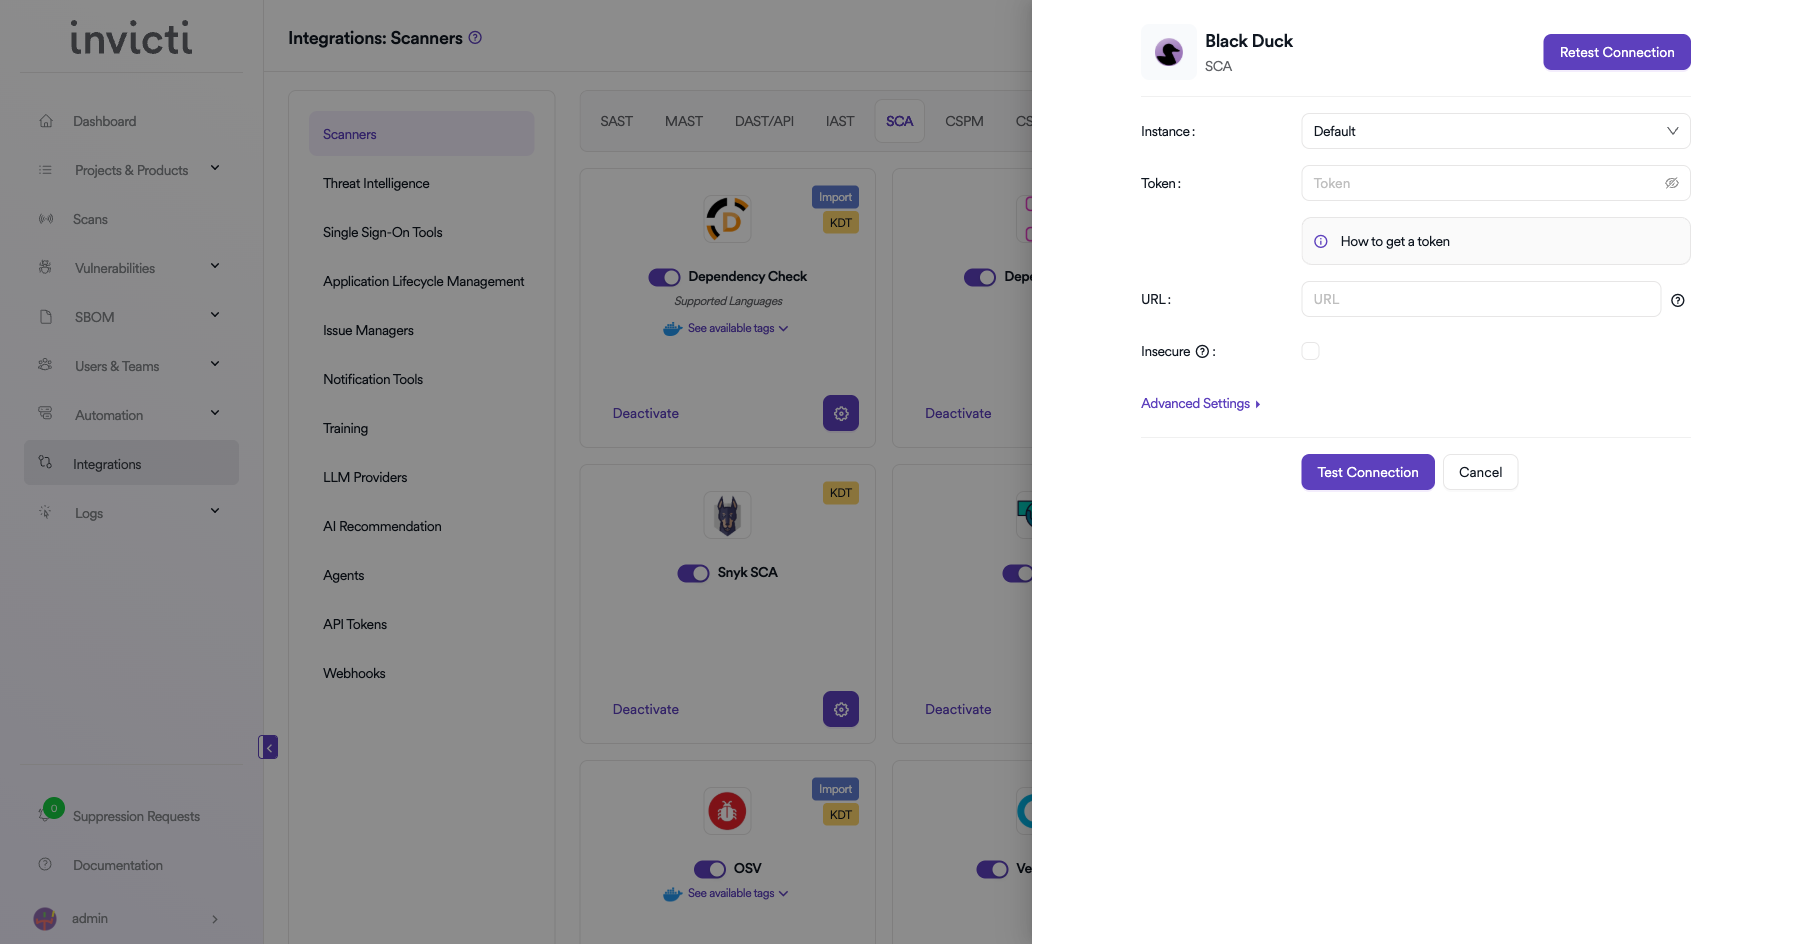
Step 5: Test the Connection
Click the "Test Connection" button at the bottom of the configuration panel to verify that the provided credentials and URL are correct.
- If the connection is successful, the integration is ready to use.
- If the connection fails, verify your Instance selection, Token, and URL values.
- For existing integrations, you can use the "Retest Connection" button at the top of the panel.
Step 6: Advanced Settings (Optional)
Click on "Advanced Settings" to expand additional options:
| Setting | Description | Default |
|---|---|---|
| Allow team leads to scan this instance | Permits team leads to trigger scans using this Black Duck instance | Off |
| Allow team leads to create new instances | Permits team leads to create additional Black Duck instances | Off |
After modifying advanced settings, click "Save Advanced Settings" to apply changes.
Summary
| Step | Action |
|---|---|
| 1 | Navigate to Integrations from the sidebar |
| 2 | Select the SCA tab under Scanners |
| 3 | Find Black Duck and click Activate (if not already active) |
| 4 | Click the gear icon and fill in Instance, Token, URL, and optionally Insecure |
| 5 | Click Test Connection to verify |
| 6 | (Optional) Configure Advanced Settings for team lead permissions |
Need help?
Invicti Support team is ready to provide you with technical help. Go to Help Center