Package: Invicti AppSec Enterprise (on-premise, on-demand)
JFrog Xray SCA integration
JFrog Xray is a universal binary analysis tool that scans artifacts, builds, and release bundles for security vulnerabilities and license compliance. The Invicti AppSec integration supports both API-based scanning (where Xray generates a vulnerability report against a repository) and file import (CLI or UI export formats).
Prerequisites
| Field | Description |
|---|---|
| JFrog Platform URL | The base URL of your JFrog Platform instance (e.g., https://yourcompany.jfrog.io) |
| Access Token | A JFrog Platform access token with read access to Xray reports and repositories |
Get an Access Token (on JFrog Side)
- Log in to your JFrog Platform instance.
- Click your profile icon in the upper right corner and select Edit Profile.
- Under Authentication Settings, click Generate an Identity Token (or Access Token).
- Enter a description and set an expiration if required.
- Click Generate and copy the token immediately — it will not be shown again.
For API-based scanning, the token must have Xray: Read and Xray: Manage Reports permissions.
Step 1: Navigate to Integrations
From the left sidebar menu, click on Integrations.
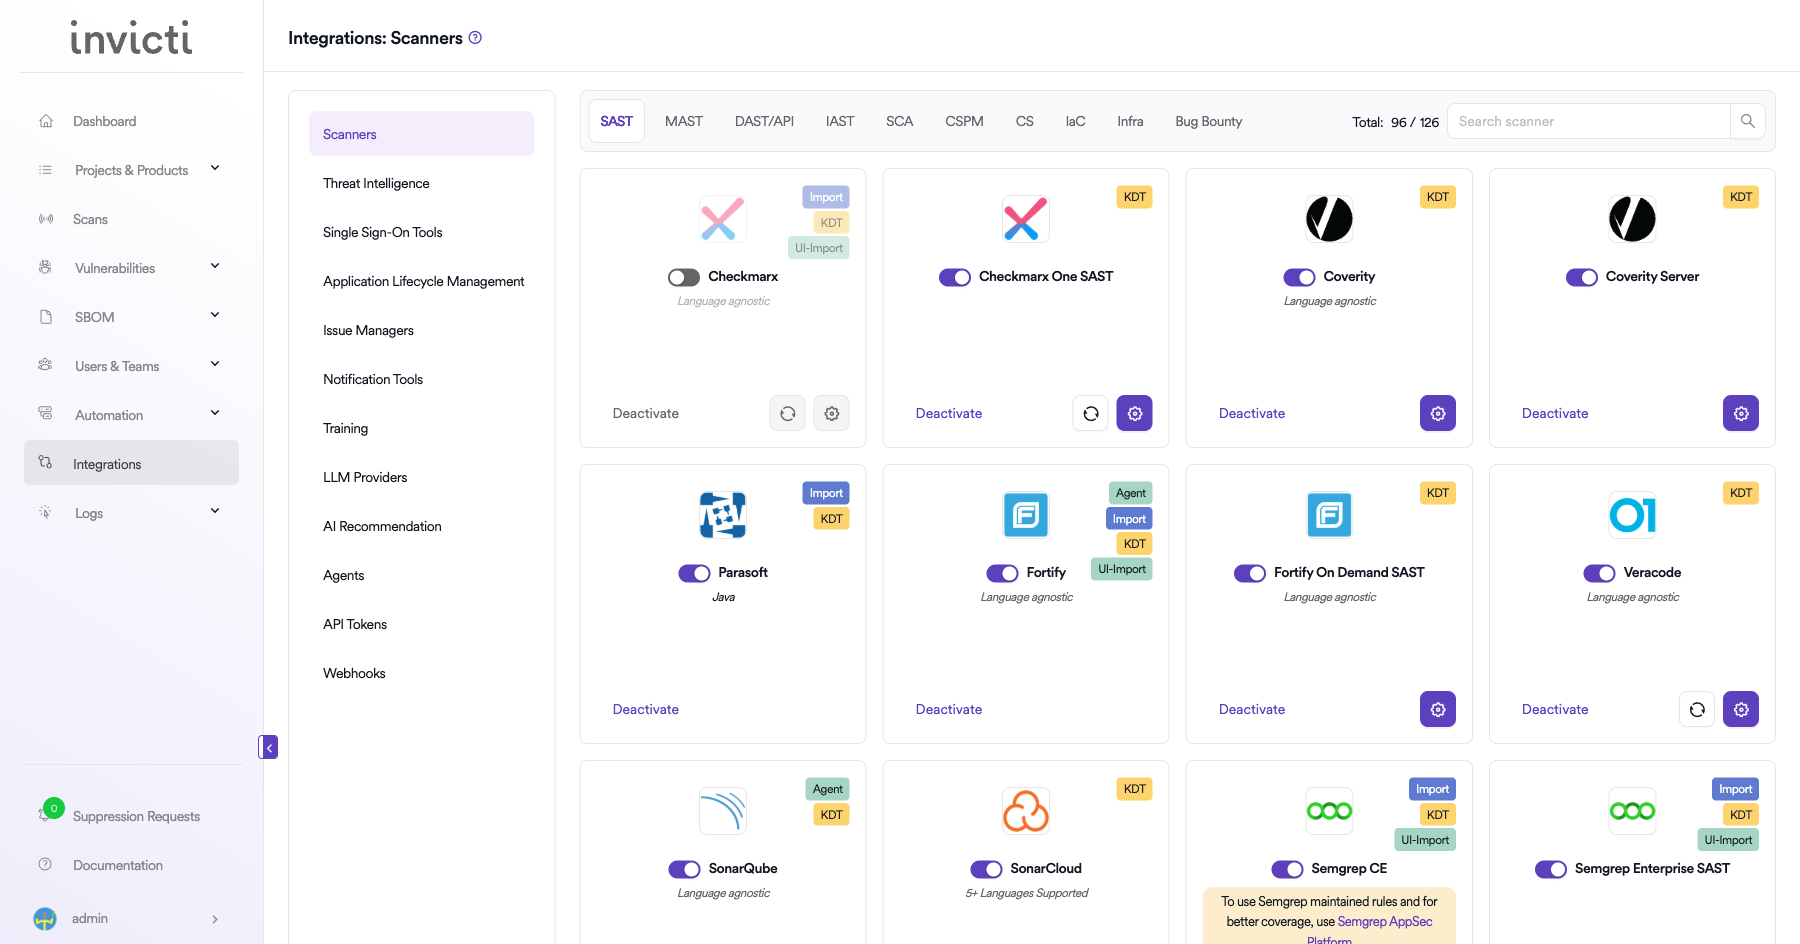
Step 2: Select the SCA Tab
On the Integrations > Scanners page, click on the SCA tab.
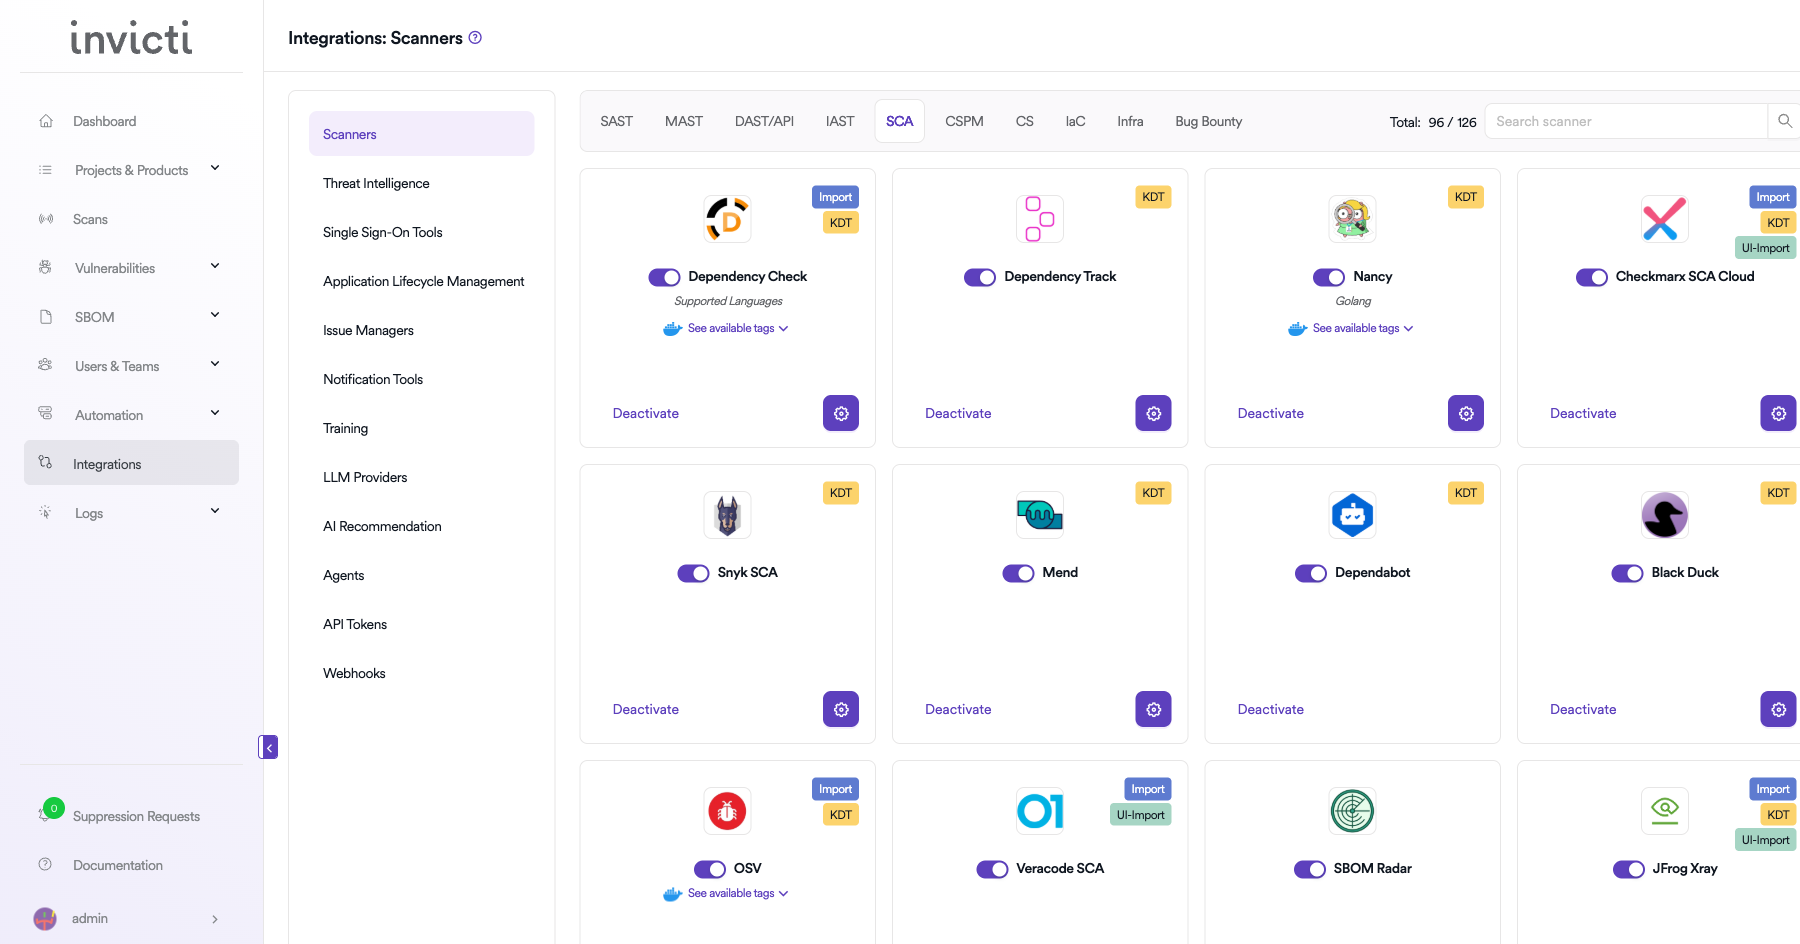
Step 3: Find and Activate JFrog Xray
Scroll through the list of SCA scanners to find JFrog Xray SCA.
- If JFrog Xray SCA is not activated, click the Activate button to enable the integration.
The scan method badges on the JFrog Xray SCA card include KDT, Import, UI-Import, and Bind, indicating multiple integration modes are supported.
Step 4: Configure Connection Settings
Click the gear icon on the JFrog Xray SCA card to open the settings panel. Fill in the required fields:
| Field | Description | Required |
|---|---|---|
| Is API Enabled | Enable to allow Invicti AppSec to connect to your JFrog Xray instance via API (instead of import-only mode). When disabled, no connection fields are shown and no connection test is performed. | No |
| Access Token | JFrog Platform access token (shown only when Is API Enabled is checked) | Conditional |
| URL | Base URL of your JFrog Platform instance (shown only when Is API Enabled is checked) | Conditional |
| Insecure | Enable only if your JFrog instance uses a self-signed SSL certificate (shown only when Is API Enabled is checked) | No |
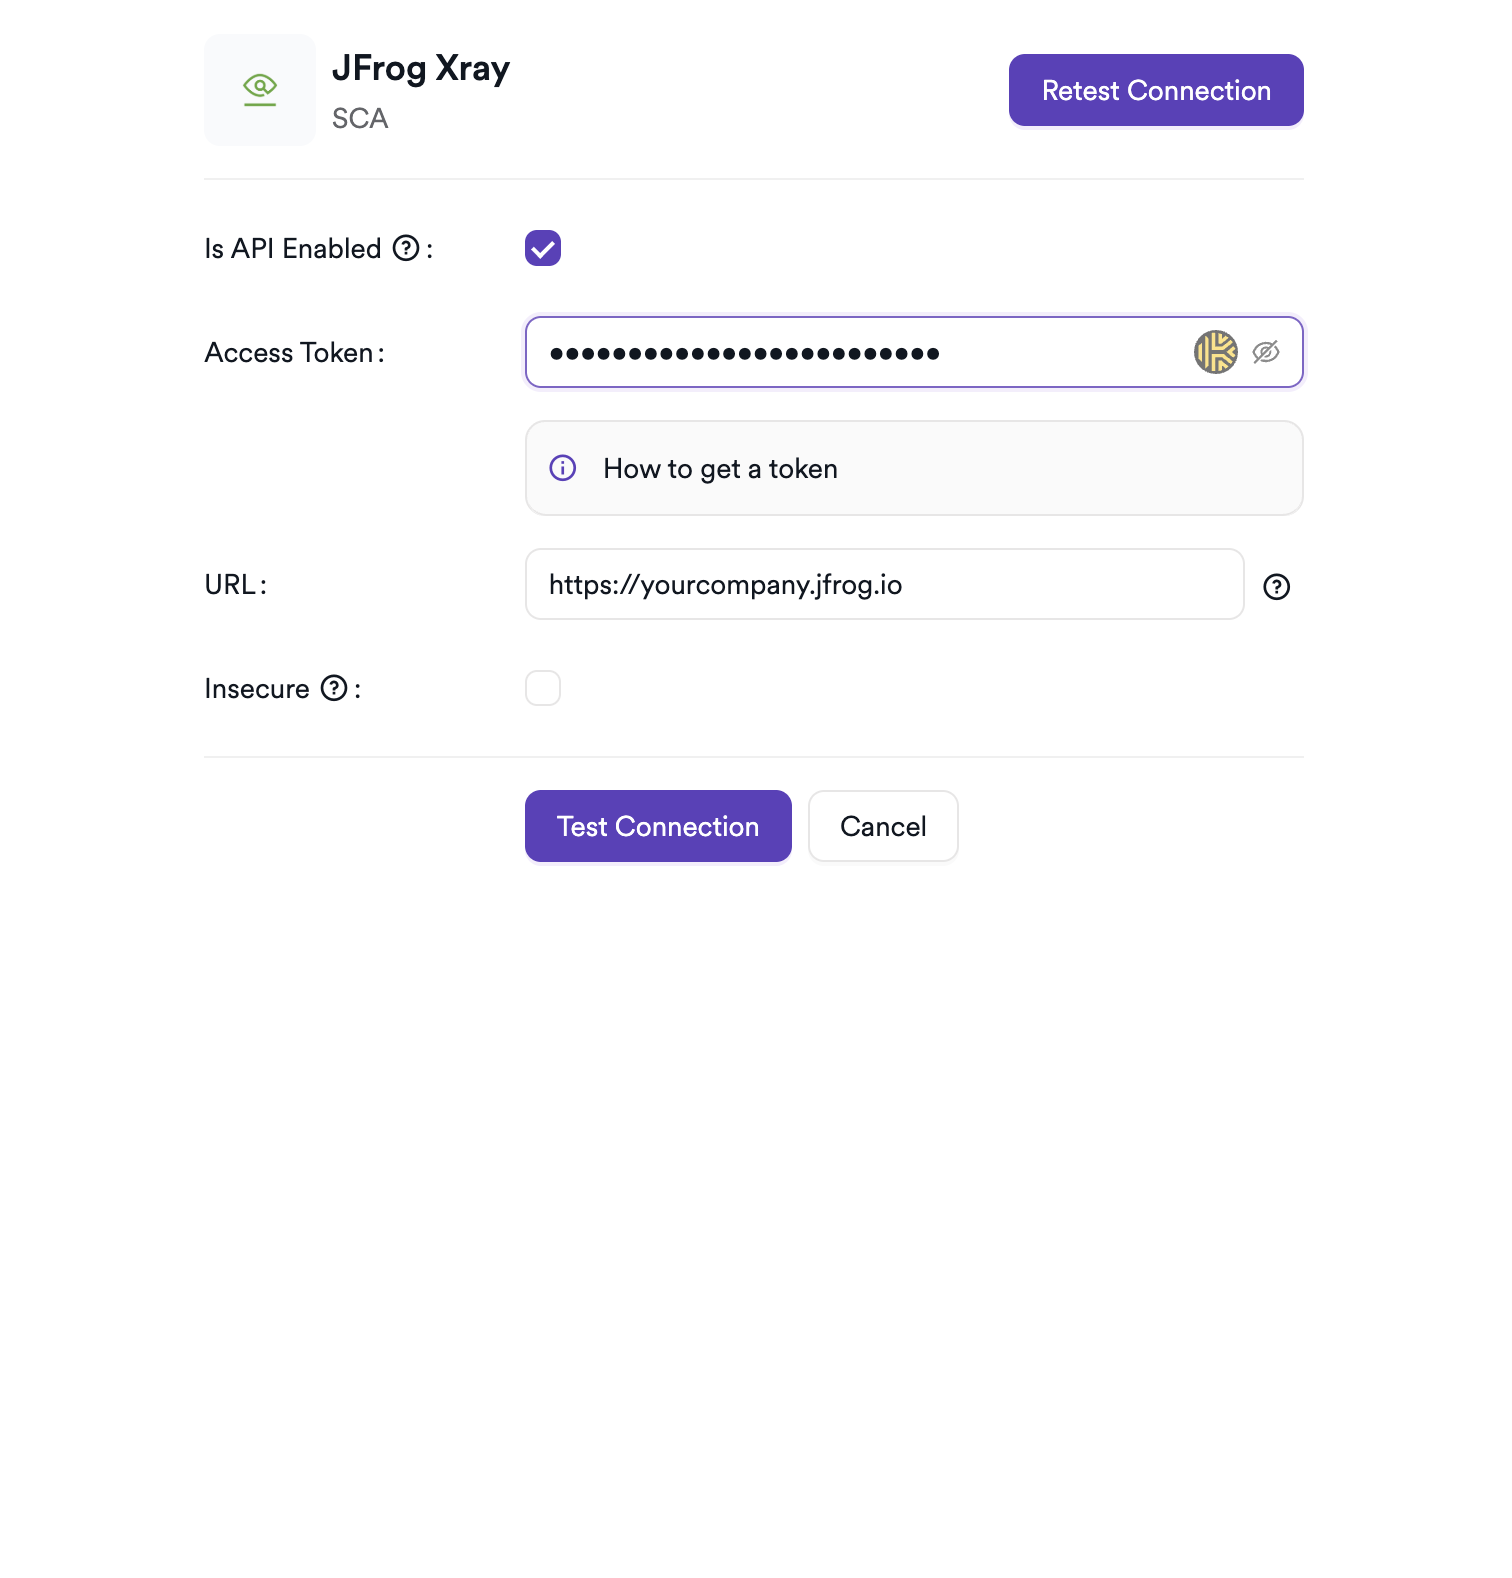
Step 5: Test the Connection
Click Test Connection. A green Connection successful message confirms connectivity to your JFrog Xray instance.
Summary
| Step | Action |
|---|---|
| 1 | Navigate to Integrations from the sidebar |
| 2 | Select the SCA tab |
| 3 | Activate JFrog Xray SCA |
| 4 | Enter URL, Access Token, and optional settings |
| 5 | Test the connection |
Create a Scan
Navigate to Project Scanners
- Open a project in Invicti AppSec.
- Go to Settings > Scanners.
- Click Add Scanner.
Add JFrog Xray SCA Scanner
- Select SCA as the scanner type.
- Choose JFrog Xray SCA from the scanner list.
- Click Add to open the scan configuration drawer.
Scan Configuration Fields
| Field | Description | Required |
|---|---|---|
| Environment | Select the environment for the scan | No |
| Repository Key | The JFrog Xray repository key to scan (searchable select loaded from your JFrog instance) | Yes |
| Branch | Source code branch associated with this scan | Yes |
| Include Path Patterns | Path patterns to include in the report | No |
| Exclude Path Patterns | Path patterns to exclude from the report | No |
| Meta Data | Additional metadata for the scan | No |
| Scan Tag | Tag to identify the scan | No |
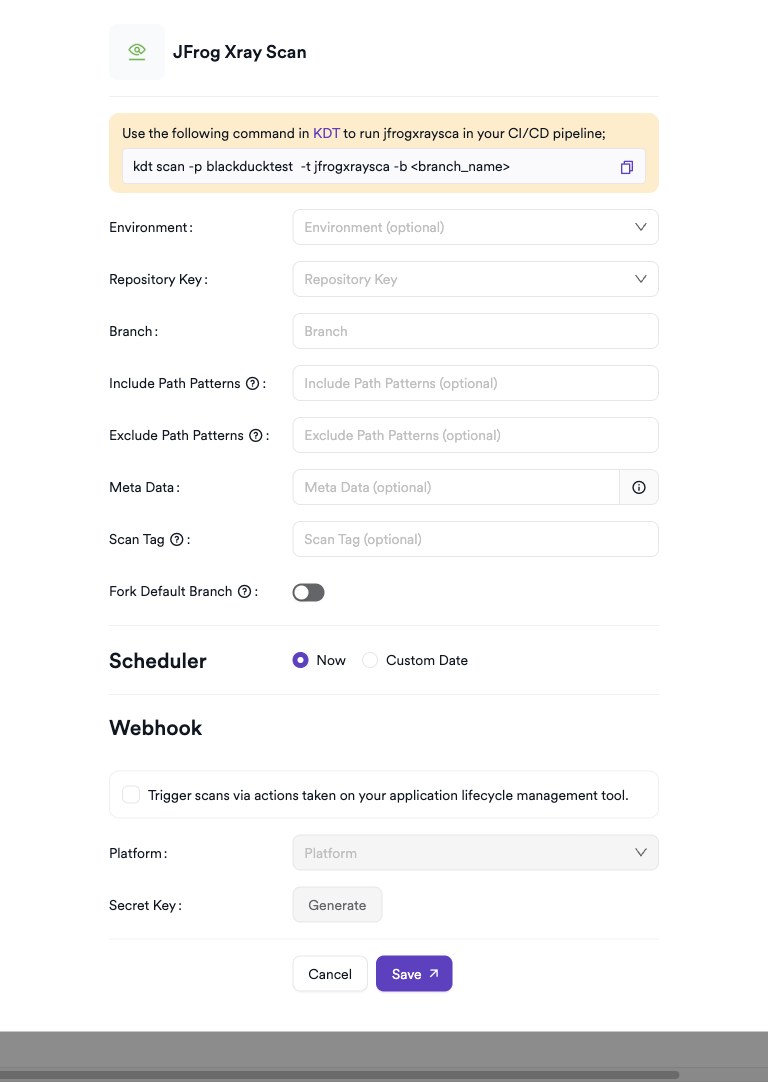
Scheduler
Enable the Scheduler toggle to run JFrog Xray scans on a recurring schedule.
Webhook (Optional)
Add a webhook URL to receive scan completion notifications.
KDT Command
kdt scan -p <project_name> -t jfrogxraysca -b <branch_name>
Import Scan Results
JFrog Xray scan results can also be imported manually. Two import formats are supported:
CLI Export Format
Export using the JFrog CLI (jf scan or jf audit) and import the JSON file.
UI Export Format
From the JFrog Platform UI:
- Navigate to Xray > Scans List.
- Select the scan you want to export.
- Click Export and select JSON format.
- Upload the exported JSON file to Invicti AppSec.
Troubleshooting
Connection Fails
| Issue | Resolution |
|---|---|
| Invalid credentials | Verify the access token is valid and has not expired. Regenerate if needed. |
| 401 Unauthorized | Ensure the token has Xray: Read and Xray: Manage Reports permissions. |
| URL not reachable | Check network connectivity and firewall rules between Invicti AppSec and JFrog. |
| SSL certificate error | Enable Insecure mode if the JFrog instance uses a self-signed certificate. |
Scan Issues
| Issue | Resolution |
|---|---|
| Repository not found | Verify the repository key is correct and the token has access to it. |
| Report generation fails | Ensure Xray is enabled and the repository is watched by at least one Xray policy. |
| Import fails | Ensure the JSON file is in the CLI or UI export format. Mixed/malformed formats will be rejected. |
| Empty results | Check if the Xray watch/policy is configured to report vulnerabilities for the scanned artifacts. |
Best Practices
- Use a dedicated service account token instead of a personal access token for production integrations.
- Enable Xray watches and policies on all repositories before triggering API-based scans, otherwise no violations will be reported.
- Rotate the access token regularly and update the integration settings accordingly.
- Use Include/Exclude Path Patterns to narrow the scan scope and reduce report generation time for large repositories.
- For CI/CD pipelines, prefer the KDT-based workflow and import the results using the
--output jsonflag of the JFrog CLI.
Limitations
- API-based scanning requires at least one Xray watch and policy assigned to the target repository; without policies, the generated report will be empty.
- The JFrog Xray API does not support scanning local repositories that are not indexed by Xray.
- Very large repositories may result in slow report generation; use path patterns to limit scope.
- Import-only mode does not support real-time status polling — results are available only after the import is complete.
Need help?
Invicti Support team is ready to provide you with technical help. Go to Help Center