Deployment: Invicti Platform on-demand, Invicti Platform on-premises
Instant scan
Running scans is a crucial step in the security assessment process, allowing you to identify and address vulnerabilities within your web applications. There are multiple ways to start a scan. This document describes how to launch a new scan immediately using the New scan button.
All scans must comply with the Authorized target scanning policy. Review this document before executing the scans.
Steps to start a new scan
After configuring your targets, you're ready to begin scanning.
- Select Scans from the left-side menu, then click New scan on the DAST scans page to open the scan settings.
- In the Scan target drop-down, use the checkboxes to select the target you want to scan.
- Select Scan profile from the list of available default or custom profiles.
For scans started from Inventory > Targets, the scan profile used depends on whether you select Run scan with defaults, Run previous scan again, or Run custom scan. For more information, refer to the Targets overview document.
- Optionally, in the Report drop-down menu, select a report type.
- Optionally, in the Tags field, add tags to label and organize the scan.
- Select Immediately in the How would you like to scan? field.
To schedule the scan for a later time, refer to the Future scan document.
If the target's login sequence includes a manual intervention step, you must use an instant scan - scheduled and recurring scans don't support interactive login. See Complete an interactive login for details.
- Confirm the scan configuration and start the scan by pressing Start scan.
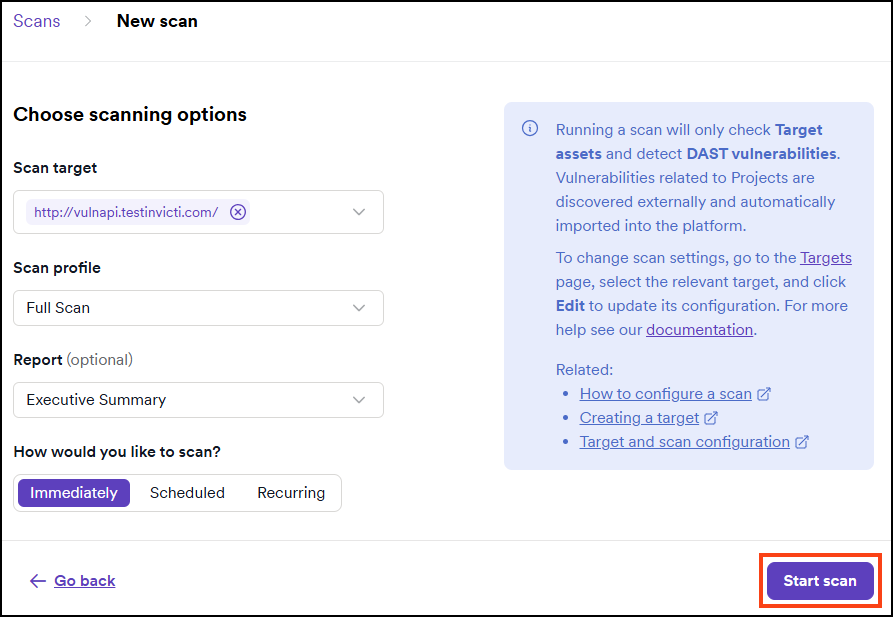
The scan starts immediately. You can access the scan results by clicking on the relevant line on the list of scans on the DAST scans page. Refer to the Review scan results document for more information.
Complete an interactive login
If the target has a manual intervention step in its login sequence, the scan pauses at the start with a Waiting for Interactive Login status. A warning banner appears on the scan page.
- On the scan page, click Complete Interactive Login in the warning banner.
- The Login Sequence Recorder opens at the manual intervention point. Perform the required manual action - for example, solve the CAPTCHA.
- Click Resume in the Login Sequence Recorder. The scan continues automatically.
Only the user who started the scan can complete the interactive login. If the interactive login isn't completed within 30 minutes, the scan stops.
When a scan is waiting for interactive login, Invicti sends an in-app notification to the scan creator.
Alternative scan options
- Future scan - schedules a one-time scan for a specific date and time.
- Scheduled scan - sets up scans to run on a schedule through DAST scan schedules.
- Recurring scan - sets up a scheduled scan that repeats automatically on a defined interval.
- Incremental scan - scans only newly discovered or modified pages.
- Scan dynamic URL target - triggers scans on ephemeral targets via API or CI/CD.
- PCI ASV scan - runs official PCI DSS compliance scans through Clone Systems.
Troubleshooting
The page shows "Scan cannot proceed because scanning has been disabled by your administrator"
An administrator has suspended scanning for your organization, so you can't start new scans until they turn it off. Contact your administrator or, if you have the Owner role, go to Settings > Scanning and set Suspend all scanning to No. For more information, refer to the Scanning settings document.
Need help?
Invicti Support team is ready to provide you with technical help. Go to Help Center