Package: Invicti AppSec Core (on-demand), Invicti AppSec Enterprise (on-premise, on-demand)
Invicti Enterprise DAST/API Integration
Invicti Enterprise is a powerful on-premise or private-cloud DAST solution for large organizations. This integration allows Invicti AppSec to trigger scans, import findings, and manage vulnerabilities from Invicti Enterprise.
Prerequisites
| Field | Description |
|---|---|
| Invicti Enterprise URL | The base URL of your Invicti Enterprise instance (e.g., https://invicti.your-company.com) |
| API Token | A personal or service account API token from Invicti Enterprise |
Get an API Token (on Invicti Enterprise Side)
- Log in to your Invicti Enterprise instance.
- Click your profile icon in the upper right corner.
- Select My Account from the dropdown.
- Navigate to the API Token section.
- Click Generate New Token.
- Copy the token immediately — it is shown only once.
Step 1: Navigate to Integrations
From the left sidebar menu, click on Integrations.
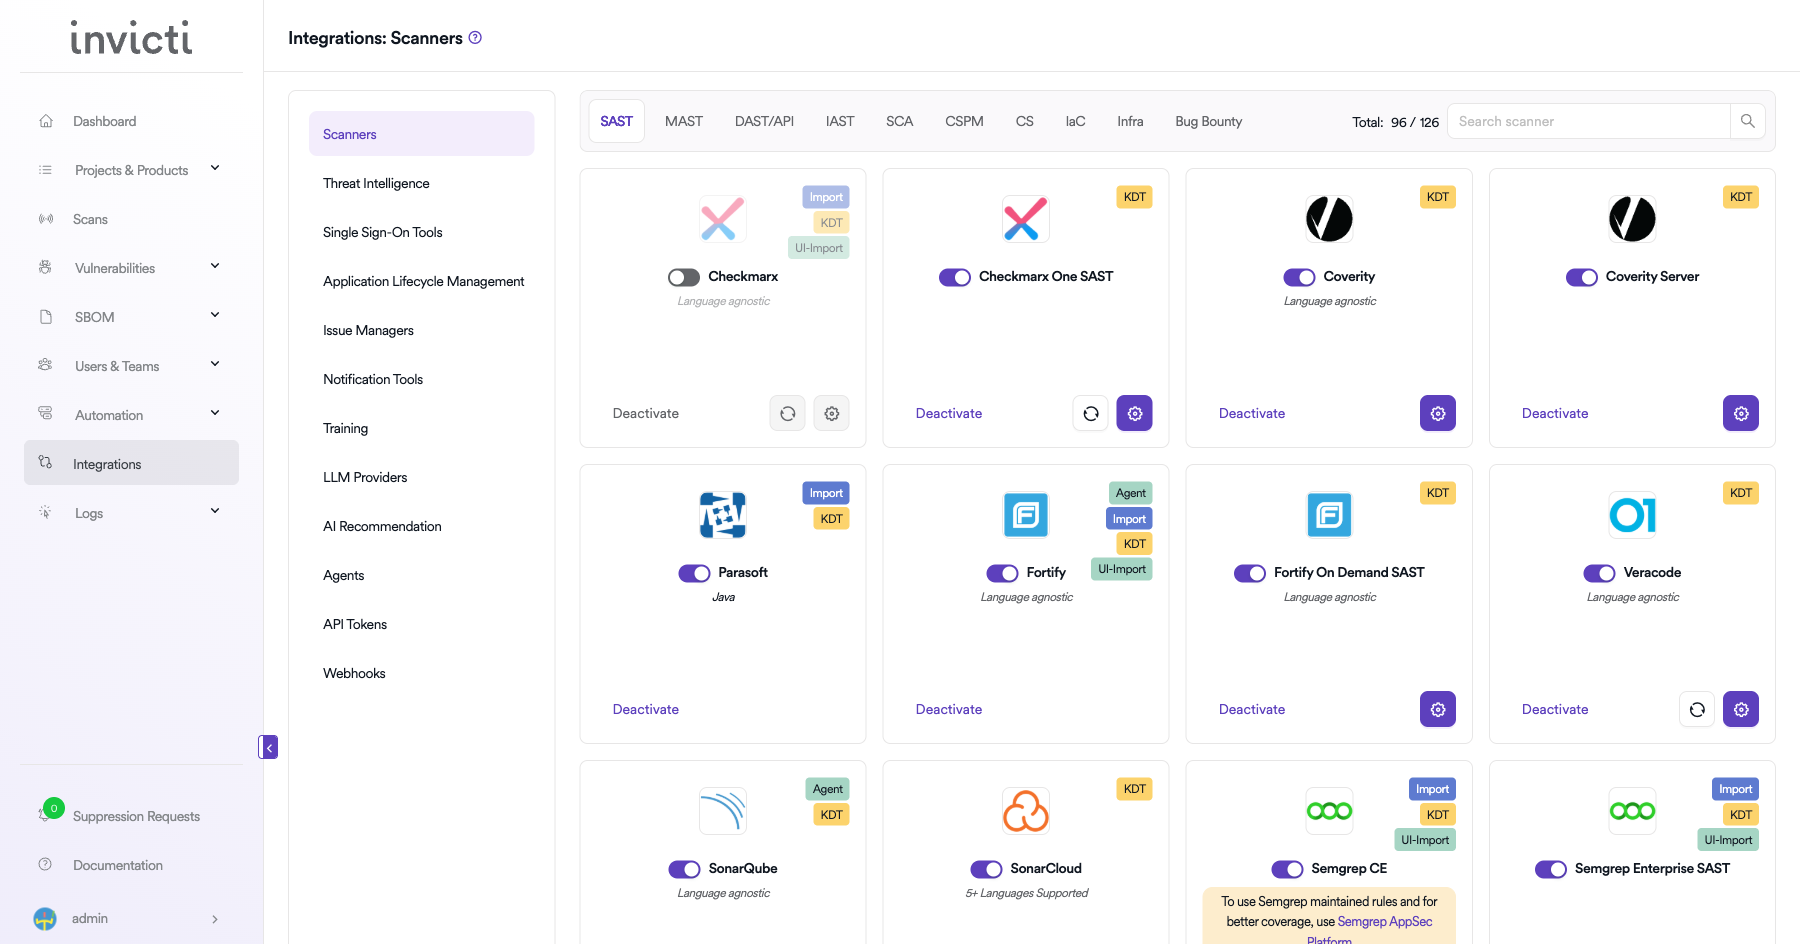
Step 2: Select the DAST/API Tab
On the Integrations > Scanners page, click on the DAST/API tab.
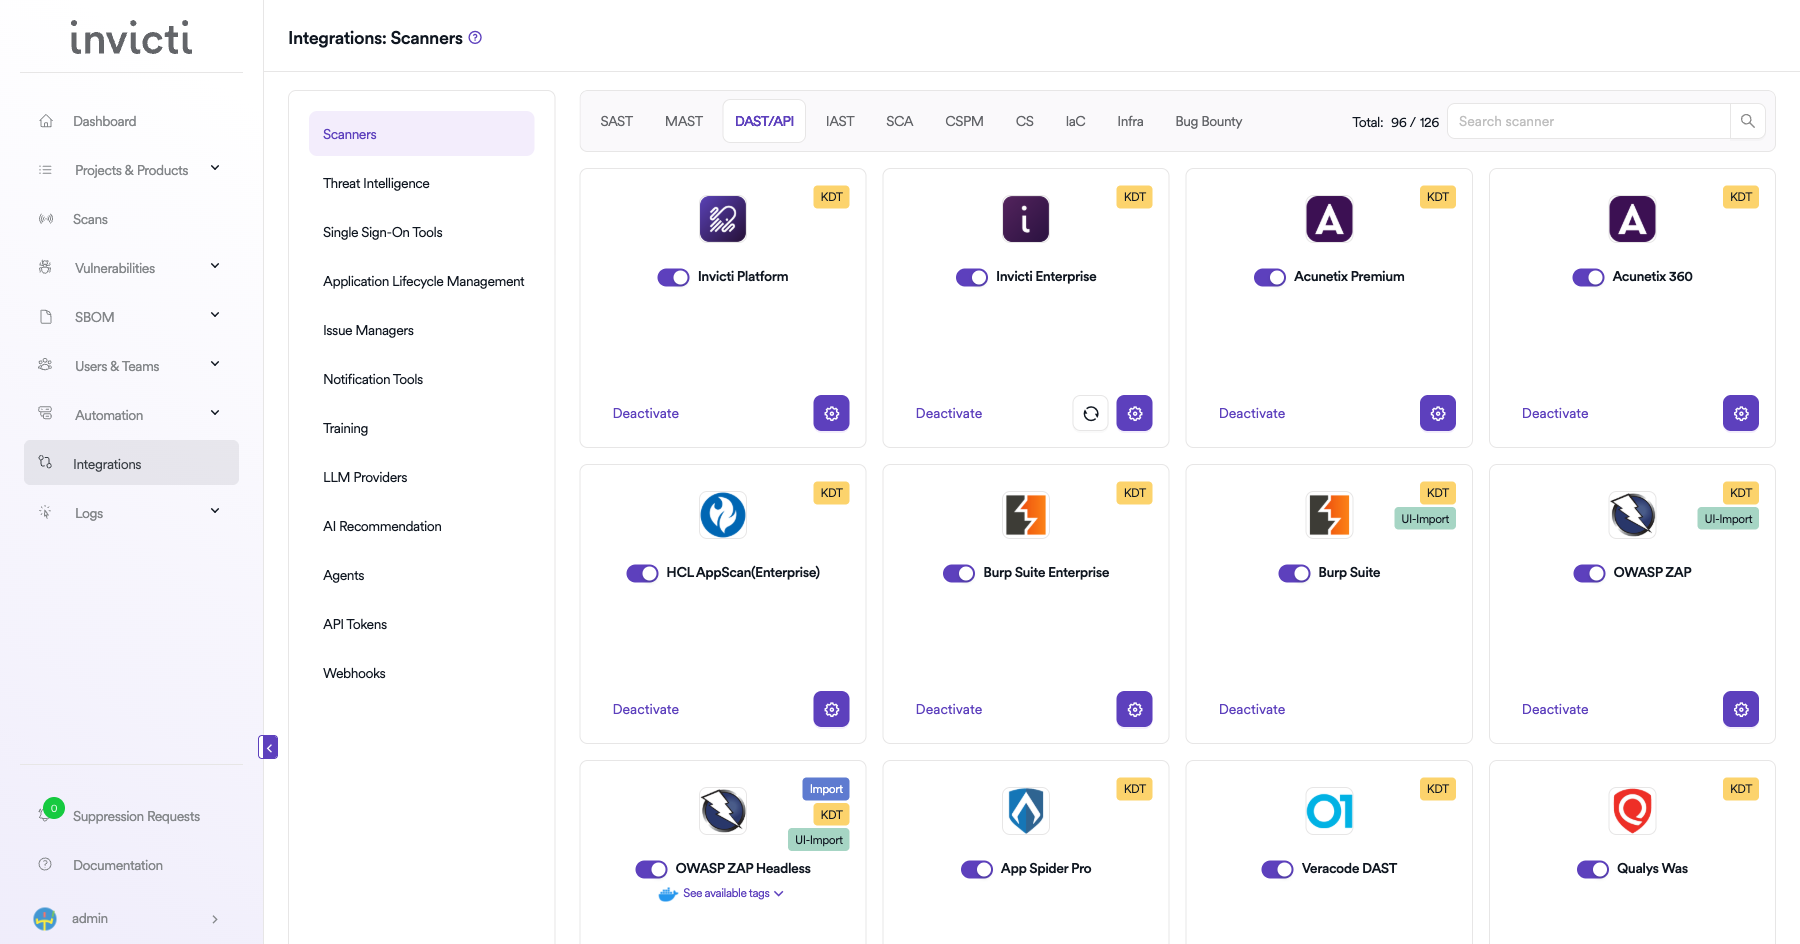
Step 3: Find and Activate Invicti Enterprise
Scroll through the list of DAST/API scanners to find Invicti Enterprise.
- If Invicti Enterprise is not activated, you will see an "Activate" button. Click it to enable the integration.
The scan method badge on the Invicti Enterprise card shows KDT, which means scans are triggered through the Kondukto CLI tool (KDT).
Step 4: Configure Connection Settings
Click on the gear icon on the Invicti Enterprise card to open the configuration panel. Fill in the required fields:
- Username: Enter your Invicti Enterprise account username.
- Token: Paste the API token generated from your Invicti Enterprise account.
- URL: Enter your Invicti Enterprise base URL (e.g.,
https://www.netsparkercloud.com). - Insecure: Enable this checkbox only if your Invicti Enterprise instance uses a self-signed SSL certificate.
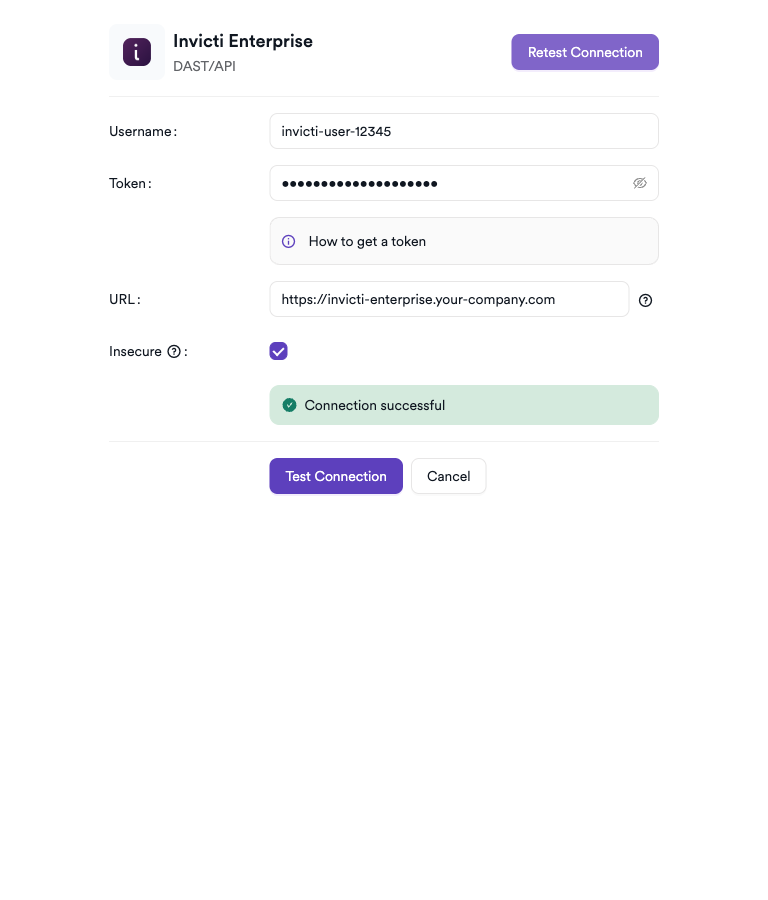
Step 5: Test the Connection
Click Test Connection. A green Connection successful message confirms that Invicti AppSec can communicate with your Invicti Enterprise instance.
Summary
| Step | Action |
|---|---|
| 1 | Navigate to Integrations from the sidebar |
| 2 | Select the DAST/API tab |
| 3 | Activate the Invicti Enterprise scanner |
| 4 | Enter URL and API Token |
| 5 | Test the connection |
Create a Scan
Navigate to Project Scanners
- Open a project in Invicti AppSec.
- Go to Settings > Scanners.
- Click Add Scanner.
Add Invicti Enterprise Scanner
- Select DAST/API as the scanner type.
- Choose Invicti Enterprise from the scanner list.
- Click Add to open the scan configuration drawer.
Scan Configuration Fields
| Field | Description | Required |
|---|---|---|
| Environment | Select the environment for the scan | No |
| Bind To | Invicti Enterprise project to bind to | Yes |
| Scan Type | Select scan type: New, Incremental, or Retest | No |
| Start Scan | Toggle to trigger the scan immediately | No |
| Branch | Source code branch associated with this scan | No |
| Meta Data | Additional metadata for the scan | No |
| Scan Tag | Tag to identify the scan | No |

Scheduler
Enable the Scheduler toggle to run this scan on a recurring schedule.
Webhook (Optional)
Add a webhook URL to receive scan status notifications.
KDT Command
kdt scan -p <project_name> -t invicti-enterprise -b <branch_name>
Troubleshooting
Connection Fails
| Issue | Resolution |
|---|---|
| Invalid API token | Regenerate the token from Invicti Enterprise and update the settings |
| Wrong URL | Ensure the URL points to your on-premise instance and includes https:// |
| Self-signed SSL certificate | Configure Invicti AppSec to trust your organization's CA certificate |
| Network/firewall | Ensure network connectivity between Invicti AppSec and the Enterprise host |
Scan Issues
| Issue | Resolution |
|---|---|
| No scan profiles listed | Verify the API token has sufficient permissions to list scan profiles |
| Scan not starting | Ensure the Invicti Enterprise scan engine is running and reachable |
| Empty results | Confirm the scan reached a completed state in Invicti Enterprise |
| Permission denied | The service account must have at minimum a Scan Manager role |
Best Practices
- Use a dedicated service account with limited, read-write scan permissions.
- Rotate the API token every 90 days and update the integration immediately.
- Use HTTPS with a CA-signed certificate for your on-premise deployment.
- Restrict the service account's accessible websites to only the target applications.
- Align scan profiles with the application type (authenticated web app, REST API, GraphQL).
Limitations
- The on-premise deployment must be network-accessible from Invicti AppSec.
- Feature availability (e.g., API scanning, authenticated scans) depends on your Invicti Enterprise license tier.
- Large scan result sets may take additional time to import depending on Invicti Enterprise API response times.
- Concurrent scan limits are governed by your Invicti Enterprise license seat count.
Need help?
Invicti Support team is ready to provide you with technical help. Go to Help Center