Integrating Invicti Standard with FogBugz
FogBugz is a web-based project management system with bug and issue tracking features. You can use it to tag, categorize, and search for any issues you find.
This topic explains how to configure Invicti Standard to send a detected vulnerability to FogBugz, enabling seamless integration with your project management workflow for efficient vulnerability case tracking and remediation management.
FogBugz Fields
The following table lists and describes the FogBugz fields available in the Send to Actions configuration:
| Button/Section/Field | Description |
|---|---|
| Add | Click to add an integration. |
| Delete | Click to delete the integration and clear all fields. |
| Configure Send To | Click to configure the integration using the Settings Wizard instead of doing it manually. |
| Create Sample Issue | Once all relevant fields have been configured, click to create a sample section. |
| Action | This section contains general fields about the Send To Action. |
| Display Name | This is the name of the configuration that will be shown on menus. |
| Mandatory | This section contains fields that must be completed. |
| URL | This is the FogBugz web address. |
| Token | This is the API token for the user. |
| Vulnerability | This section contains fields with vulnerability details. |
| Body Template | This is the template file used while rendering the case contents. |
| Title Format | This is the string to be used while formatting the vulnerability title. |
| Optional | This section contains optional fields. |
| Project | This is the project in which to create cases. |
| Area | This is the area in which to assign cases. |
| Category | This is the category in which to assign cases. |
| Milestone | This is the milestone to which to assign cases. |
| Assigned To | This is the username to which to assign cases. |
| Tags | These are the case tags. |
| Custom Fields | These are the Custom Fields that are defined for the project. |
How to Integrate Invicti Standard with FogBugz
Follow these steps to configure FogBugz integration for automated vulnerability case creation:
- Open Invicti Standard
- From the Home tab on the ribbon, select Options > Send To Actions
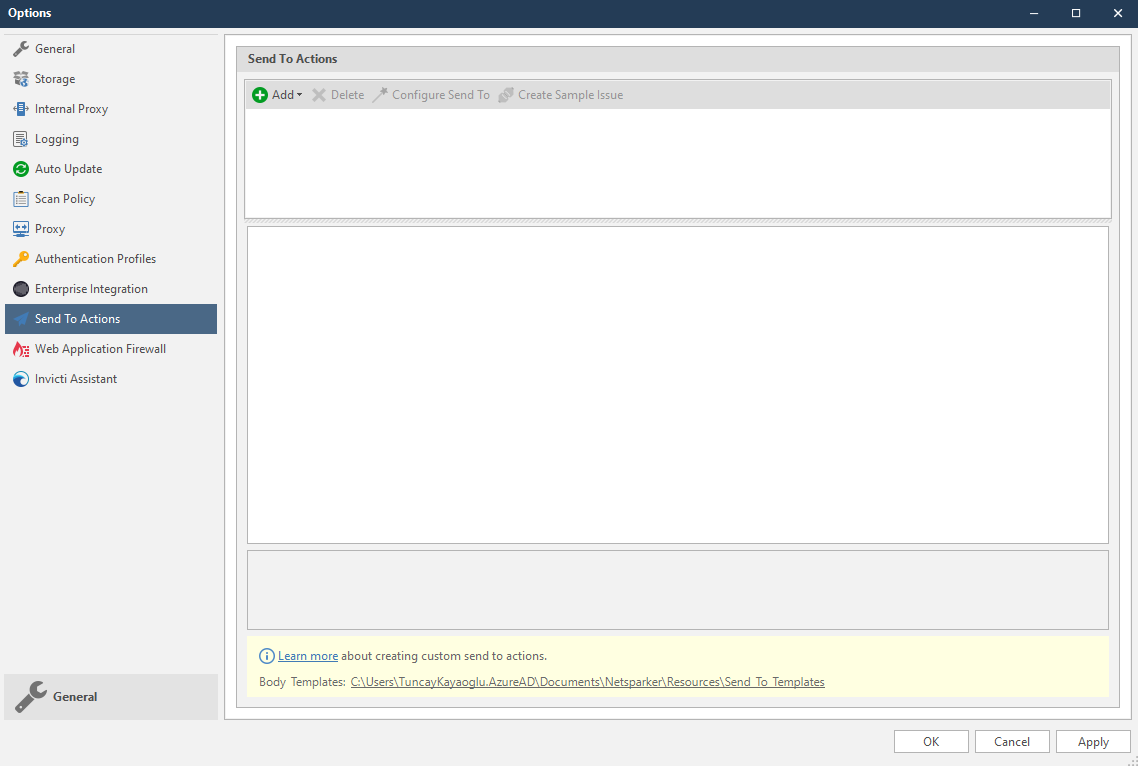
-
From the Add drop-down, select FogBugz
-
In the Mandatory section, complete the connection details:
- URL
- Token
-
In the Vulnerability section, you can specify the Body Template and Title Format
Body templates are stored in %userprofile%\Documents\Invicti\Resources\Send To Templates. If you use your own custom templates, store them in this location.
-
In the Optional section you can specify:
- Project
- Area
- Category
- Milestone
- Assigned To
- Tags
- Custom Fields
-
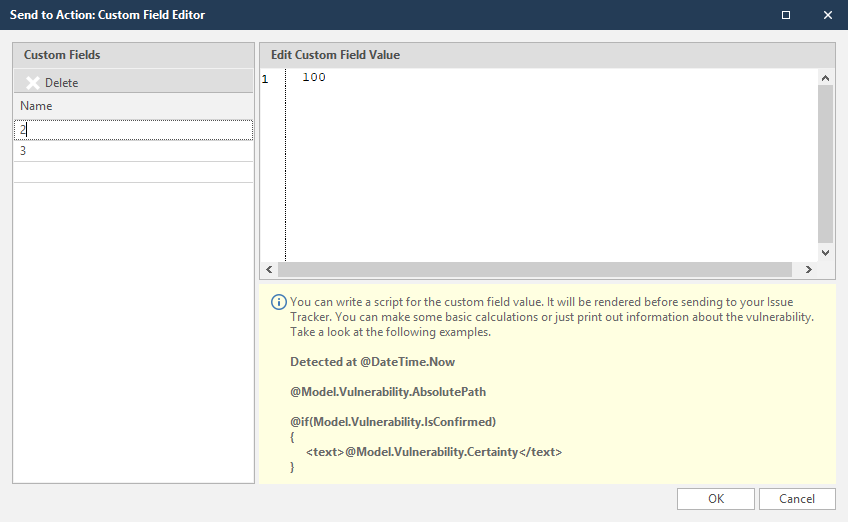
To set custom field values, in the Custom Fields field, select the ellipsis button
-
In the Edit Custom Field Value field, enter the relevant value
-
Select Create Sample Issue to confirm that Invicti Standard can connect to the configured system
- Select Apply or OK to save the integration
How to Delete the FogBugz Integration
To remove the FogBugz integration:
- Open Invicti Standard
- From the Home tab on the ribbon, select Options > Send to Actions
- Select FogBugz
- Select Delete
How to Export Reported Vulnerabilities to Projects in FogBugz
After configuring the FogBugz integration, follow these steps to export specific vulnerabilities:
- Open Invicti Standard
- From the ribbon, select the File tab. Local Scans are displayed. Double-click the relevant scan to display its results
- In the Issues panel, right-click the vulnerability you want to export and select Send to FogBugz. (Alternatively, from the ribbon, click the Vulnerability tab, then Send to FogBugz.) A confirmation message and link are displayed at the bottom of the screen
Need help?
Invicti Support team is ready to provide you with technical help. Go to Help Center